CloudCIX Python SDK
This tutorial walks you through how to create and list Compute Projects using the CloudCIX Python SDK.
Step 1: Choose Your Region
Note
For the “region_id”, please contact the region provider.
For this example, we’ll use the test_region region which has an ID of 123456.
Region Name |
Region ID |
|---|---|
test_region |
123456 |
Note
You can find available regions in your CloudCIX dashboard.
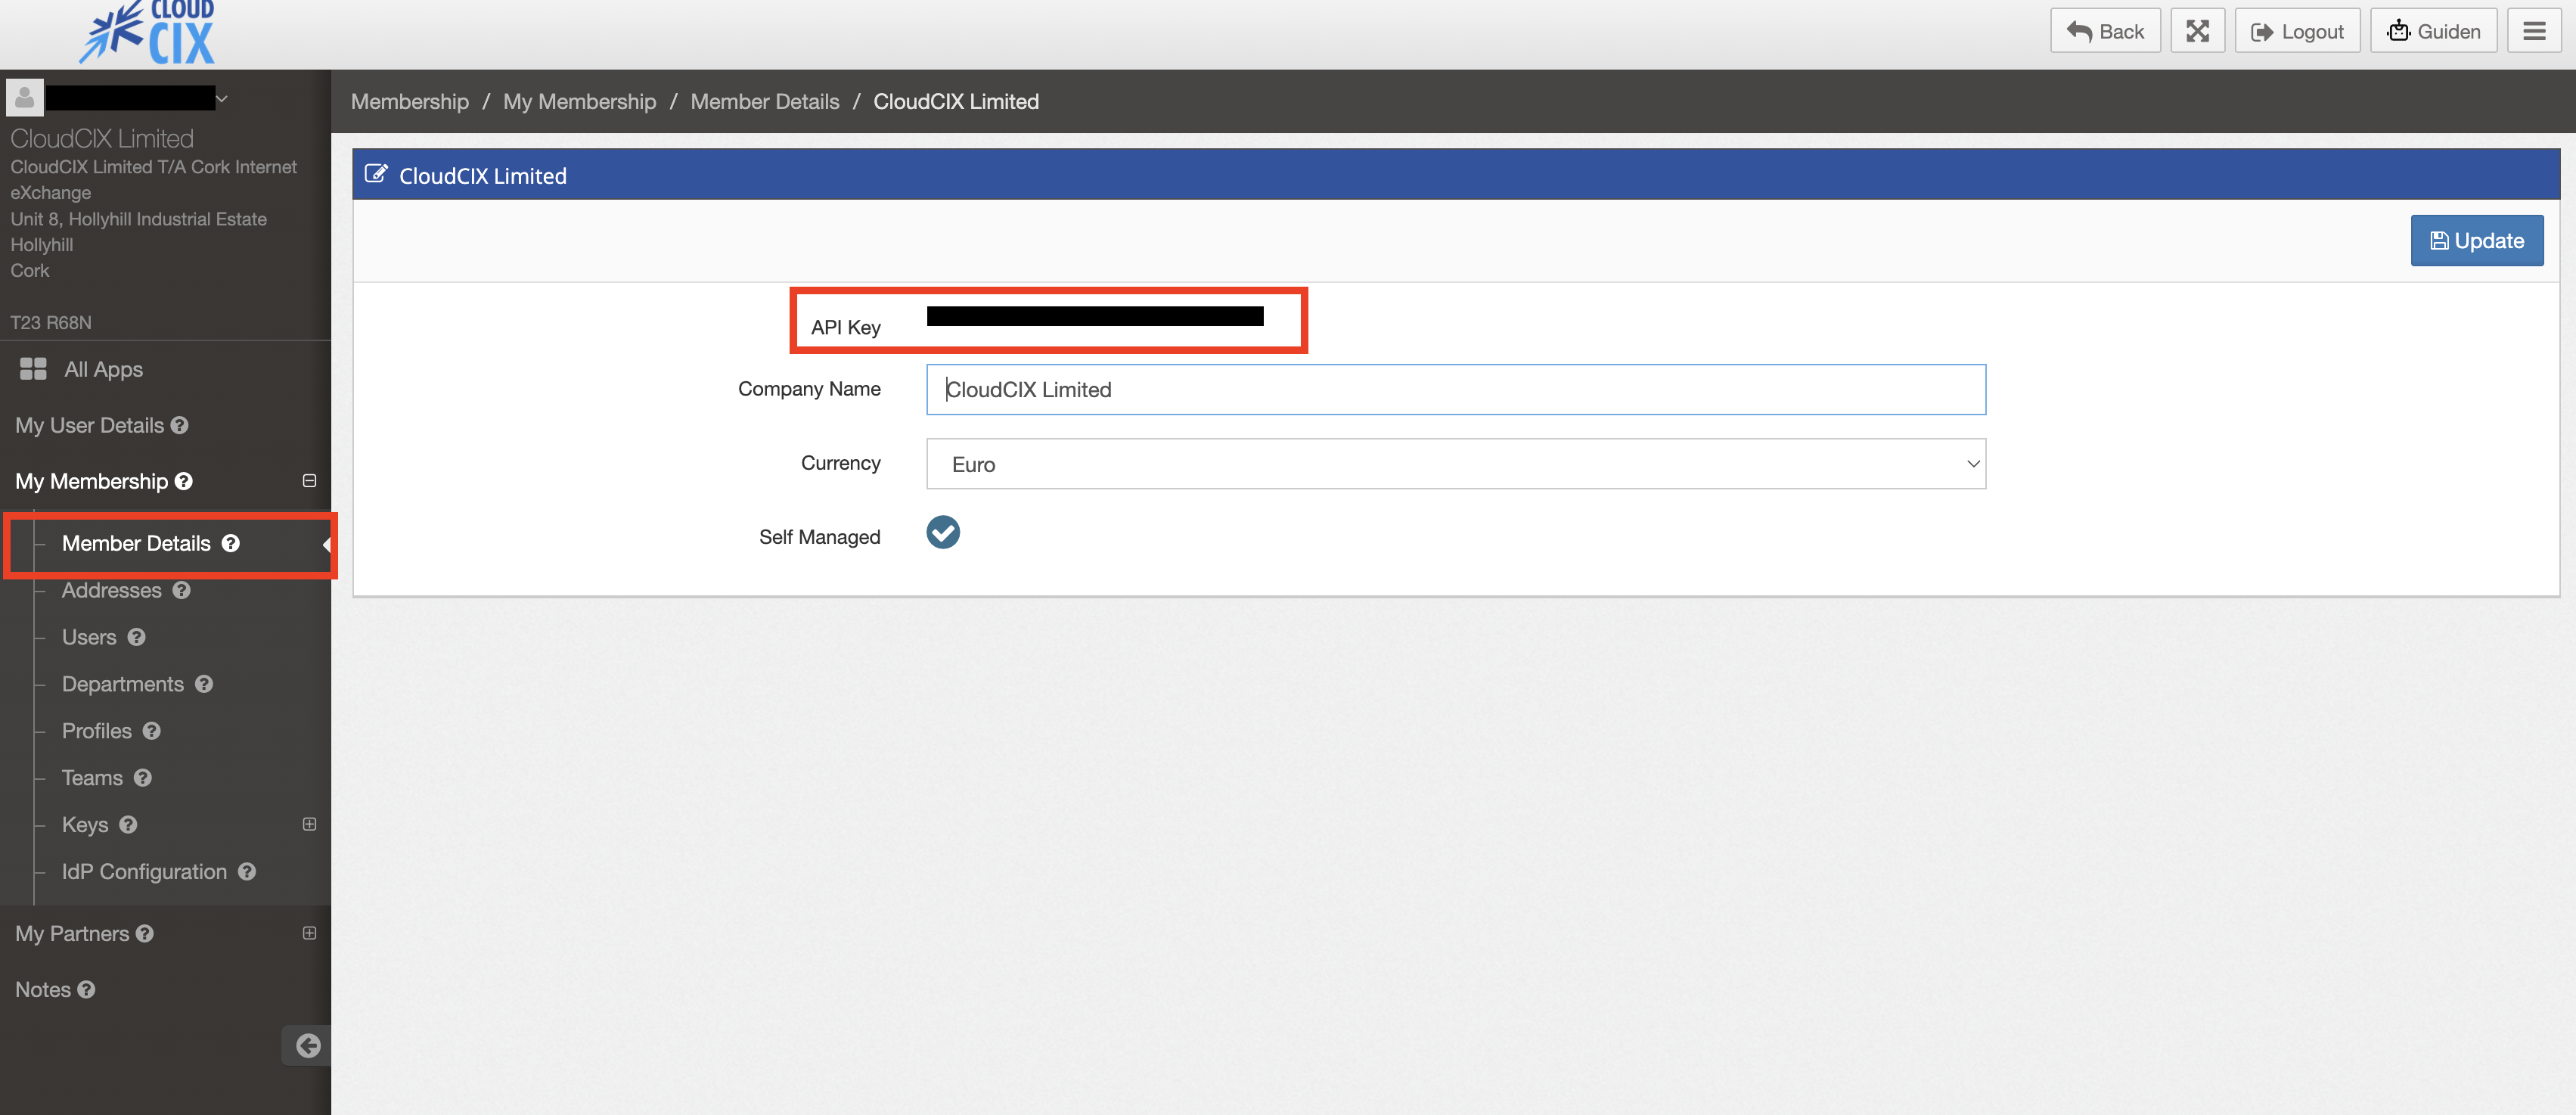
Step 2: Obtain Your API Keys
Go to https://saas.cloudcix.com.
Log in with your CloudCIX credentials.
Open Membership.
Go to My Membership → Member Details.
Locate your API Key.
Step 3: Create and Activate a Virtual Environment
python3 -m venv venv
source venv/bin/activate
Step 4: Install the CloudCIX SDK
Install the CloudCIX SDK from PyPI:
pip install -U "cloudcix>=5.0.0"
Step 5: Create the Sample Project
Create a file named my_settings.py:
# my_settings.py

CLOUDCIX_API_URL = "https://legacyapi.api.cloudcix.com/"
CLOUDCIX_API_V2_URL = "https://api.cloudcix.com/"
CLOUDCIX_API_VERSION = "5.0"

CLOUDCIX_API_USERNAME = "user@example.com"   # Email Address registered
CLOUDCIX_API_PASSWORD = ""                   # Password for registered email
CLOUDCIX_API_KEY = ""                        # CloudCIX Member API Key
Then create a file named create_project.py:
# File: my_project/create_project.py

import os
import json
from pprint import pprint

os.environ.setdefault('CLOUDCIX_SETTINGS_MODULE', 'my_settings')

# NOTE: Environment variables must be set before importing cloudcix
from cloudcix.api.membership import Membership
from cloudcix.api.compute import Compute
from cloudcix.auth import get_admin_token

# ================================================================= #
#                      Get CloudCIX Token                           #
# ================================================================= #
token = get_admin_token()

# Project data to create
project_data = {
    'name': 'My Project 1',  # Change this to your desired project name
    'region_id': 123456,     # Change this to your desired region ID
    'note': 'Test project created via SDK',  # Optional note
}

# ================================================================= #
#                      Create Compute Project                       #
# ================================================================= #
response = Compute.project.create(token=token, data=project_data)

# Print out the JSON of the response data with pretty formatting
pprint(response.json())
Finally, create a file named list_project.py:
# list_project.py

import os

os.environ.setdefault('CLOUDCIX_SETTINGS_MODULE', 'my_settings')

# NOTE: Environment variables must be set before importing cloudcix
from cloudcix.api.membership import Membership
from cloudcix.api.compute import Compute
from cloudcix.auth import get_admin_token

# ================================================================ #
#                        Get CloudCIX Token                        #
# ================================================================ #
token = get_admin_token()

params = {'limit': 2, 'page': 0}

# ================================================================ #
#                     List Compute Projects                        #
# ================================================================ #
response = Compute.project.list(token=token, params=params)

# Print the response JSON
print(response.json())  # {'content': [...], '_metadata': {...}}
Step 6: Run the Script
Run the create project script:
python3 create_project.py
Example output:
{
    "content": {
        "address_id": 1,
        "closed": false,
        "created": "2025-11-11T13:43:20Z",
        "id": 29,
        "manager_id": 1010101,
        "name": "My Project 1",
        "note": "Test project created via SDK",
        "region_id": 123456,
        "reseller_id": 1,
        "updated": "2025-11-11T13:43:20Z",
        "uri": "/project/29/"
    }
}
Then run the list projects script:
python3 list_project.py
Example output:
{
    "_metadata": {
        "limit": 2,
        "order": "name",
        "page": 0,
        "total_records": 1,
        "warnings": []
    },
    "content": [
        {
            "address_id": 1,
            "closed": false,
            "created": "2025-11-11T13:43:20Z",
            "id": 29,
            "manager_id": 1010101,
            "name": "My Project 1",
            "note": "Test project created via SDK",
            "region_id": 123456,
            "reseller_id": 1,
            "updated": "2025-11-11T13:43:20Z",
            "uri": "/project/29/"
        }
    ],
    "count": 1,
    "page": 0,
    "total": 1
}
Summary
You’ve now successfully:
Created a CloudCIX API configuration
Fetched an admin token
Created and listed Compute Projects via the CloudCIX Python SDK
Additional Sample Scripts
For more comprehensive examples and additional sample scripts using the CloudCIX Python SDK, visit our GitHub repository:
https://github.com/CloudCIX/sample-scripts
This repository contains a variety of usage examples and scripts that demonstrate different CloudCIX API functionalities.