The Membership App
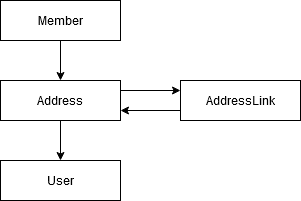
The multi-tenant capabilities of CloudCIX are derived from its Membership capabilities. Member, Address and User are the principal entities in Membership.
Watch this video to learn more about CloudCIX Membership.
This guide provides detailed instructions on how to navigate and use the features of the CloudCIX Membership App. The guide is divided into sections based on the main menu items and their sub-menu options.
1. My User Details
This section allows you to view and edit certain information related to your user account.
1.1 Your Login Details
Account Type: View whether you are an Administrator or a standard User. Administrators have full access to all features, while standard Users have access only to features assigned by an Administrator.
First Name and Surname: View your first name and surname.
Login Email/Username: View your login email address.
Password: Change your password.
1.2 Your Global Profile
Address: If your organisation has multiple addresses and you are allowed by your Member Administrator, you can change your address to see data or perform transactions related to that address.
Time Zone: Change your local time zone. All dates and times in CloudCIX are stored in Standard Time (UTC) but will be displayed in your local time zone where applicable.
User Type (Local/Global): If allowed by your Member Administrator, you can select whether you are a Local User (access to one address) or a Global User (access to all addresses).
2. My Membership
This section allows you to manage your organisation’s CloudCIX Membership. It includes options to manage Members, Addresses, Users, Departments, Profiles, and Teams. These menu items are for Administrator use only.
2.1 Member Details
Legal Group Corporate Name: View or edit the legal name of your organisation.
Currency: View or edit the consolidated reporting currency for your organisation.
2.2 Addresses
Manage Addresses: Use it to manage addresses for your organisation. All transactions in CloudCIX occur either between Addresses or within an Address.
2.3 Users
Create New Users: Administrators can create new user accounts by providing the following details: - First Name - Surname - Email Address (used as the login username) - Password (set by the Administrator or generated randomly) - Start Date (when the user gains access) - End Date (when the user loses access) - Address (assign the user to an address) - Department (optional) - Global User Option (allow the user to access all addresses) - Private User Option (hide the user from other Members)
Manage User Access: Administrators can restrict or allow user logins, control app and menu item access, and set up email alerts for specific transactions.
Administrator Privileges: The first User created in a Membership is automatically an Administrator. Other Users can be made Administrators by requesting via email to noc@cix.ie.
2.4 Departments
Create Departments: Use this menu item to create a list of Departments (e.g., Finance, Marketing) to group Users by function. Each User can only be assigned to one Department.
2.5 Profiles
Create Profiles: Use this menu item to create a list of Profiles that group Users with the same capabilities. Each User can be assigned to one Profile or none.
2.6 Teams
Create Teams: Use this menu item to create a list of Teams that group Users, often across different Departments. Users can belong to multiple Teams.
3. My Partners
This section allows you to manage your business partners in CloudCIX.
3.1 Linked Members
Manage Connected Members: Use this menu item to manage the Member organisations you are connected to in CloudCIX.
3.2 New Member
Create New Members: Use this menu item to create new CloudCIX Members. This involves: - Creating the Member Organisation. - Adding at least one Address to the Member. - Adding the first User (who will be the Administrator by default). - Private Members: If you tick the “Private” box, the new Member cannot take over management of their Membership.
3.3 Territories
Group Partner Addresses: Use this menu item to assign partner addresses to Territories for analysis purposes (e.g., by geographic region or salesperson). A partner address can only be assigned to one Territory.
4. Notes
Manage Partner Address Notes: Use this menu item to keep track of important information related to your business with partner addresses.
Key Points for Administrators
Administrator Privileges: Administrators have full access to all features and can manage Users, Addresses, and other settings.
User Management: Administrators are responsible for creating, updating, and removing Users. They can also assign permissions and set expiry dates for User accounts.
Global vs. Local Users: Administrators can decide whether a User is a Global User (access to all addresses) or a Local User (access to one address).
Private Users: Administrators can hide Users from other Members by enabling the “Is Private” option.