The Boole App
Video
A video tutorial is also available here:
Boole App is used to create and manage CloudCIX compute resources. This guide creates a project with a router, firewall, geofilter and LXD instance, then shows how to create a snapshot and a backup.
Before you start
Before starting, make sure you have:
Permission to use Boole.
A region in which to build the project.
An SSH key and a public IPv4 address if you will connect to an LXD instance.
Open Boole
From the CloudCIX app menu, open Boole. Its left menu is organised into three areas: Setup creates resources, Manage changes existing resources, and View displays project information.
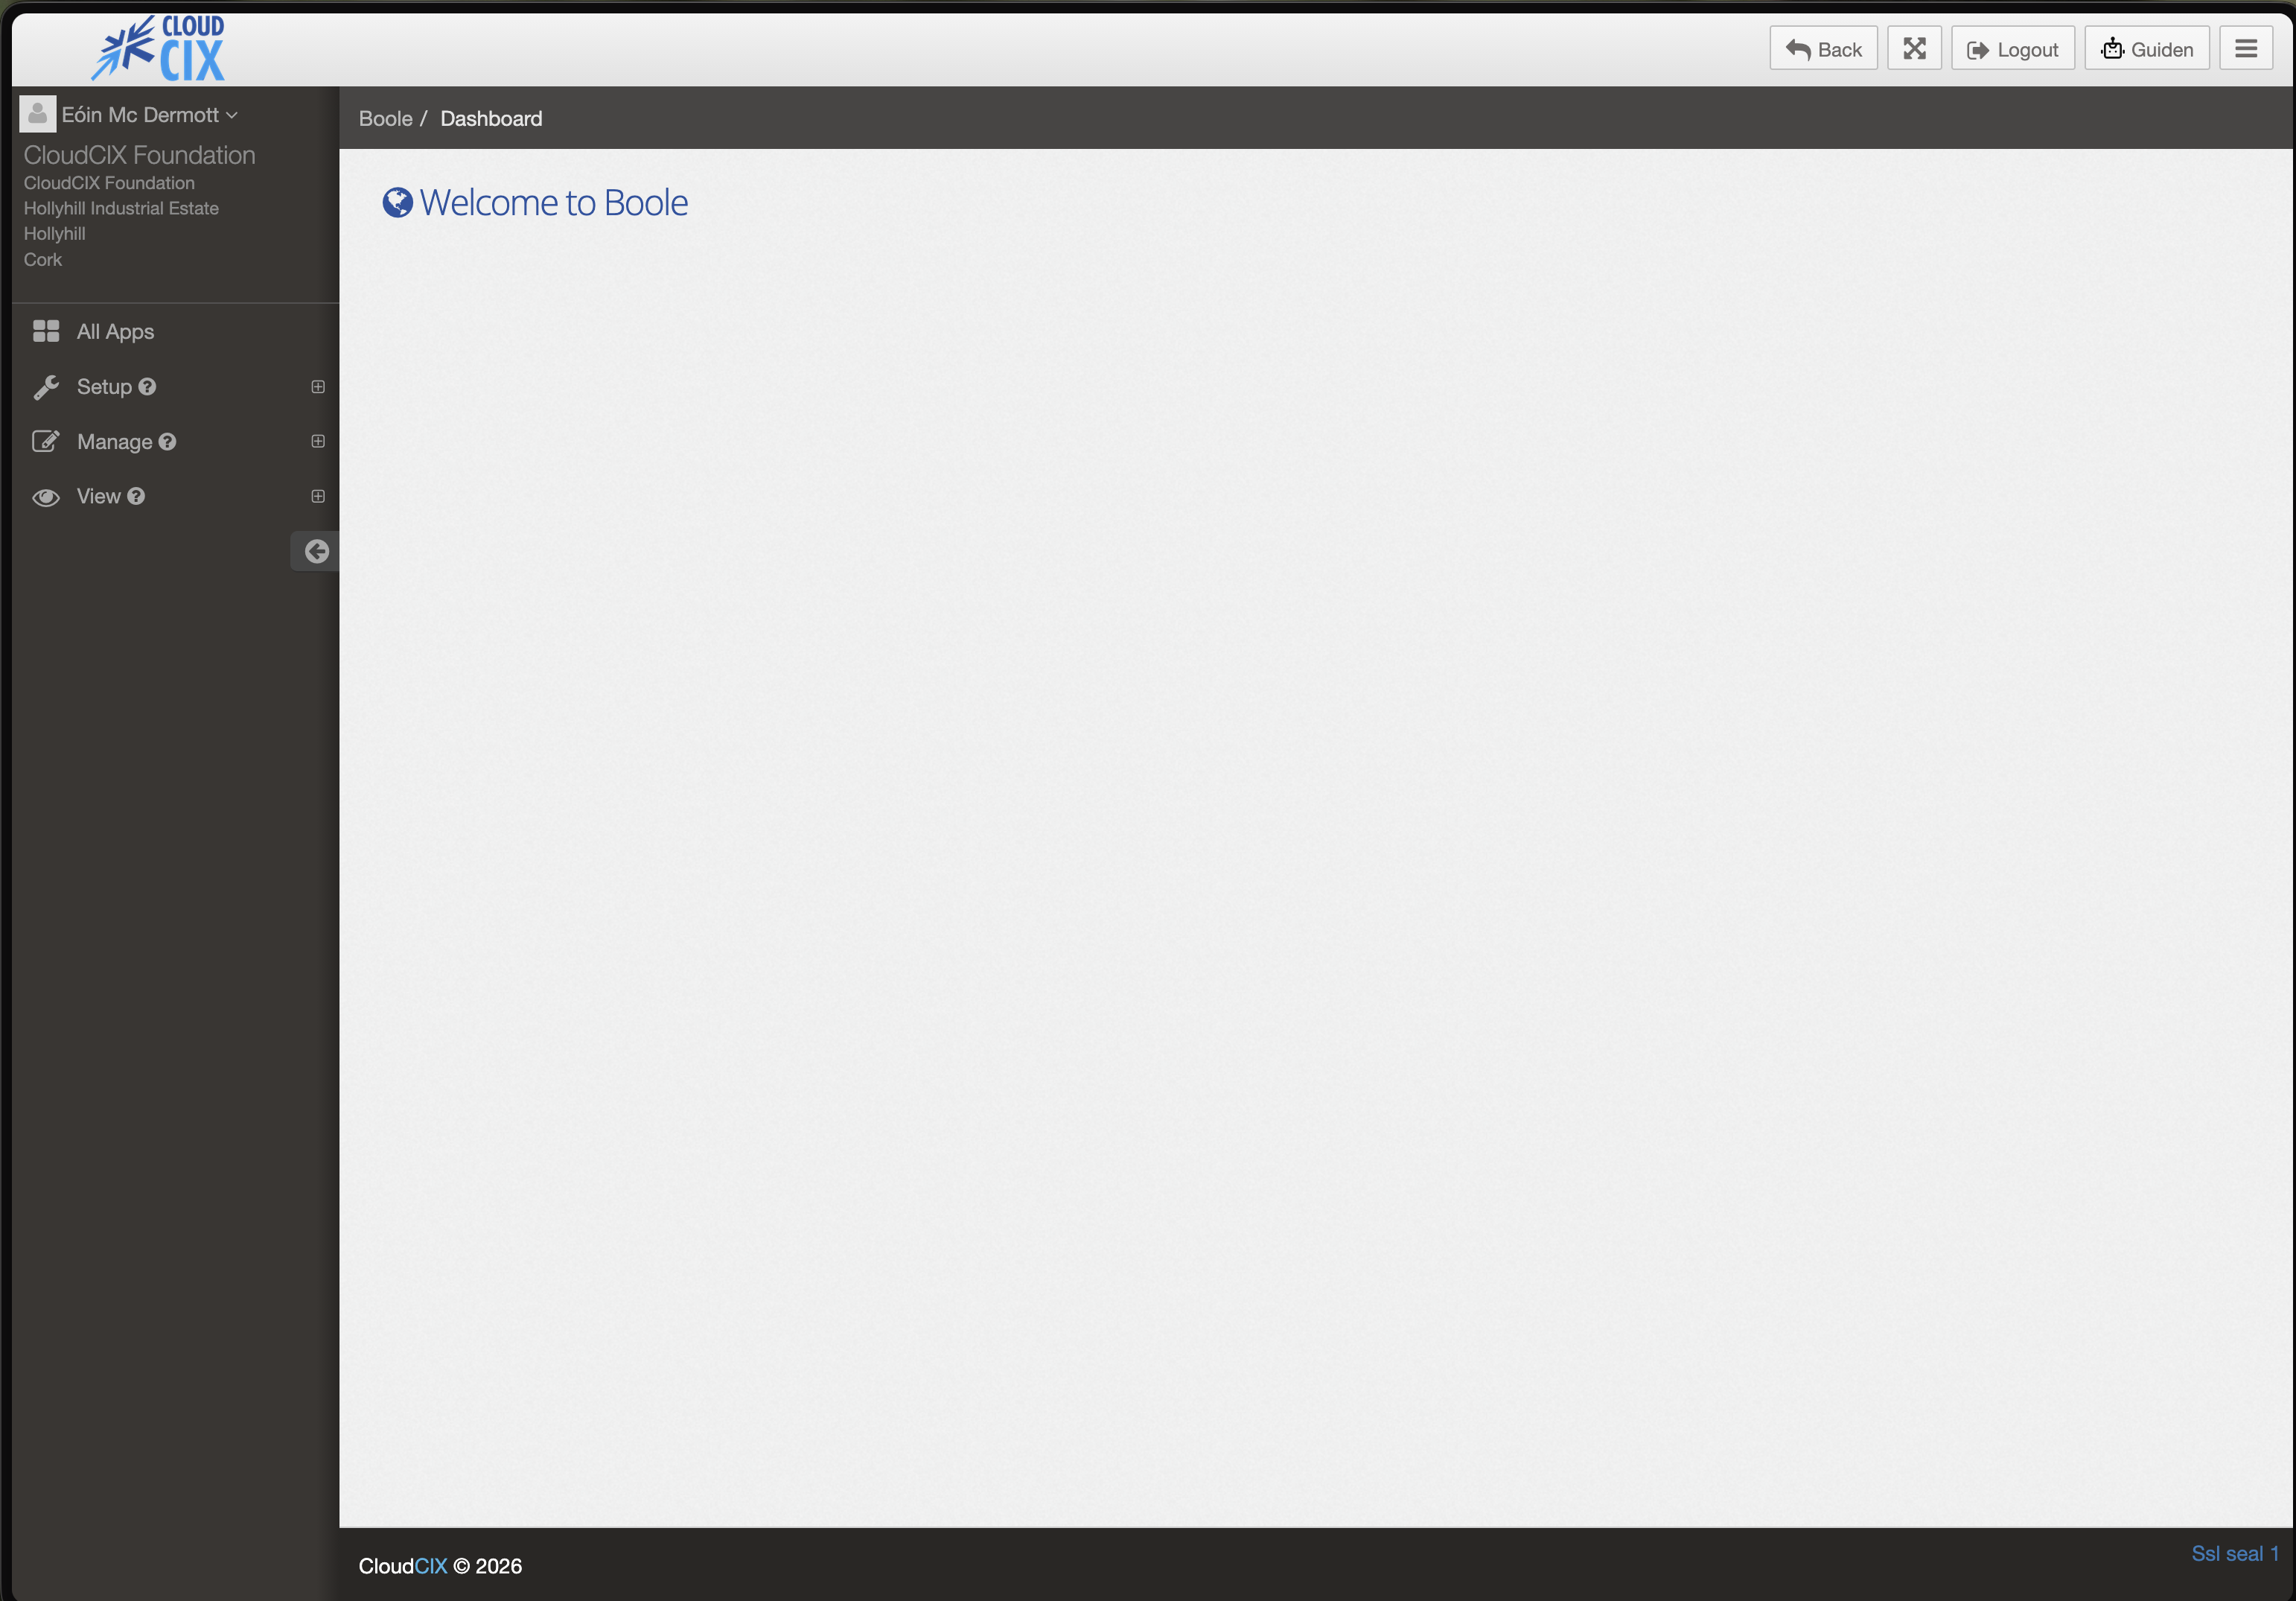
Create a project
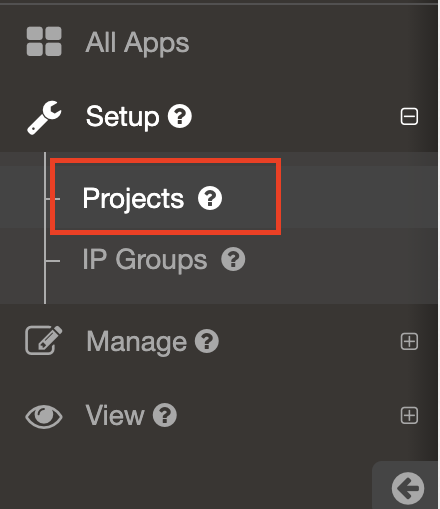
Open Boole. In the left menu, expand Setup and select Projects.
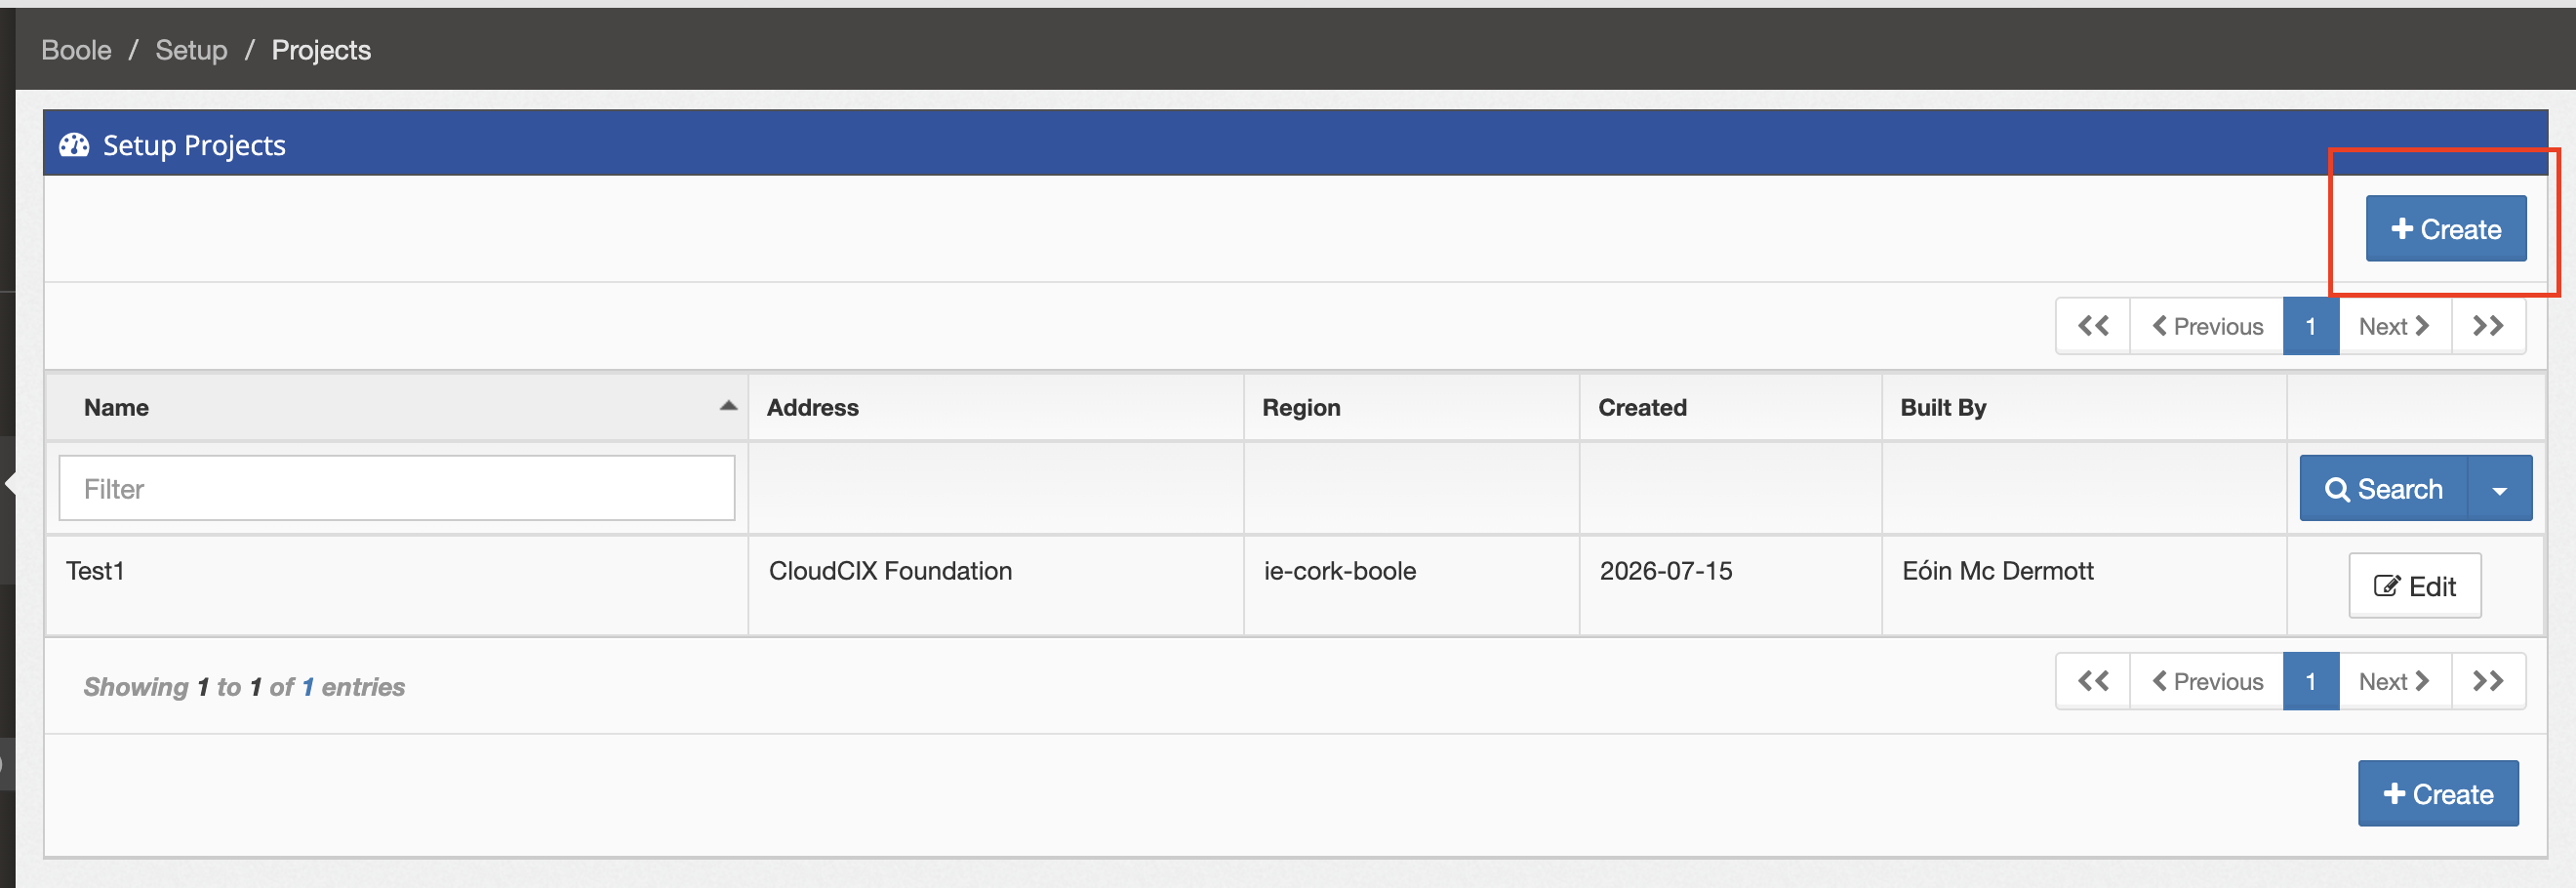
Select Create.
Enter a project Name, select a Region, and optionally add a note.
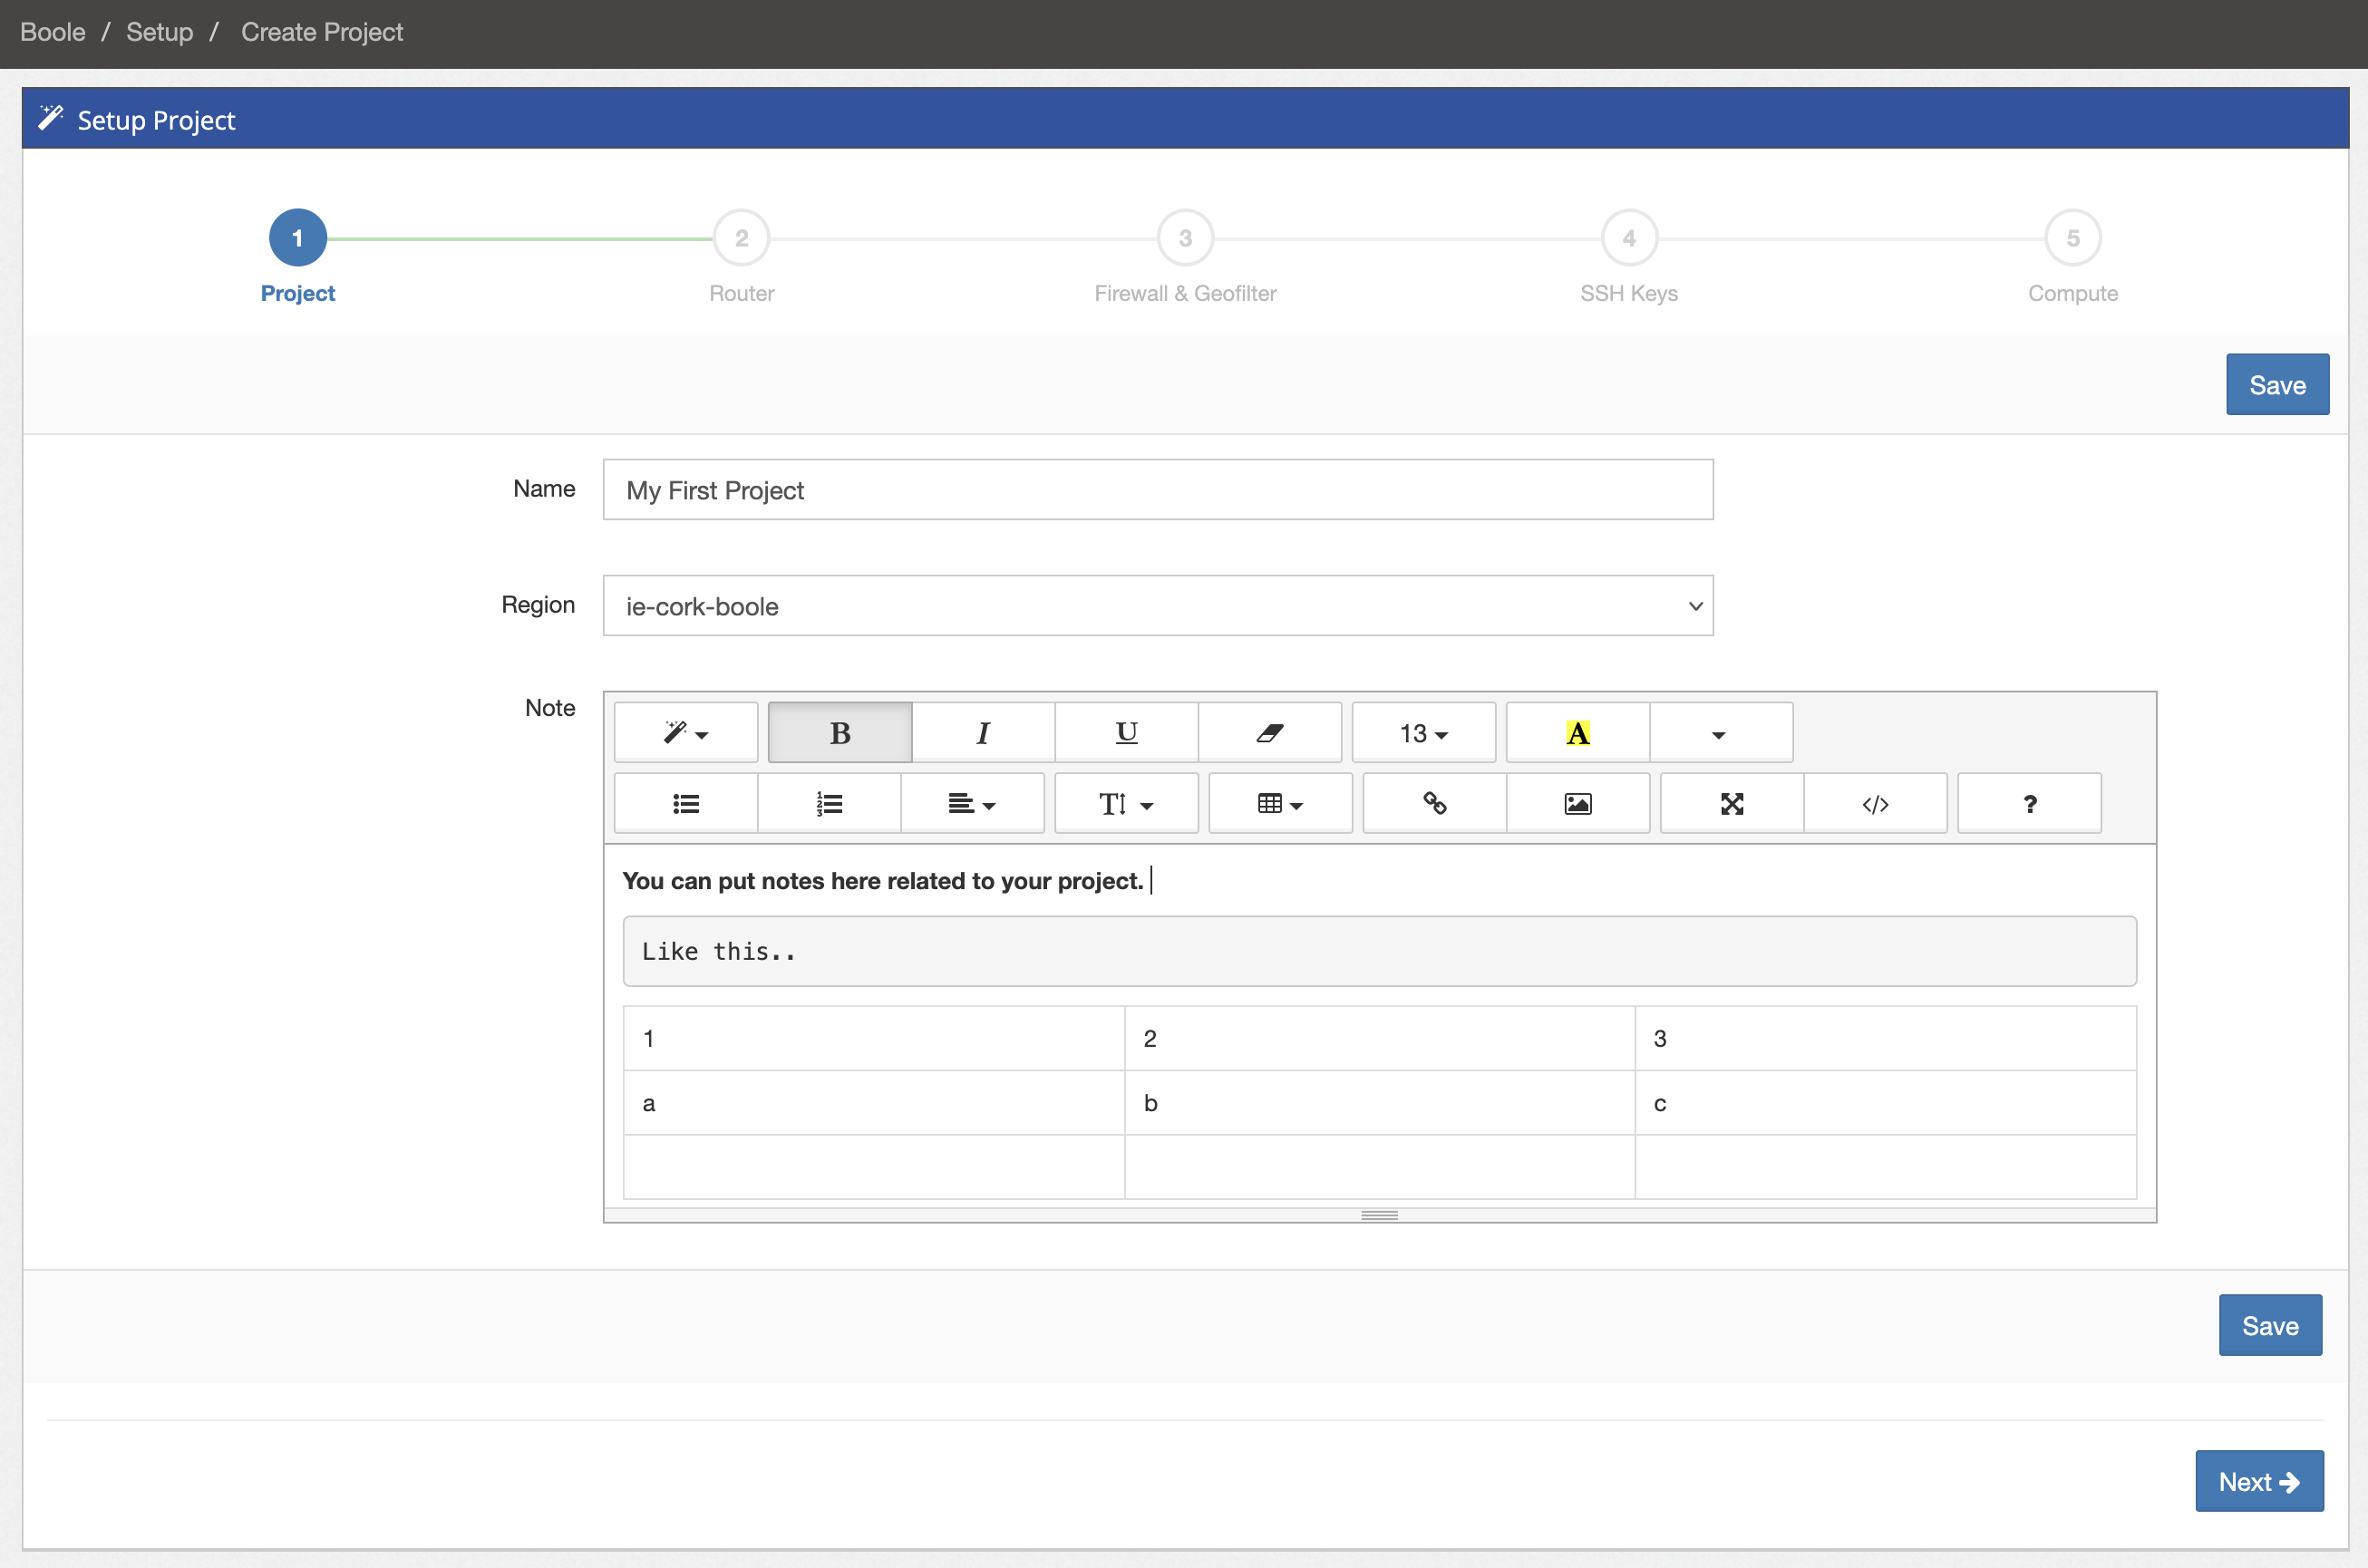
Select Save, then Next.
Add a router
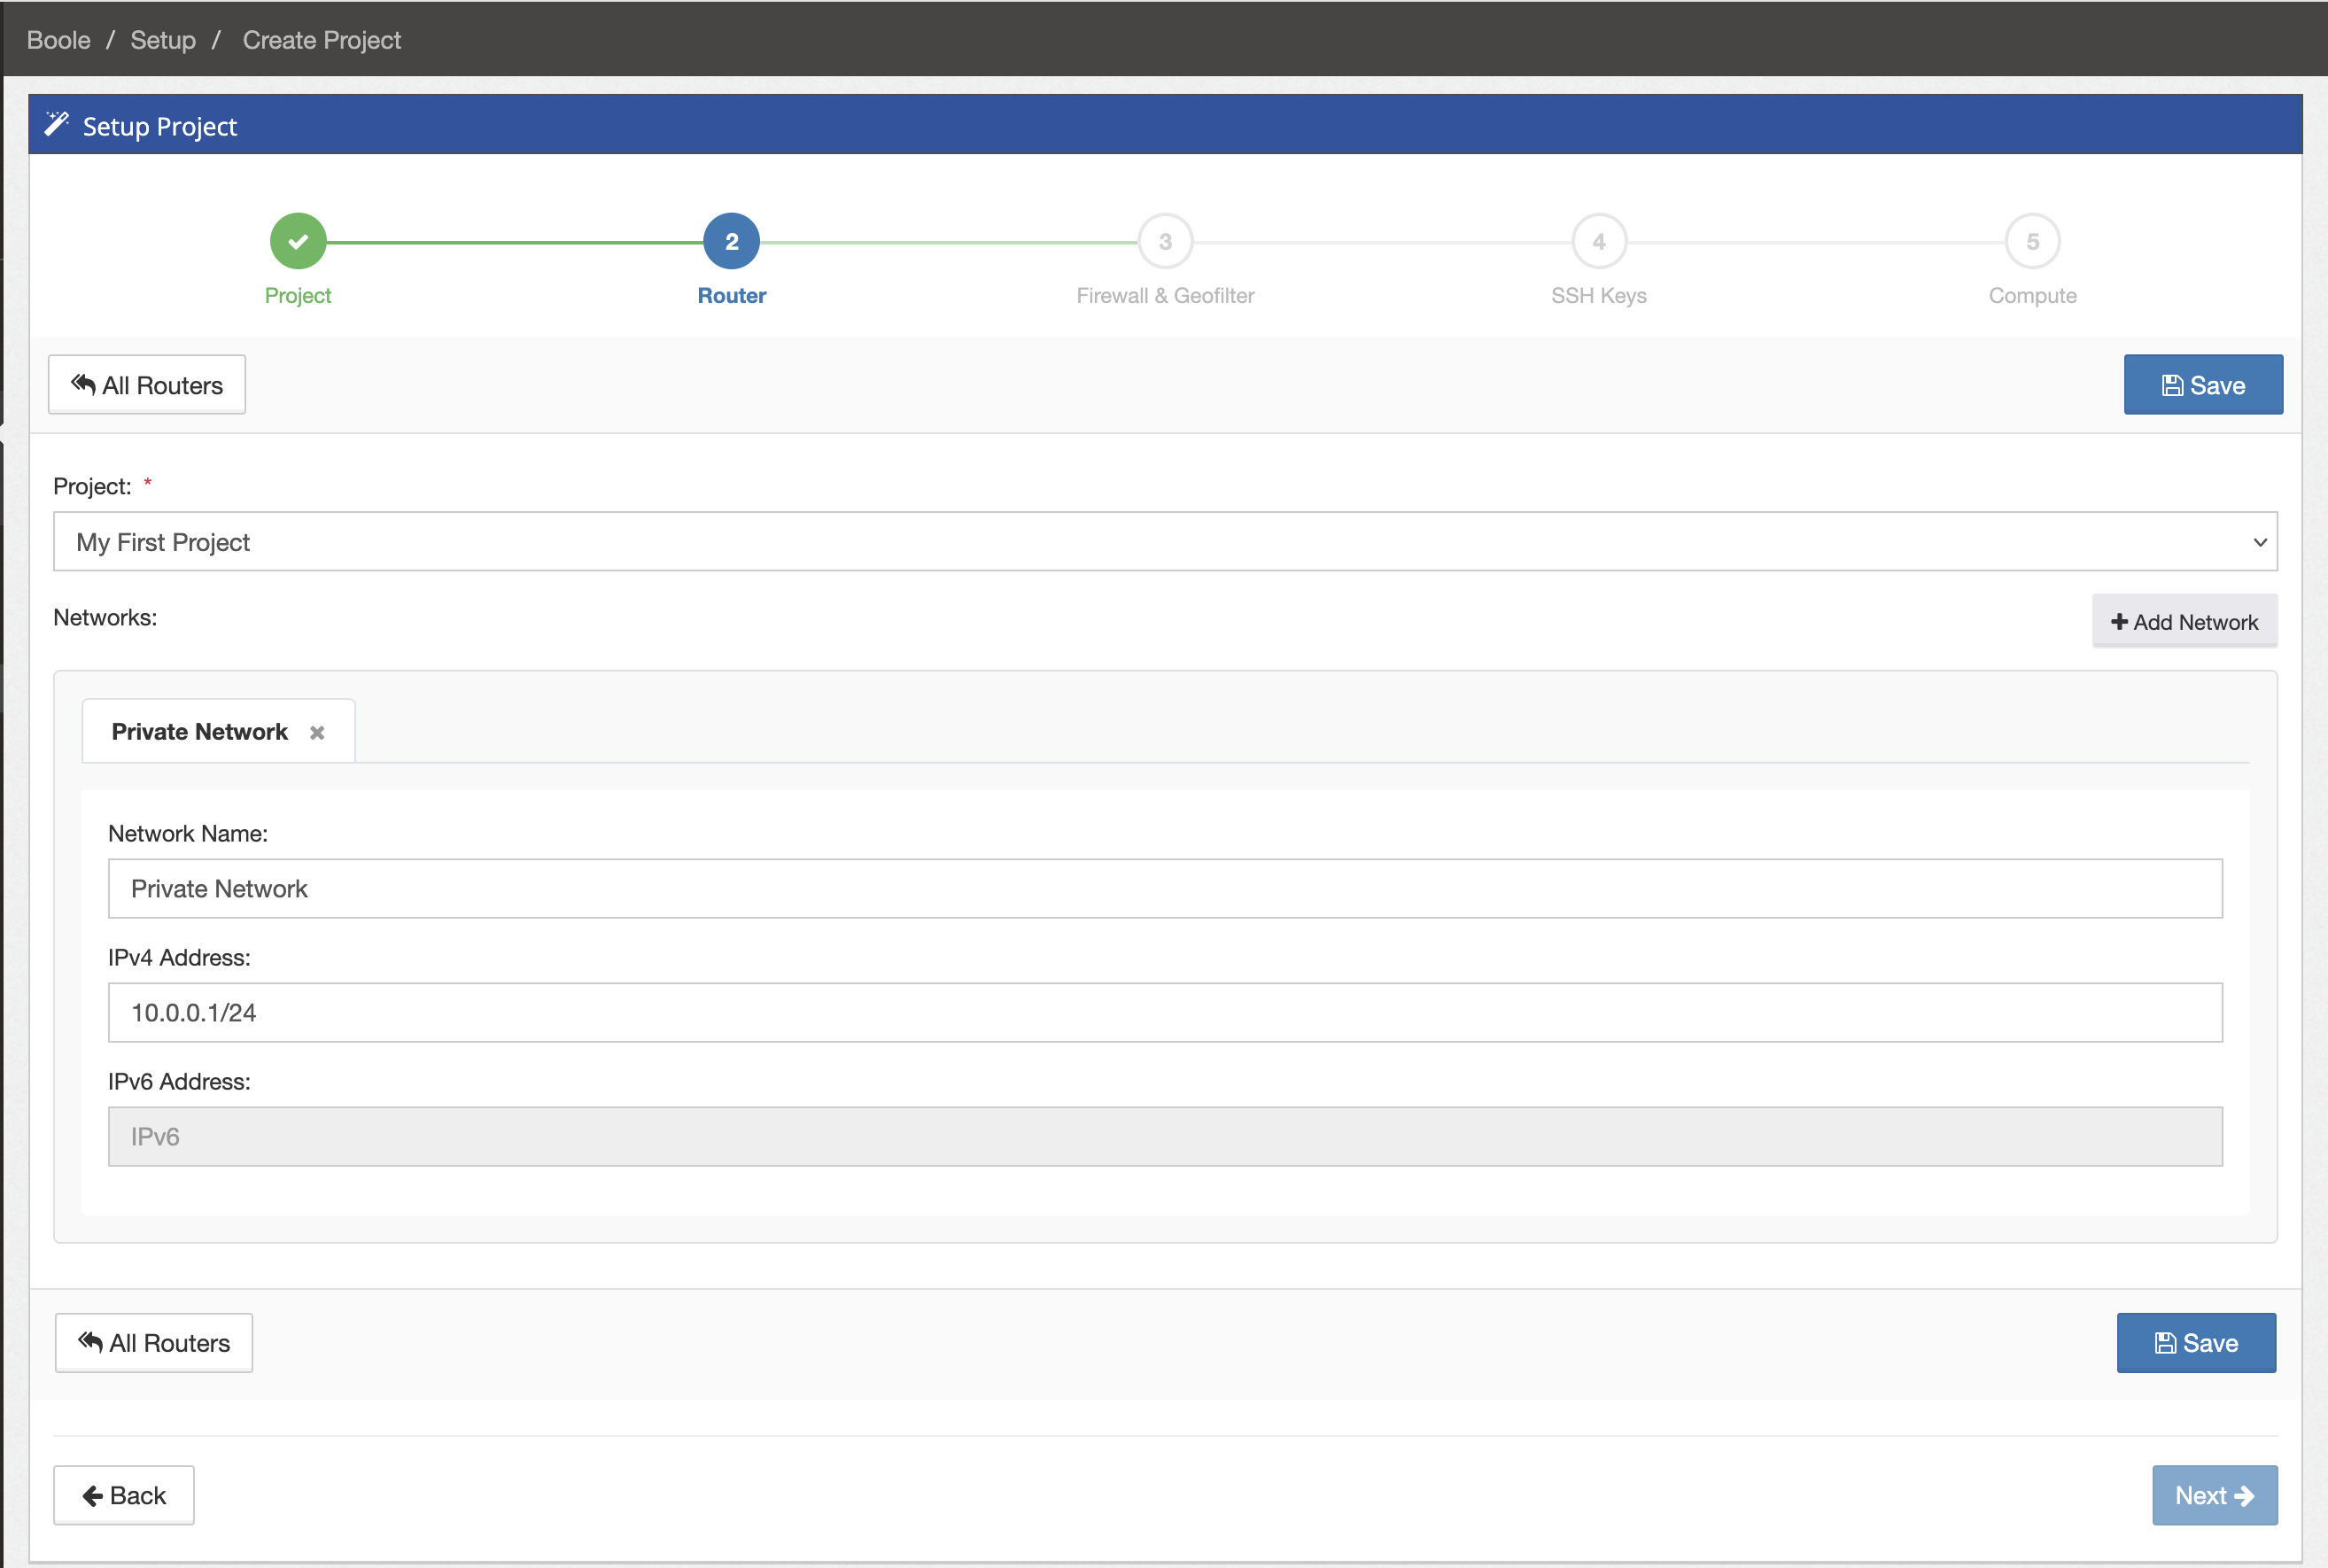
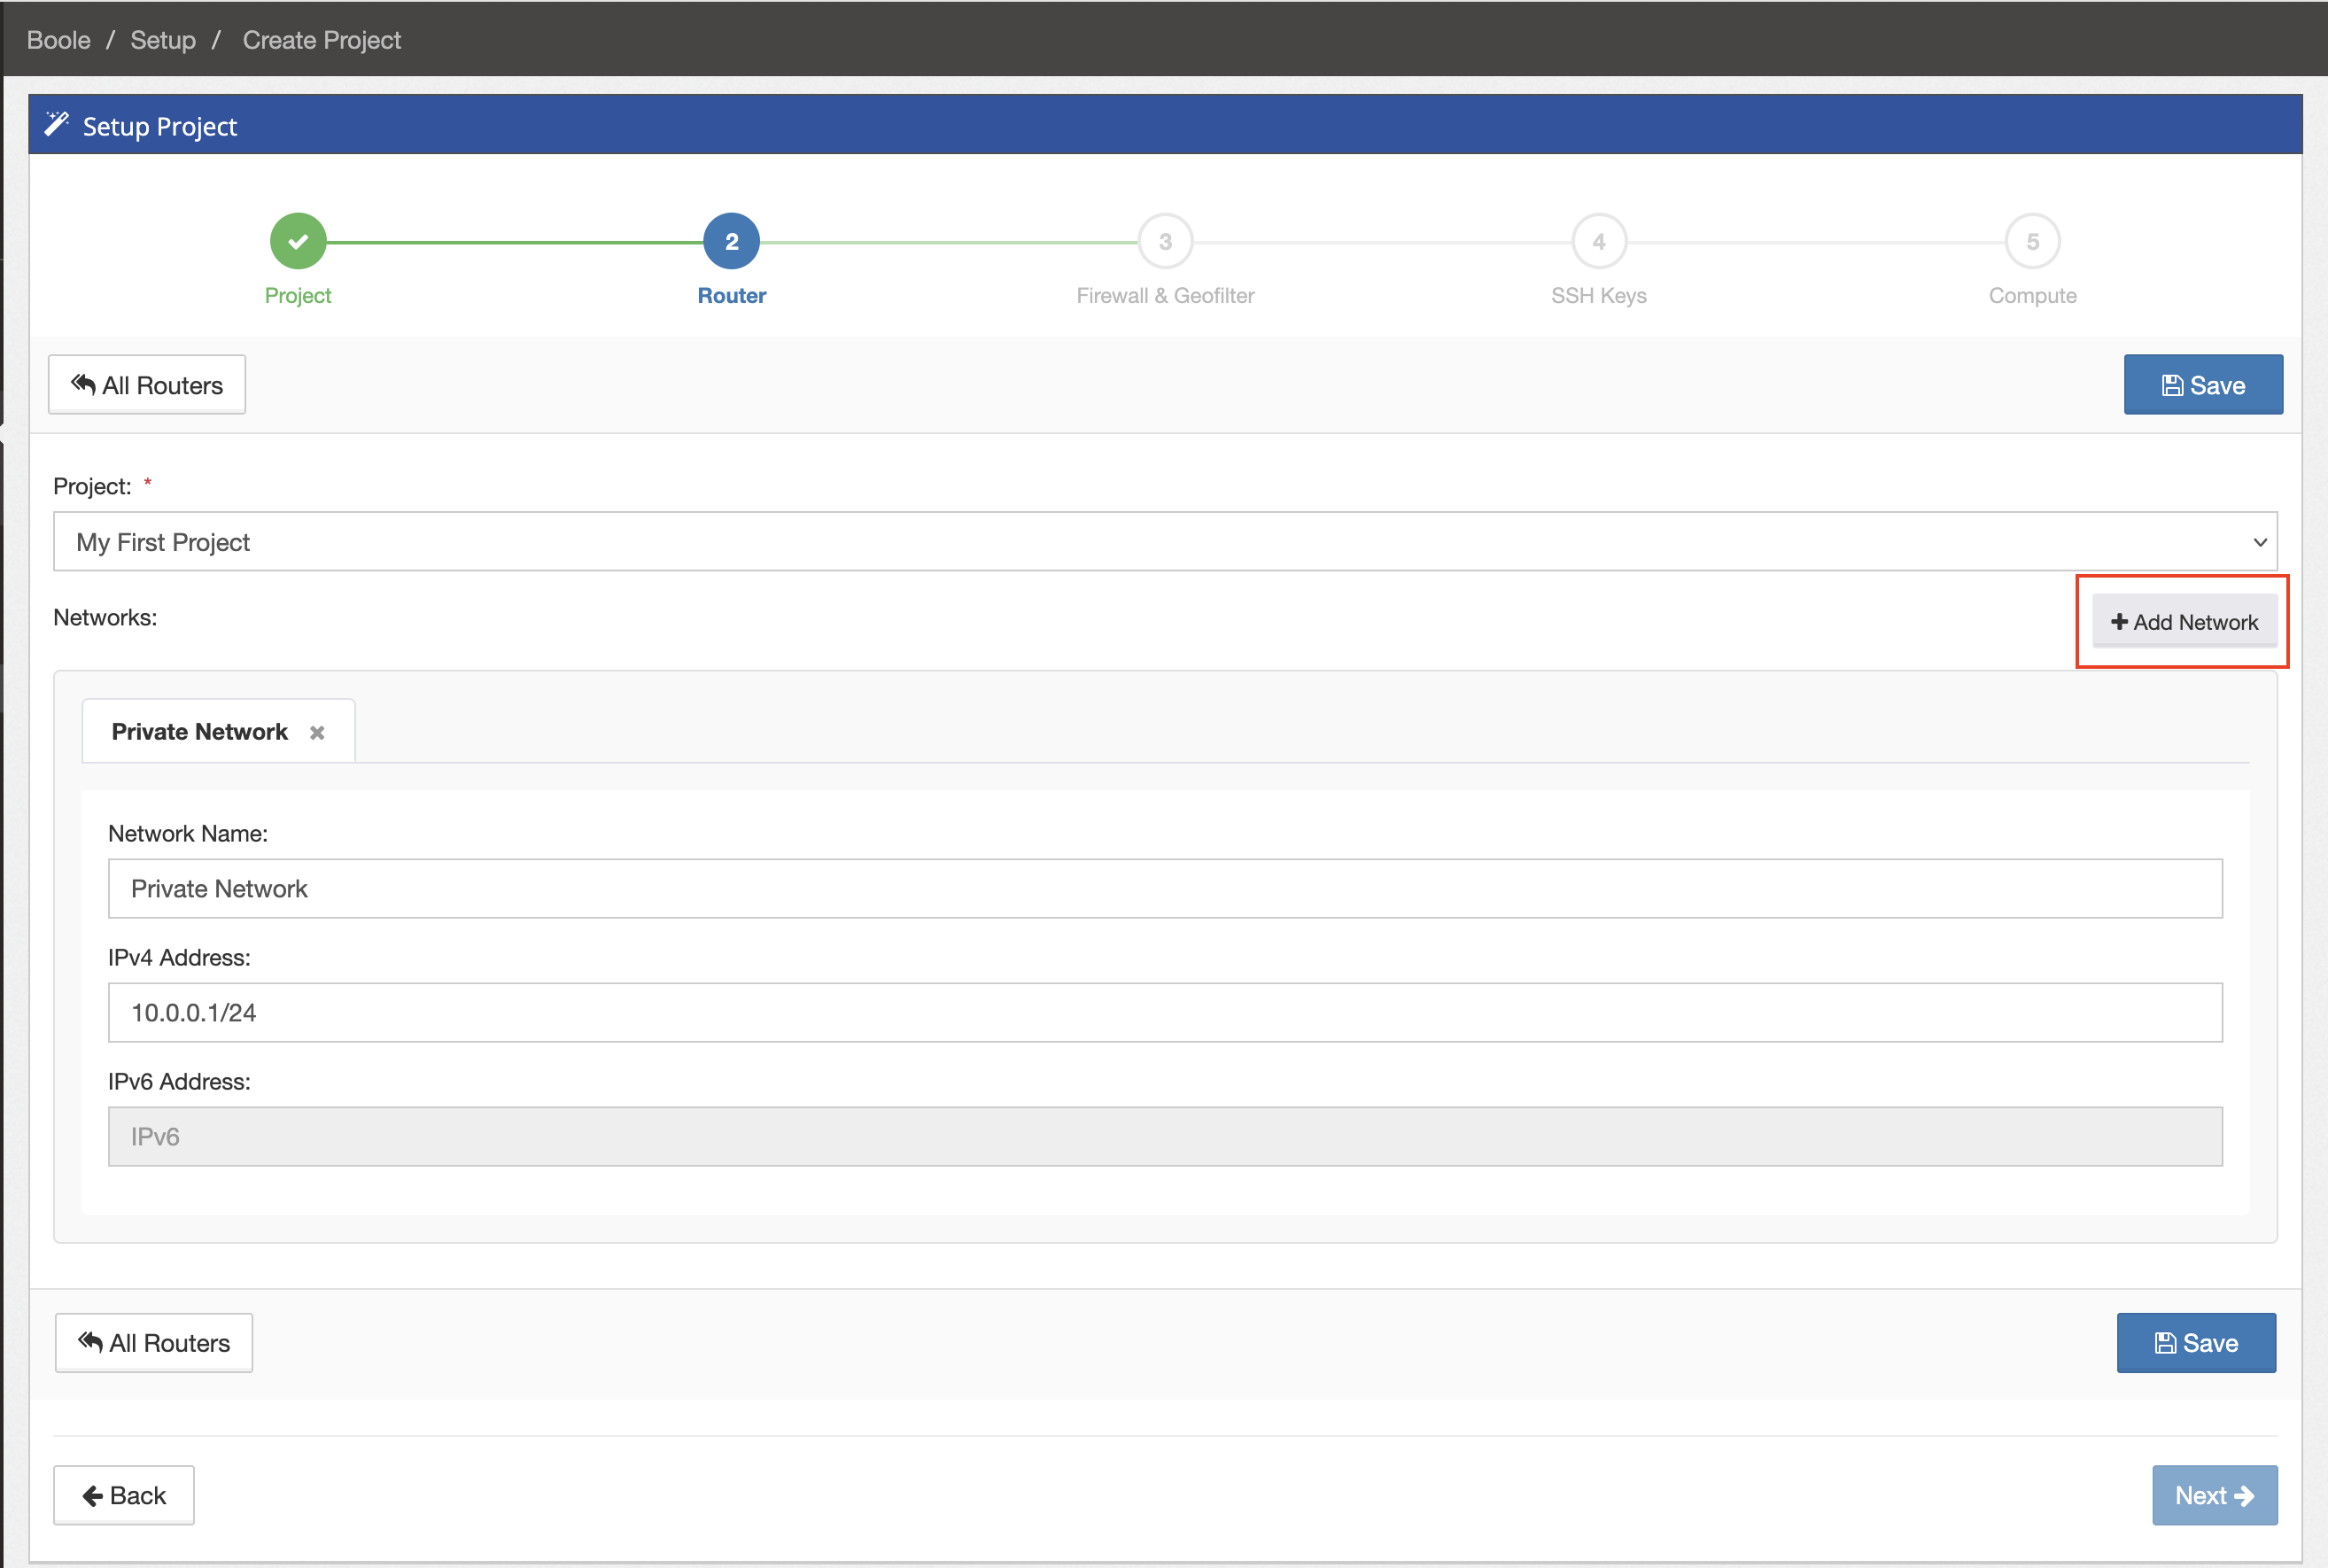
Every project needs a router and at least one network. Boole creates a private network by default. Keep its IPv4 range unless it conflicts with a network you already use. Select Add Network only when the project needs another network, then select Save and Next.
Additional networks
Select Add Network when the project requires a separate subnet, for example to isolate application and database instances. Give it a clear name and use a non-overlapping IPv4 CIDR range. Select Save before moving to the next wizard step.
Create the firewall and geofilter
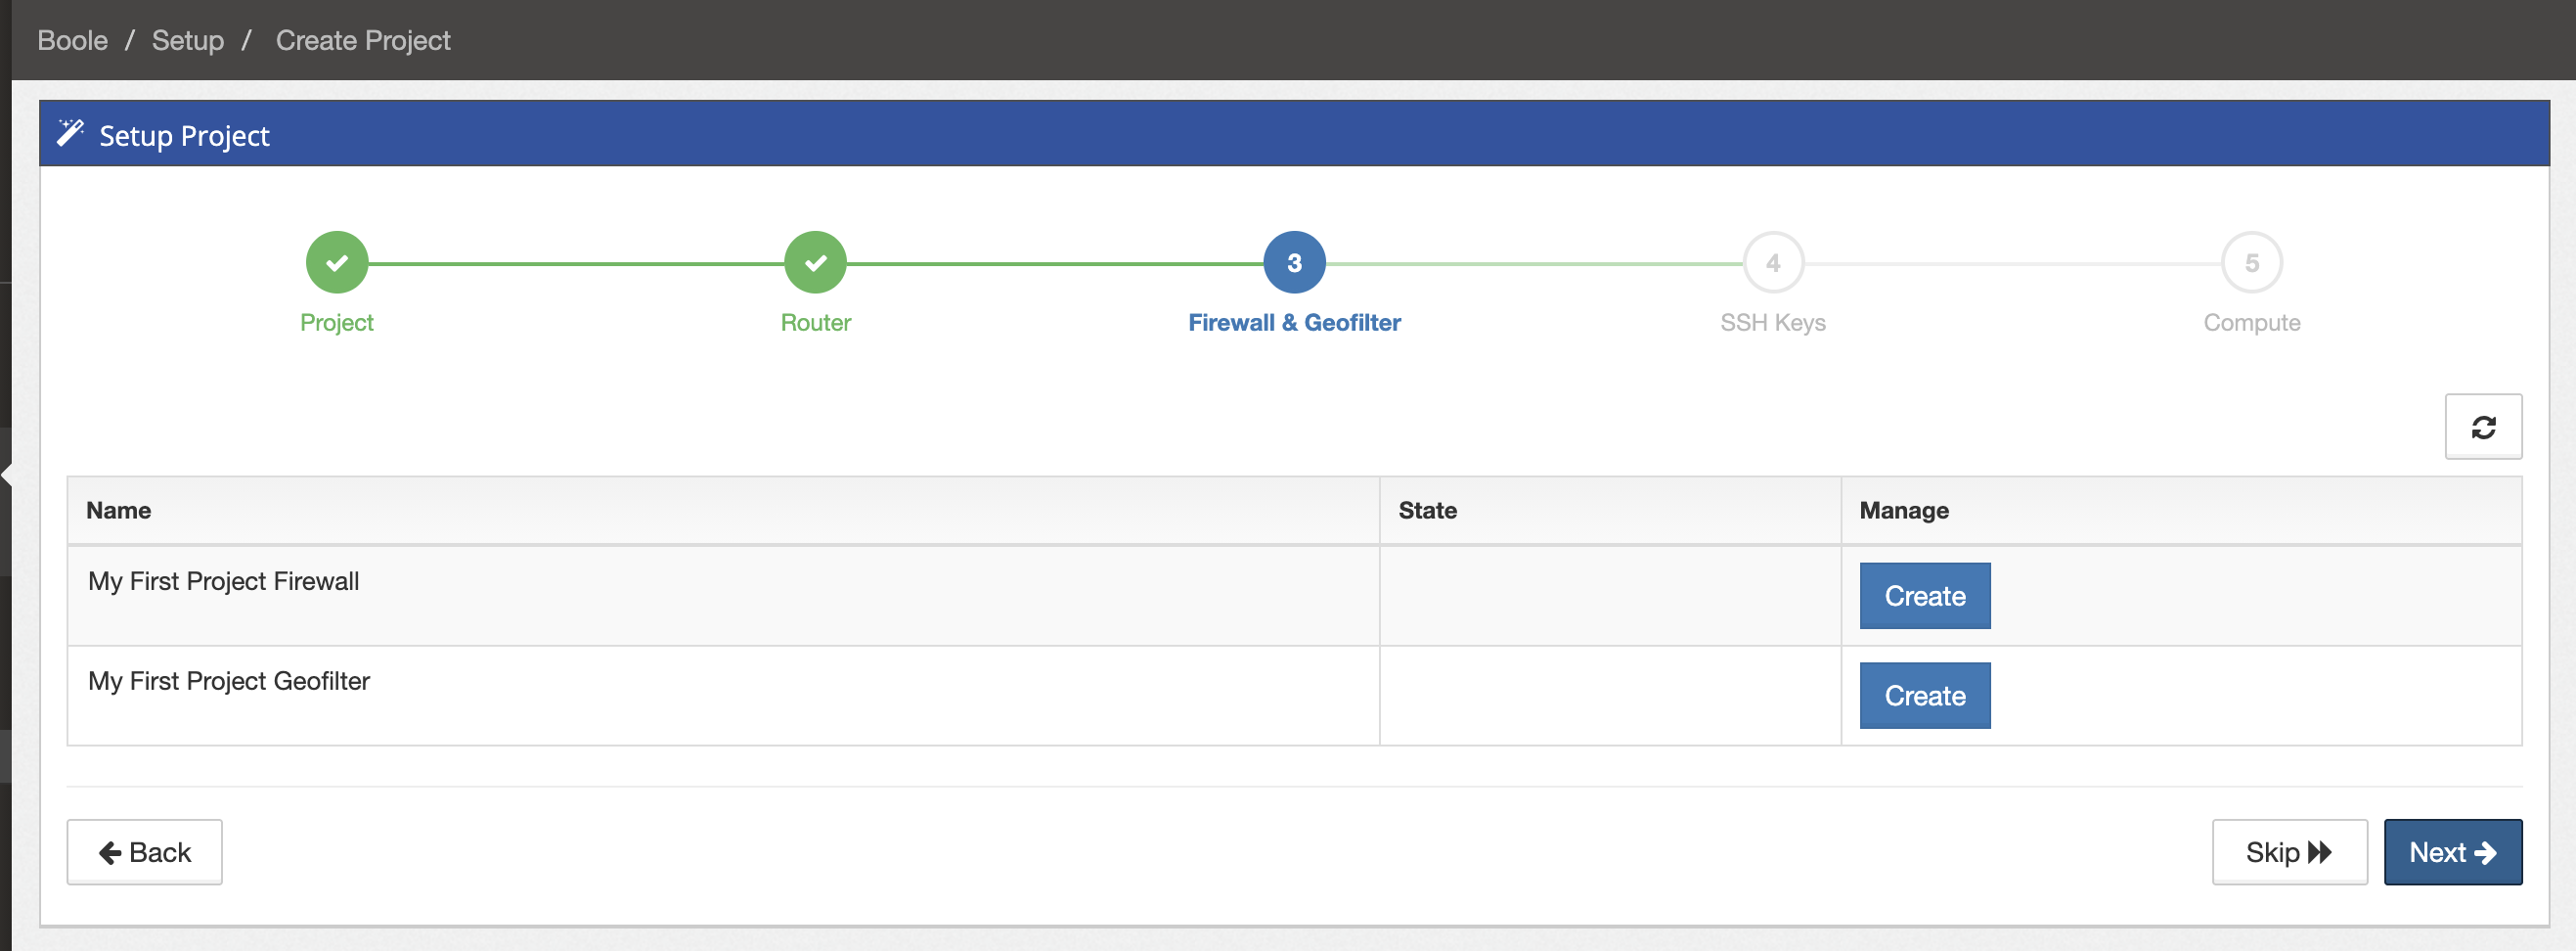
The wizard creates a firewall and a geofilter named after the project.
Firewall: controls traffic to and from resources using the source, destination, protocol and port.
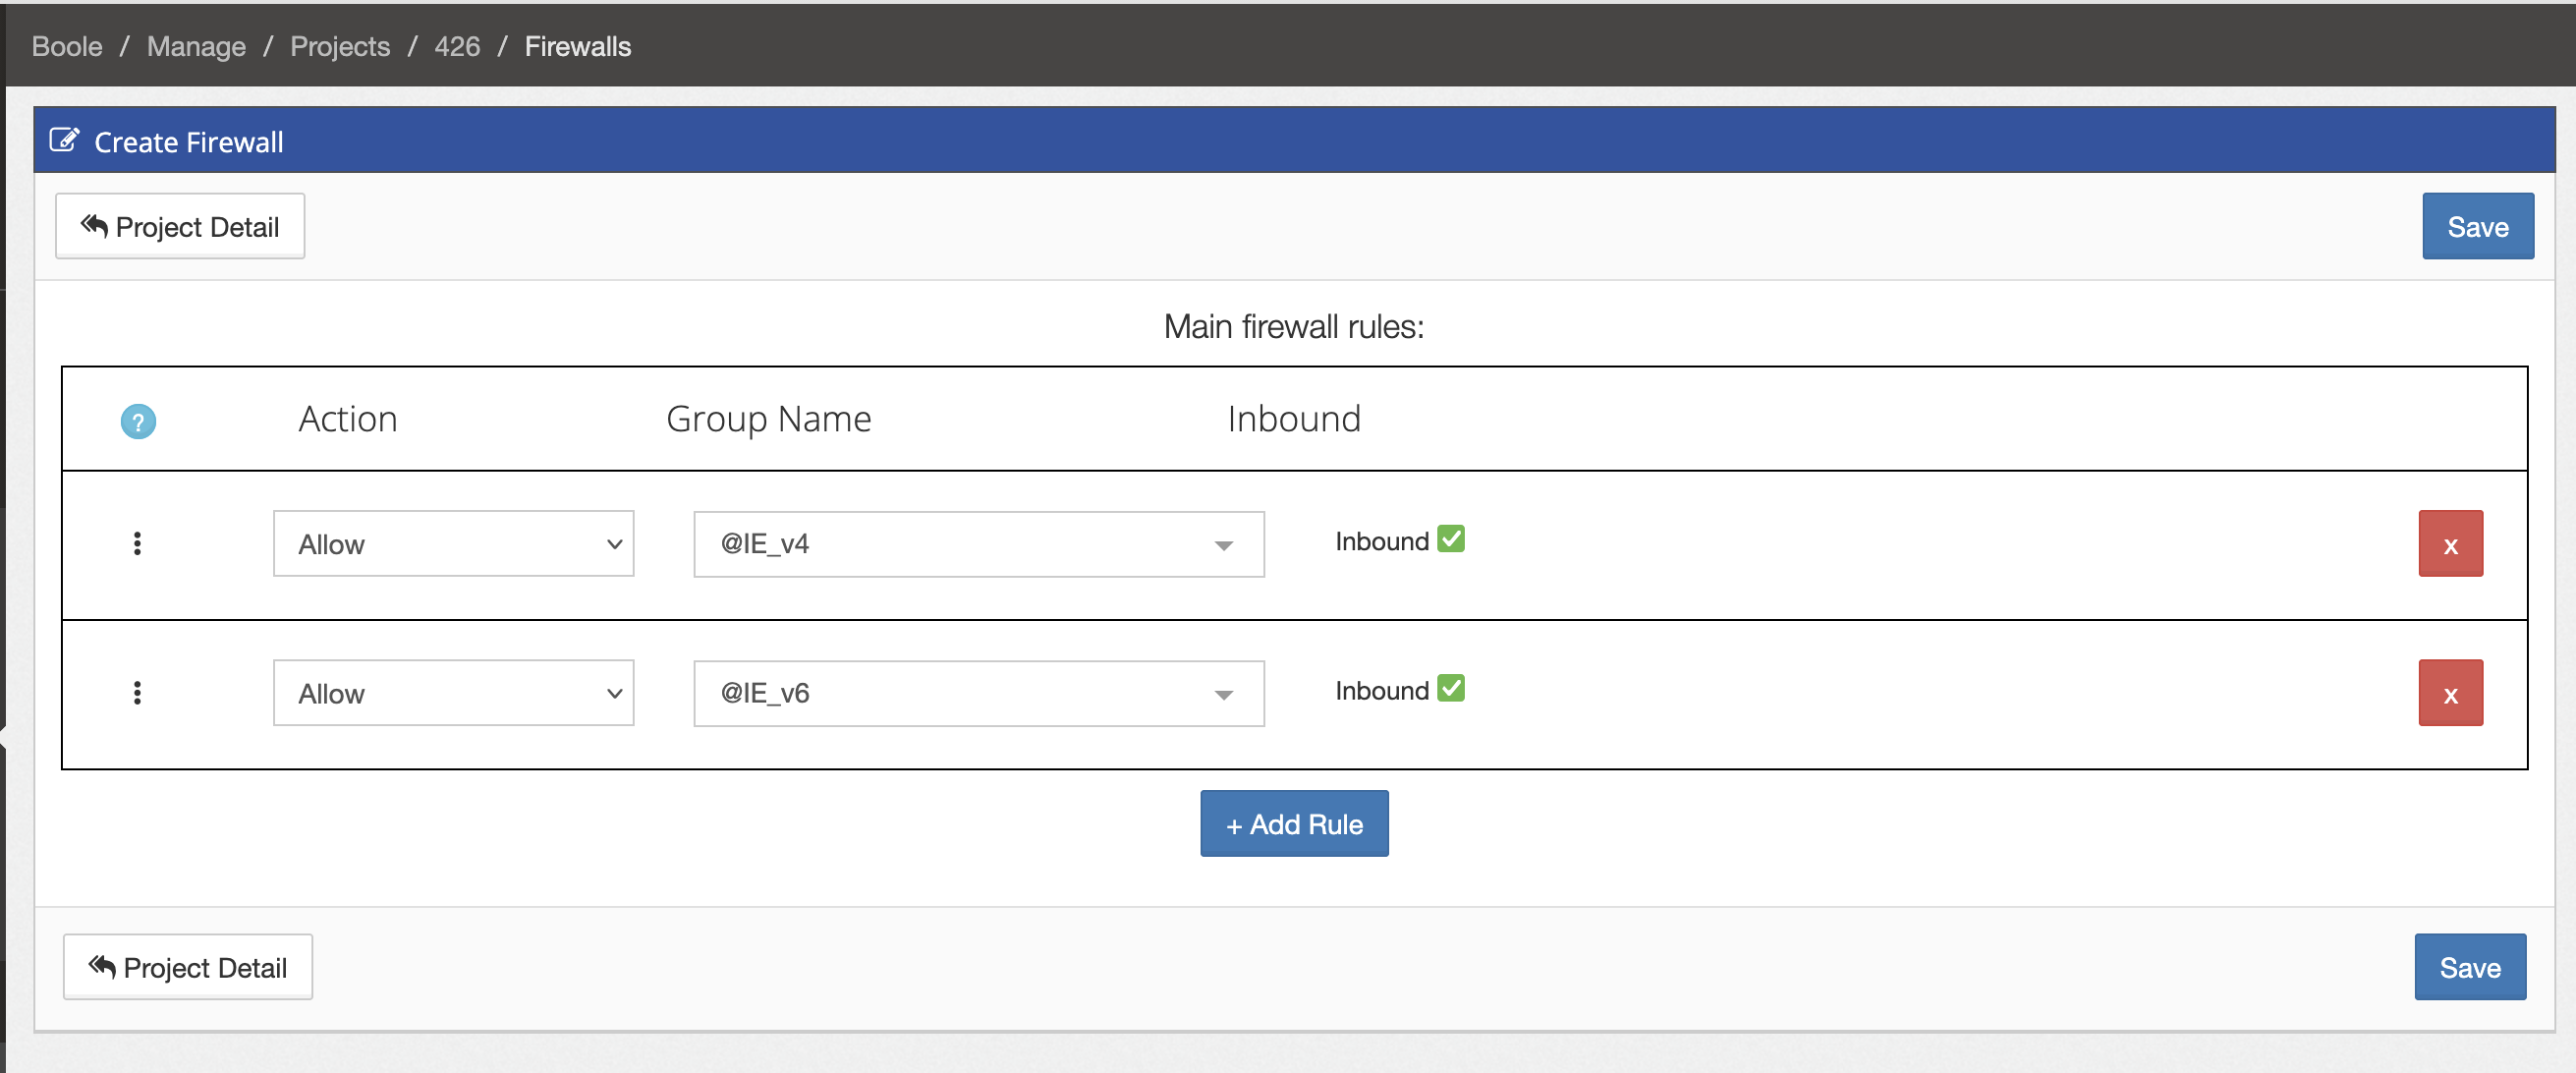
Geofilter: adds location-based control, allowing or blocking traffic by country or IP group.
Select Create beside each one. Do not skip this step if the instance will be accessible from the internet.
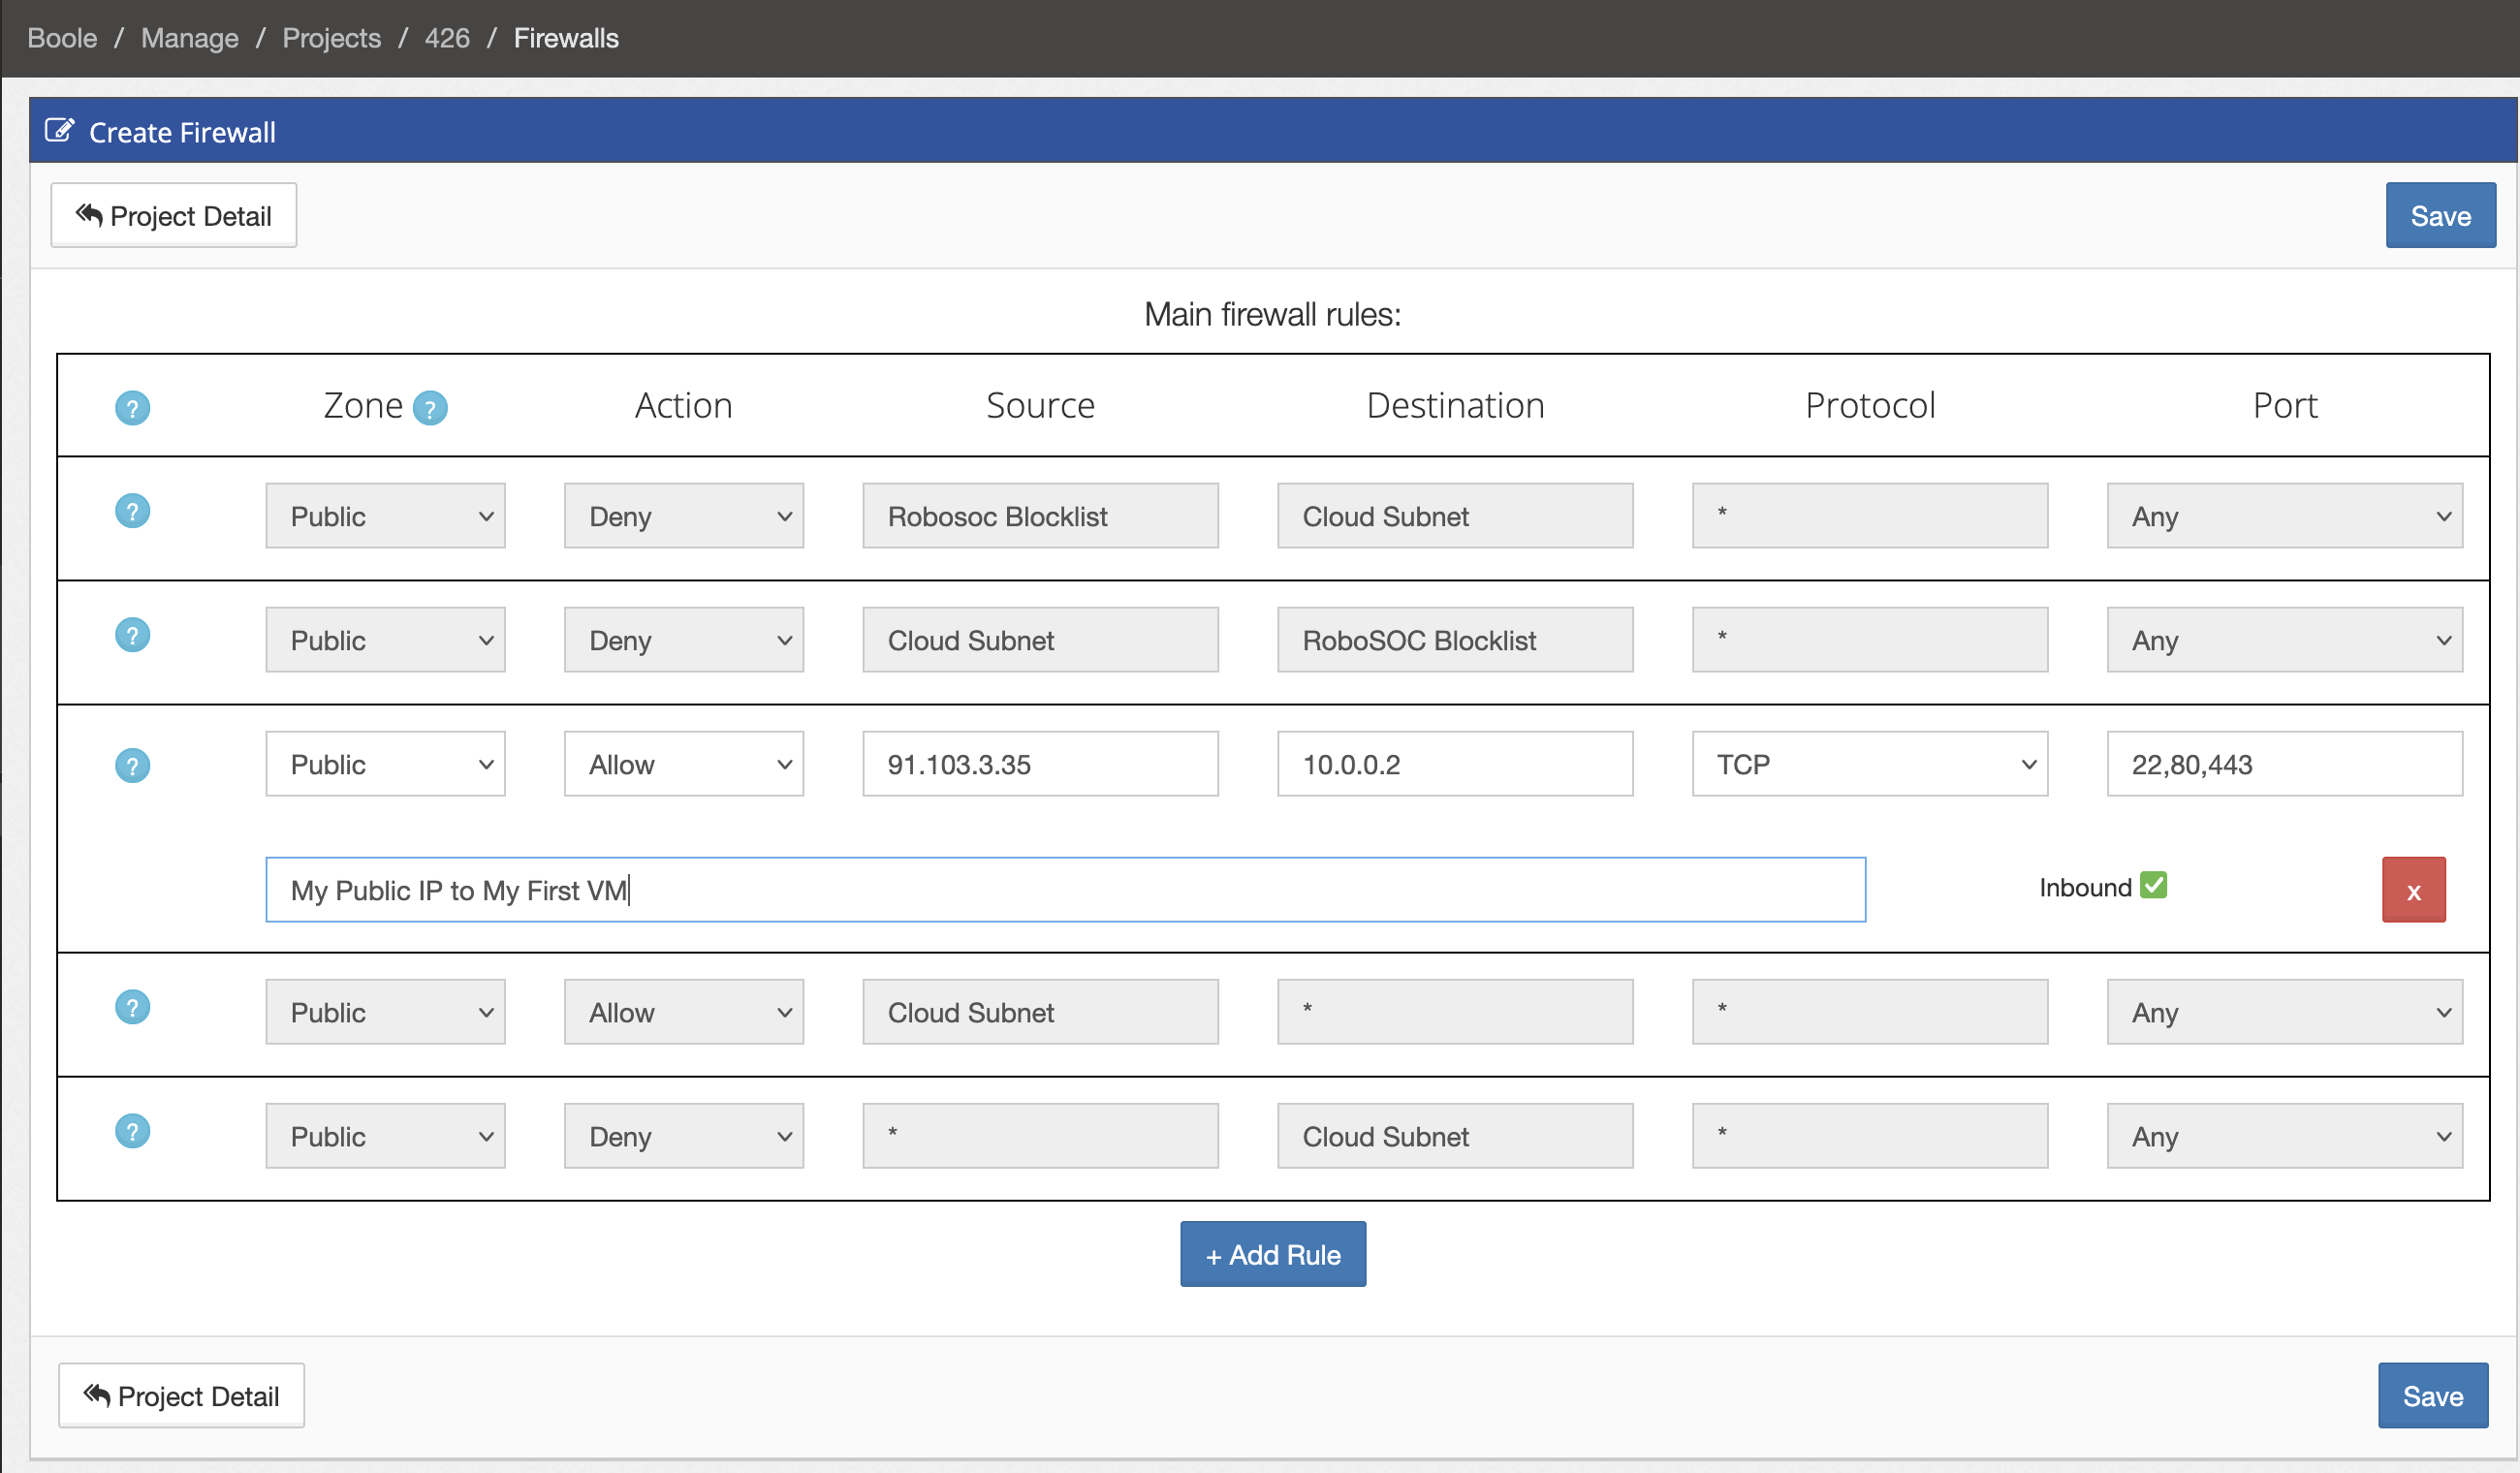
To allow access from your current location:
Find the public IPv4 address of the computer you are using: expand View and select Who Am I.
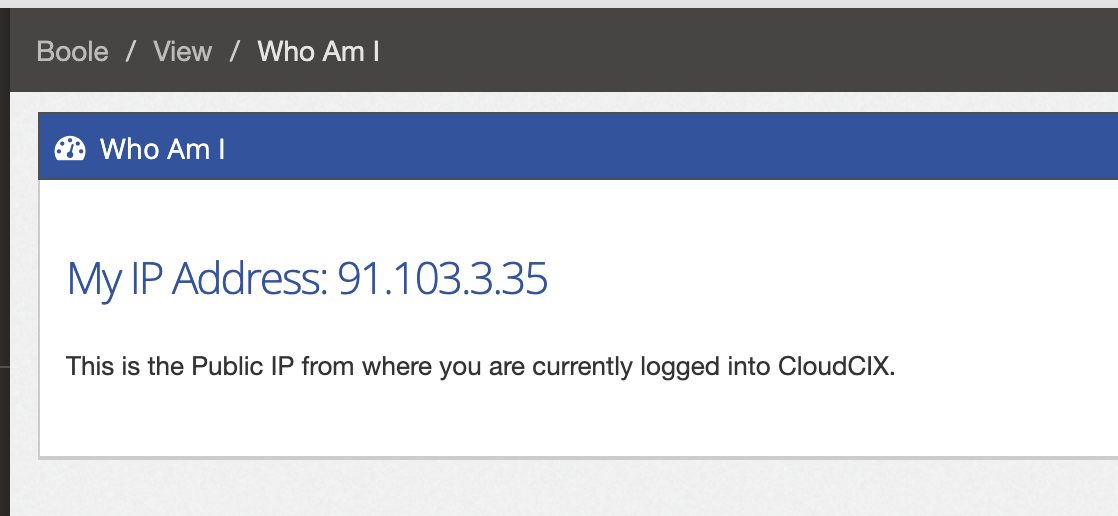
In the firewall, add an inbound Allow rule with that address as the source, the LXD instance private address as the destination, TCP as the protocol, and port 22 for SSH. Add only the ports required by the workload.
In the geofilter, retain the appropriate country/IP-group rules for the locations that should be allowed. See the RIR IP address data repository for more information.
Add an SSH key
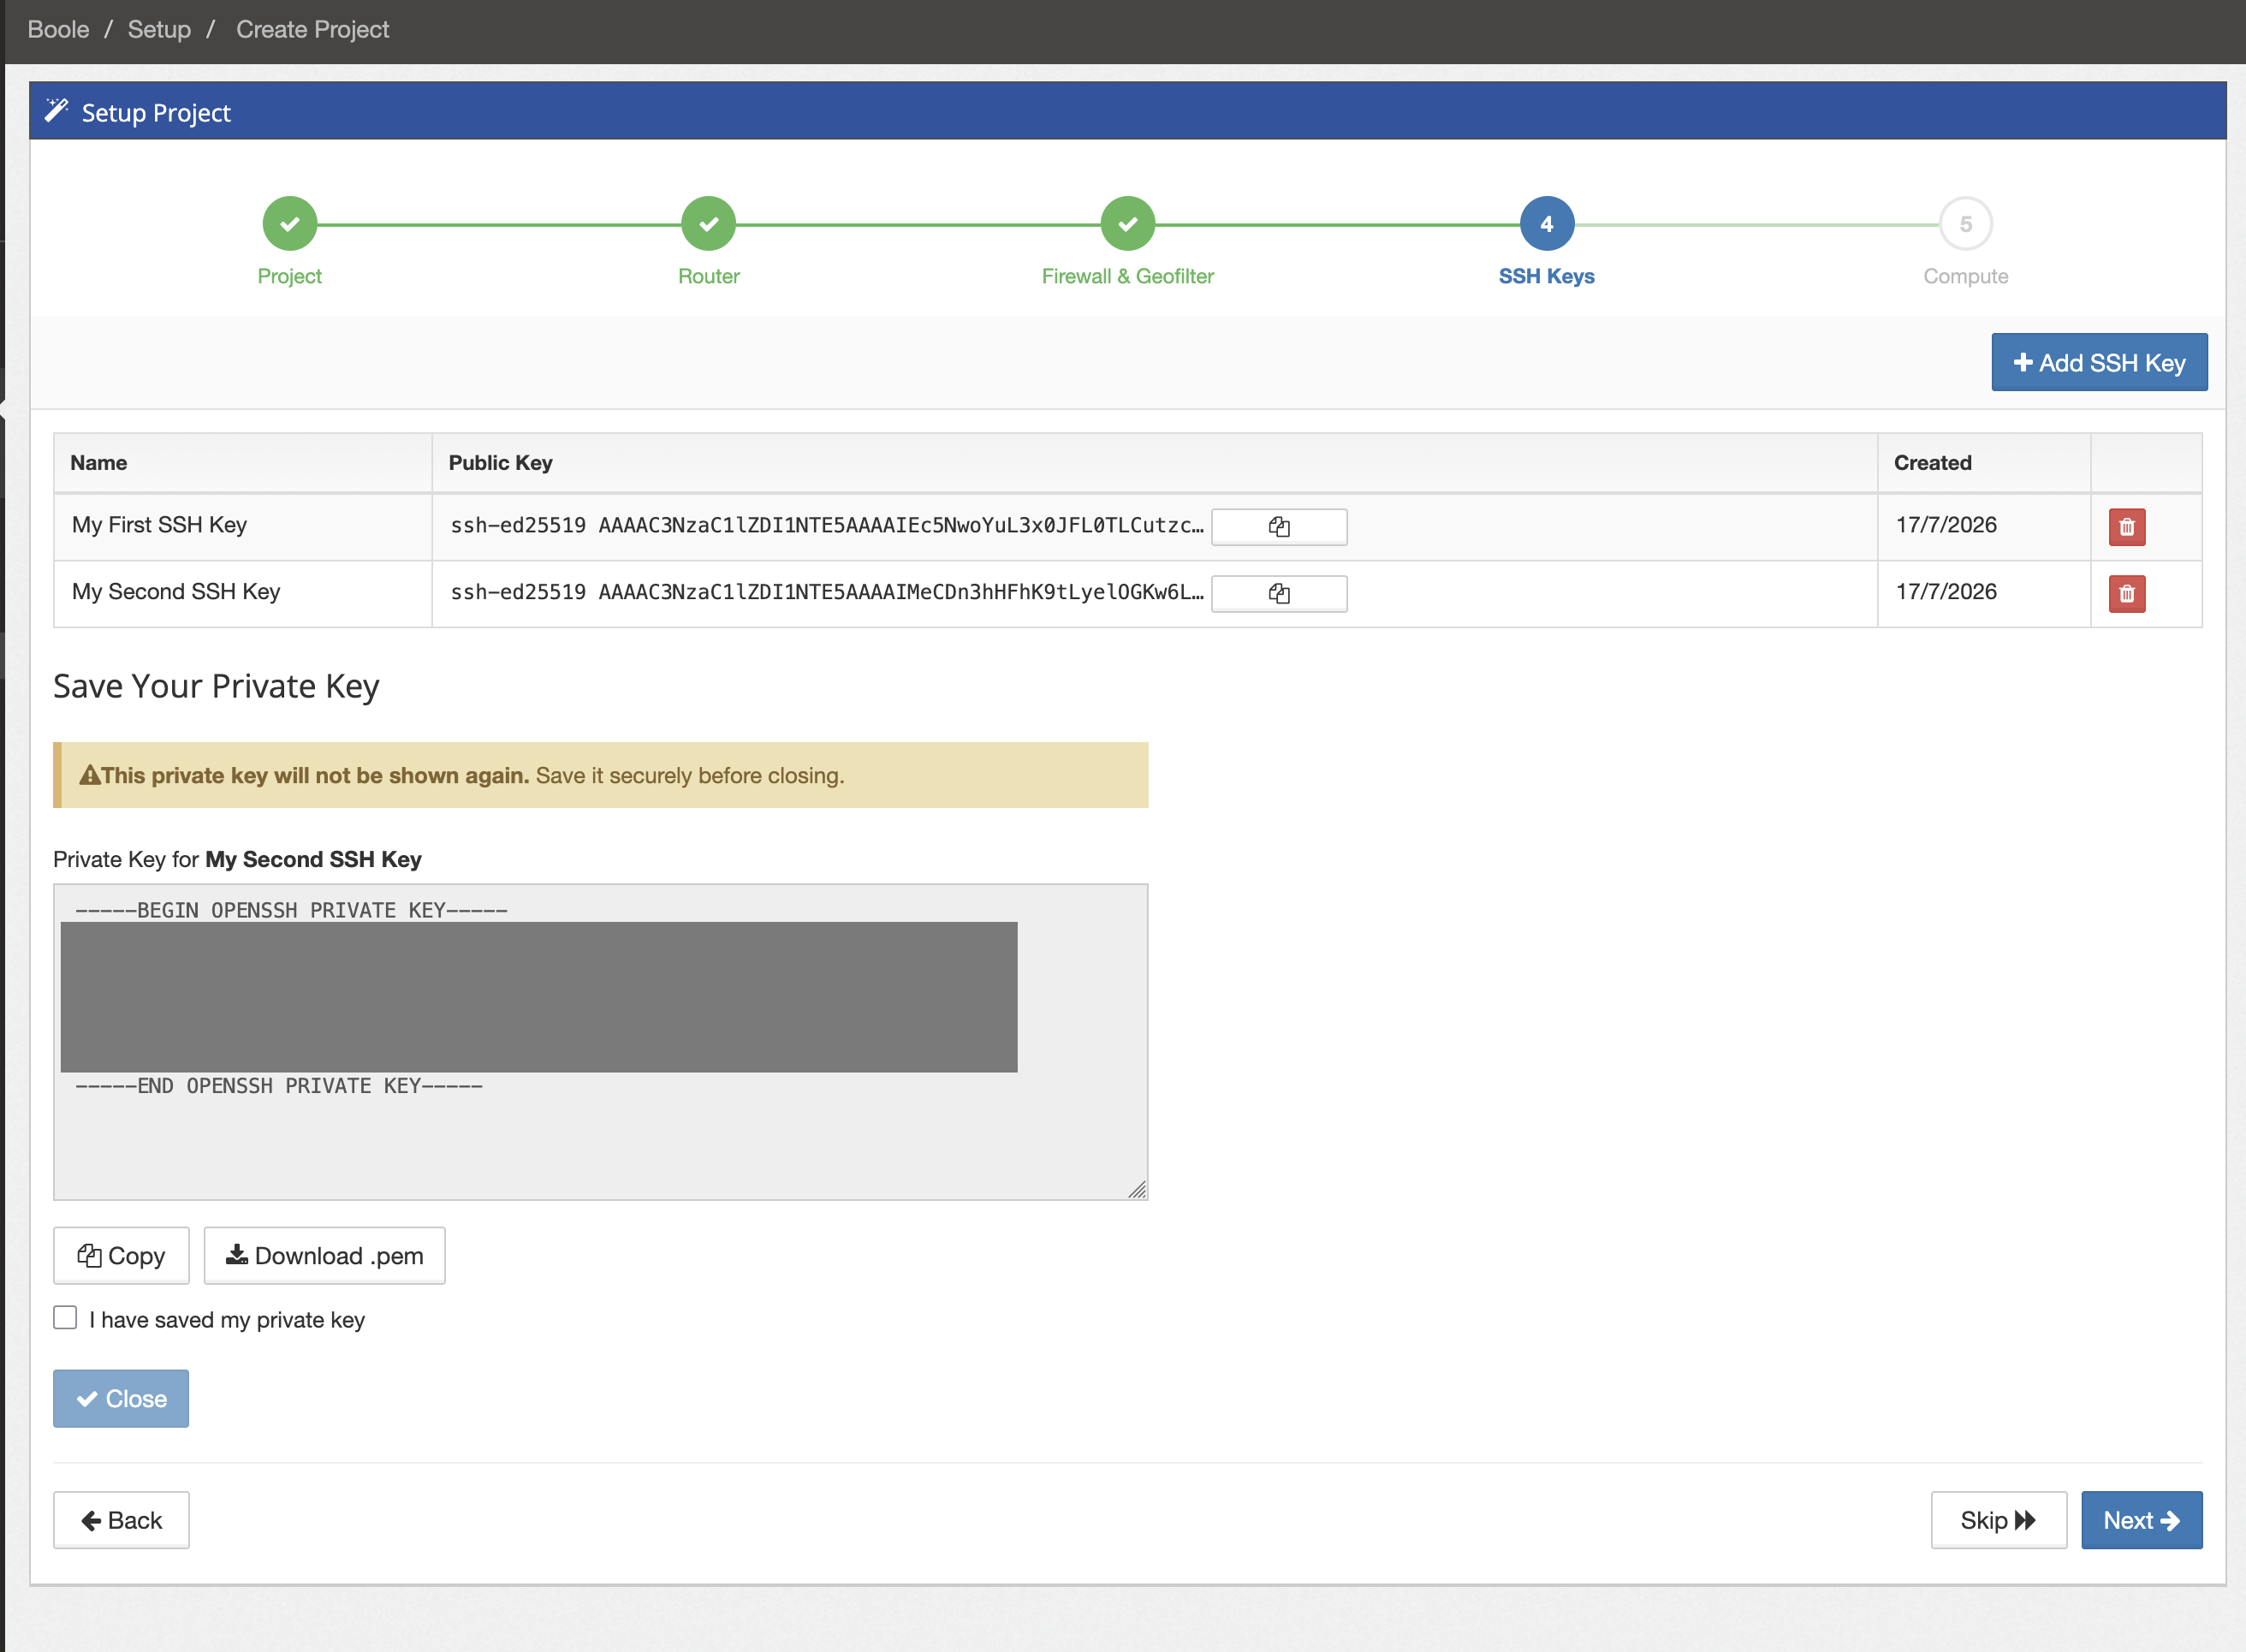
On the SSH Keys step, select Add SSH Key. You may paste an existing public key or generate one in Boole. Give the key a recognisable name. If Boole generates a private key, download or copy it immediately and store it securely: it is displayed only once. Select Next when the key is listed.
To find your public key, run the following command on your computer:
cat ~/.ssh/id_rsa.pub

Create an LXD instance
On the Compute step, select Create LXD.
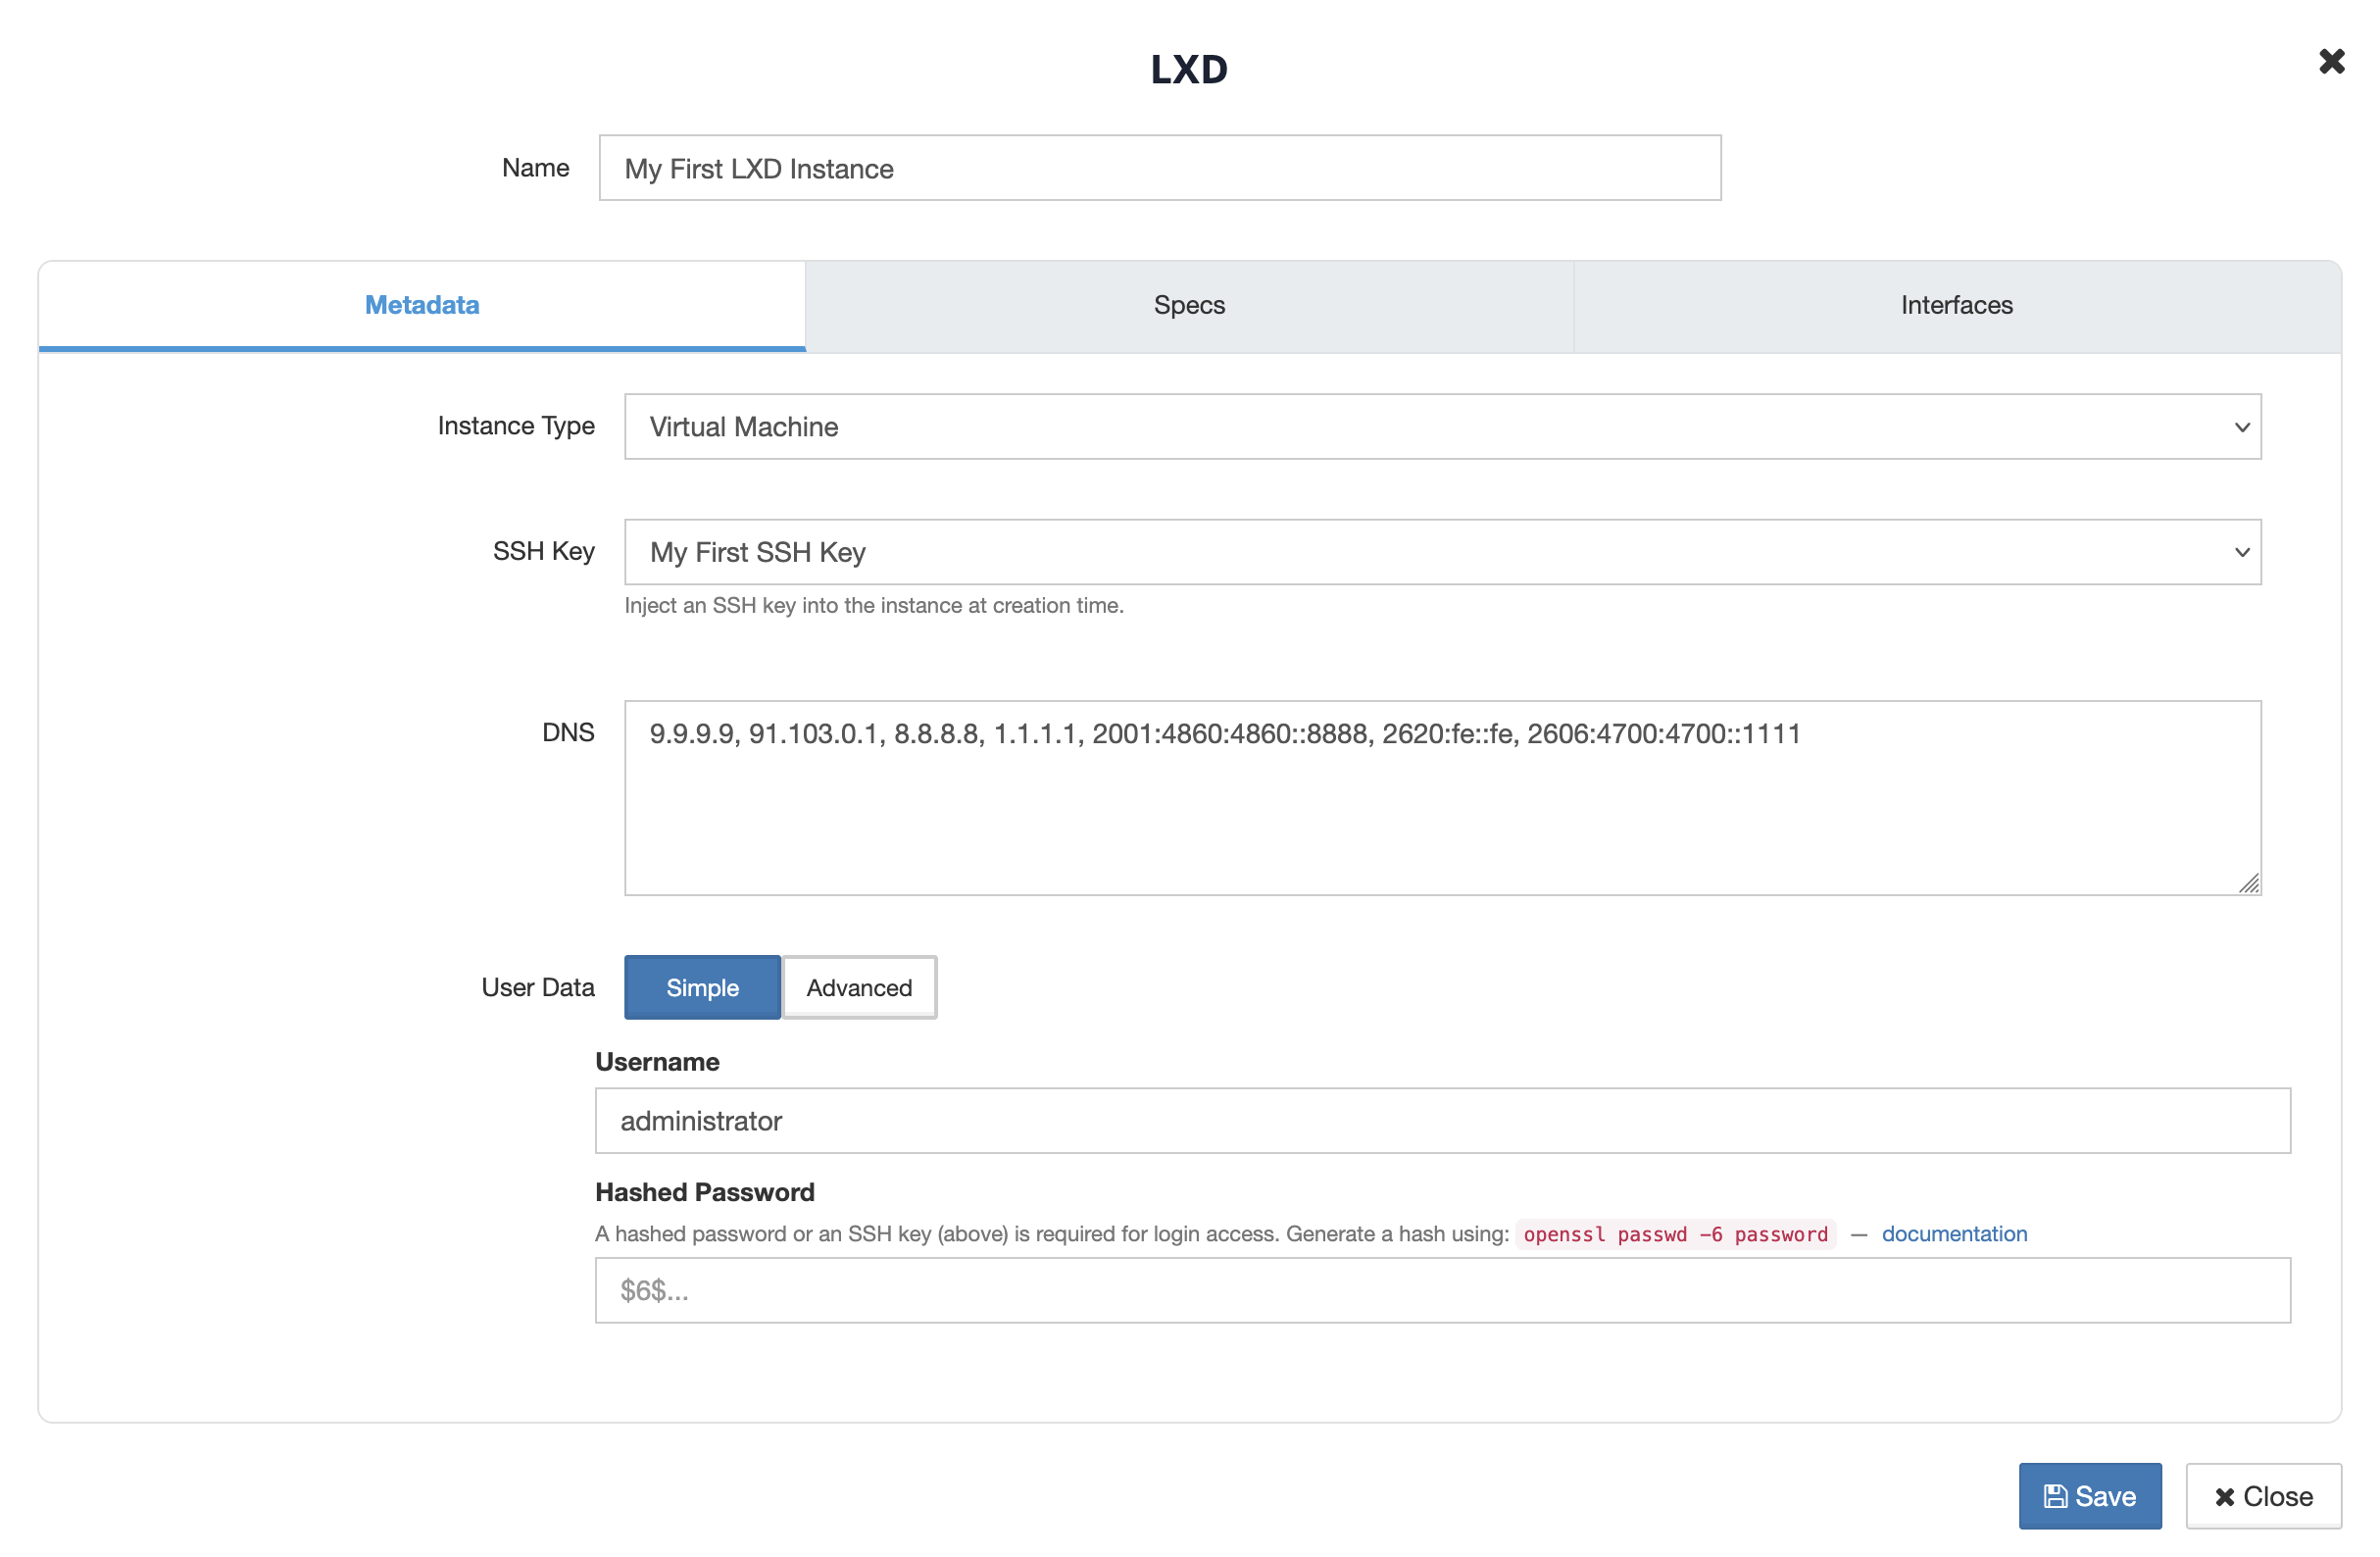
On Metadata, give the instance a name, select the SSH key, and configure login user data if required. An SSH key is preferred to a password.
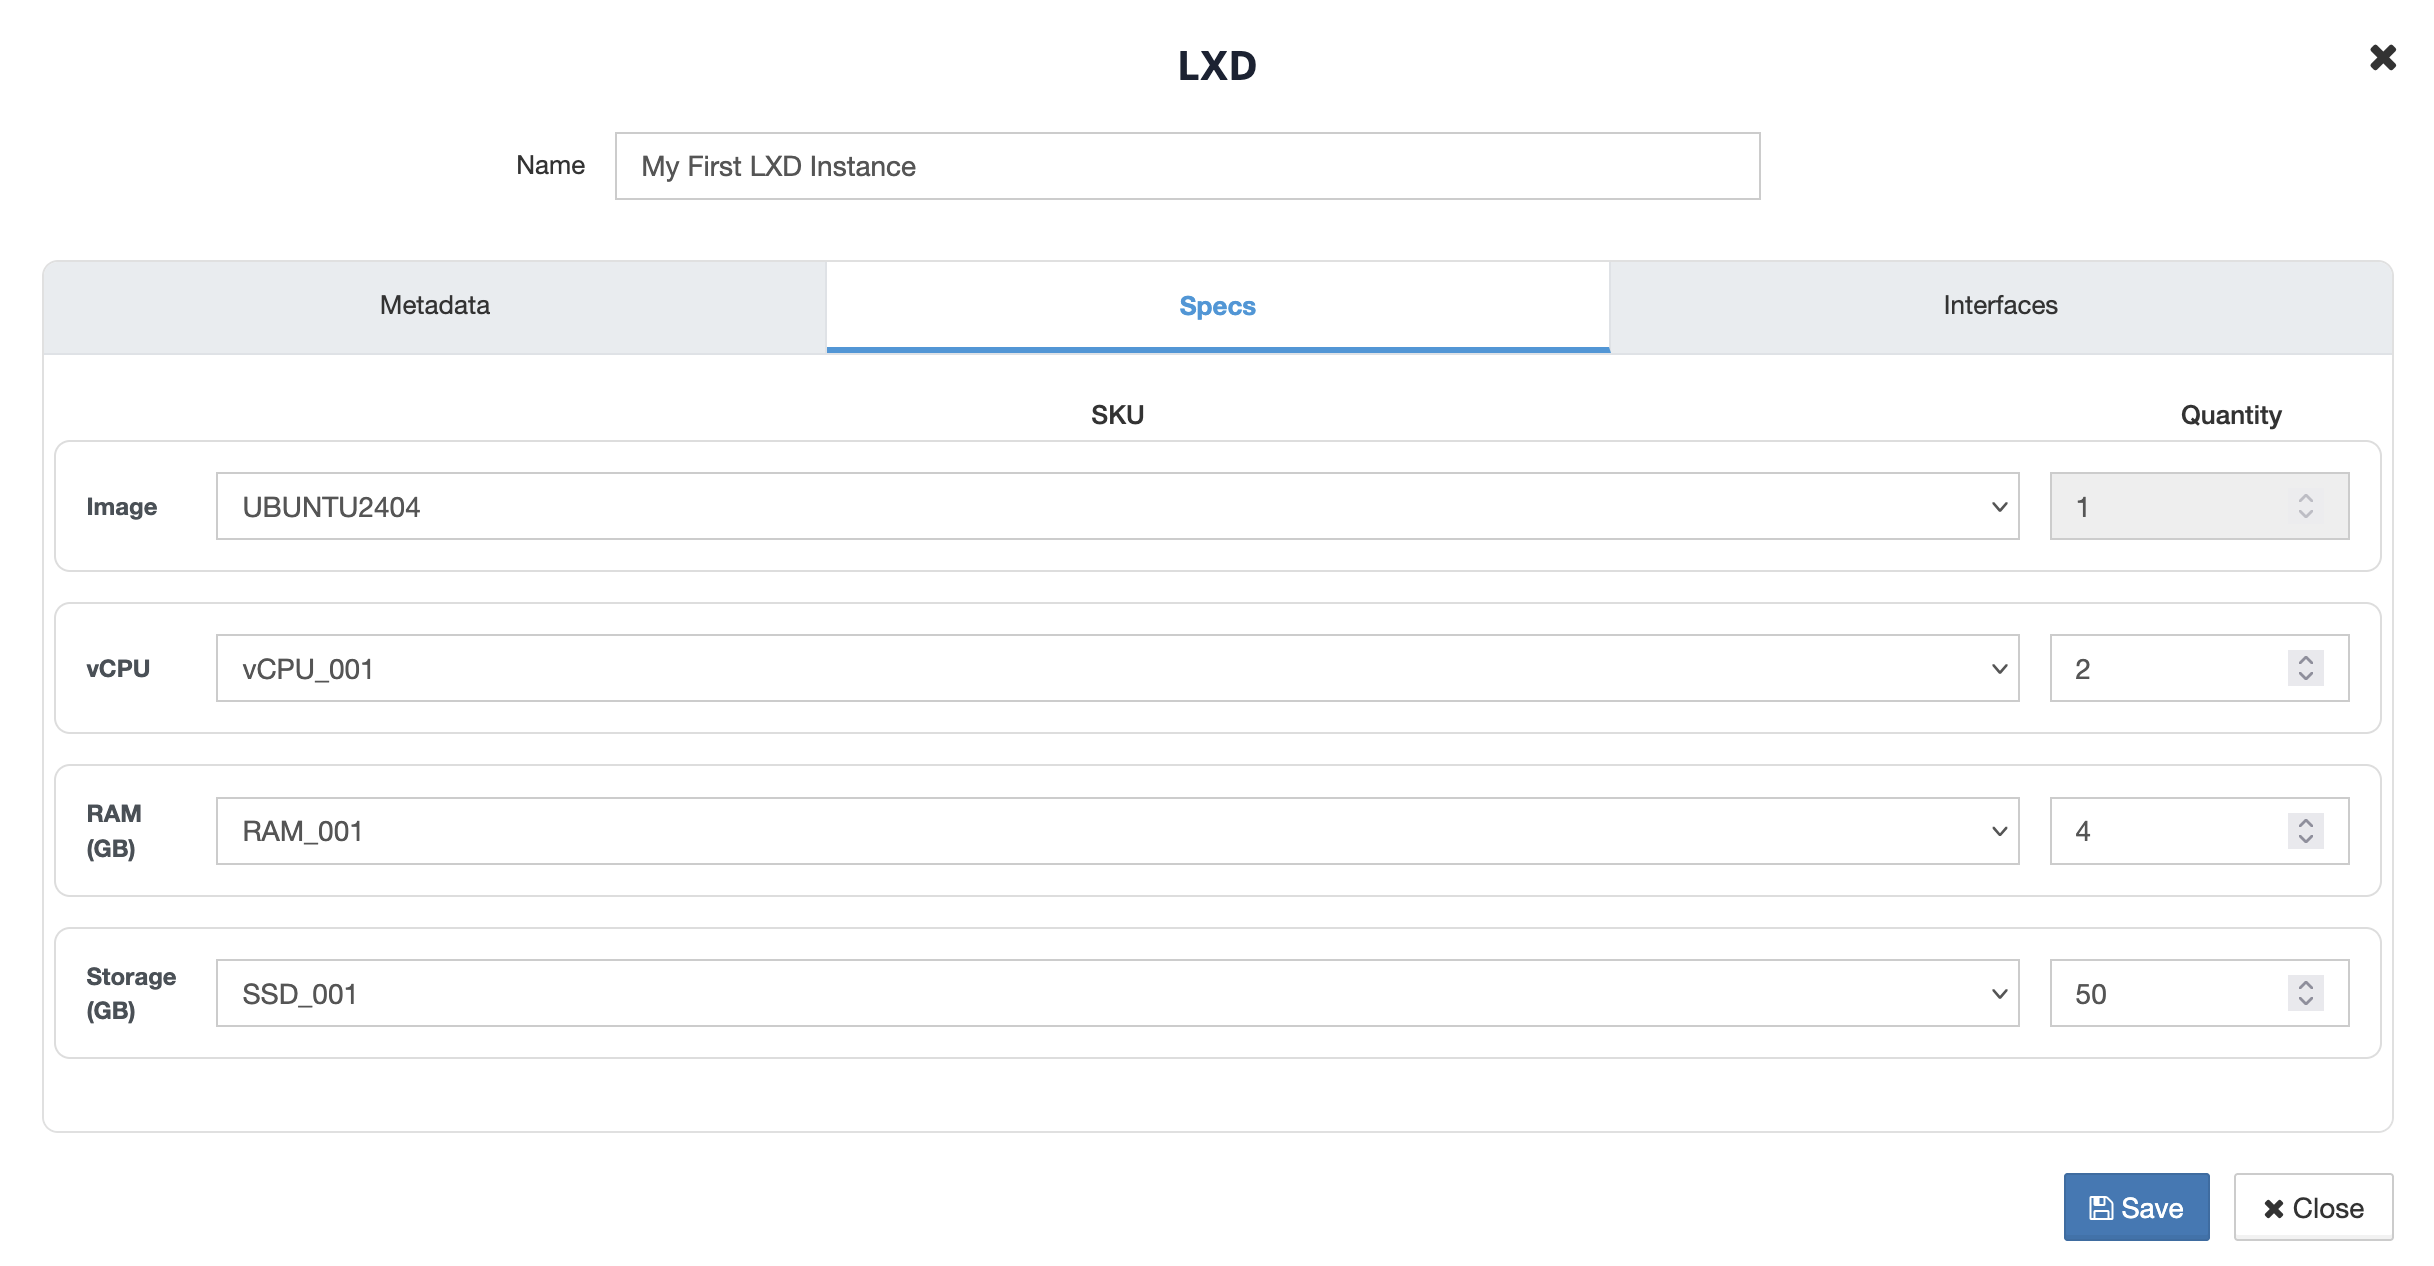
On Specs, select the image and set the vCPU, RAM and storage quantities.
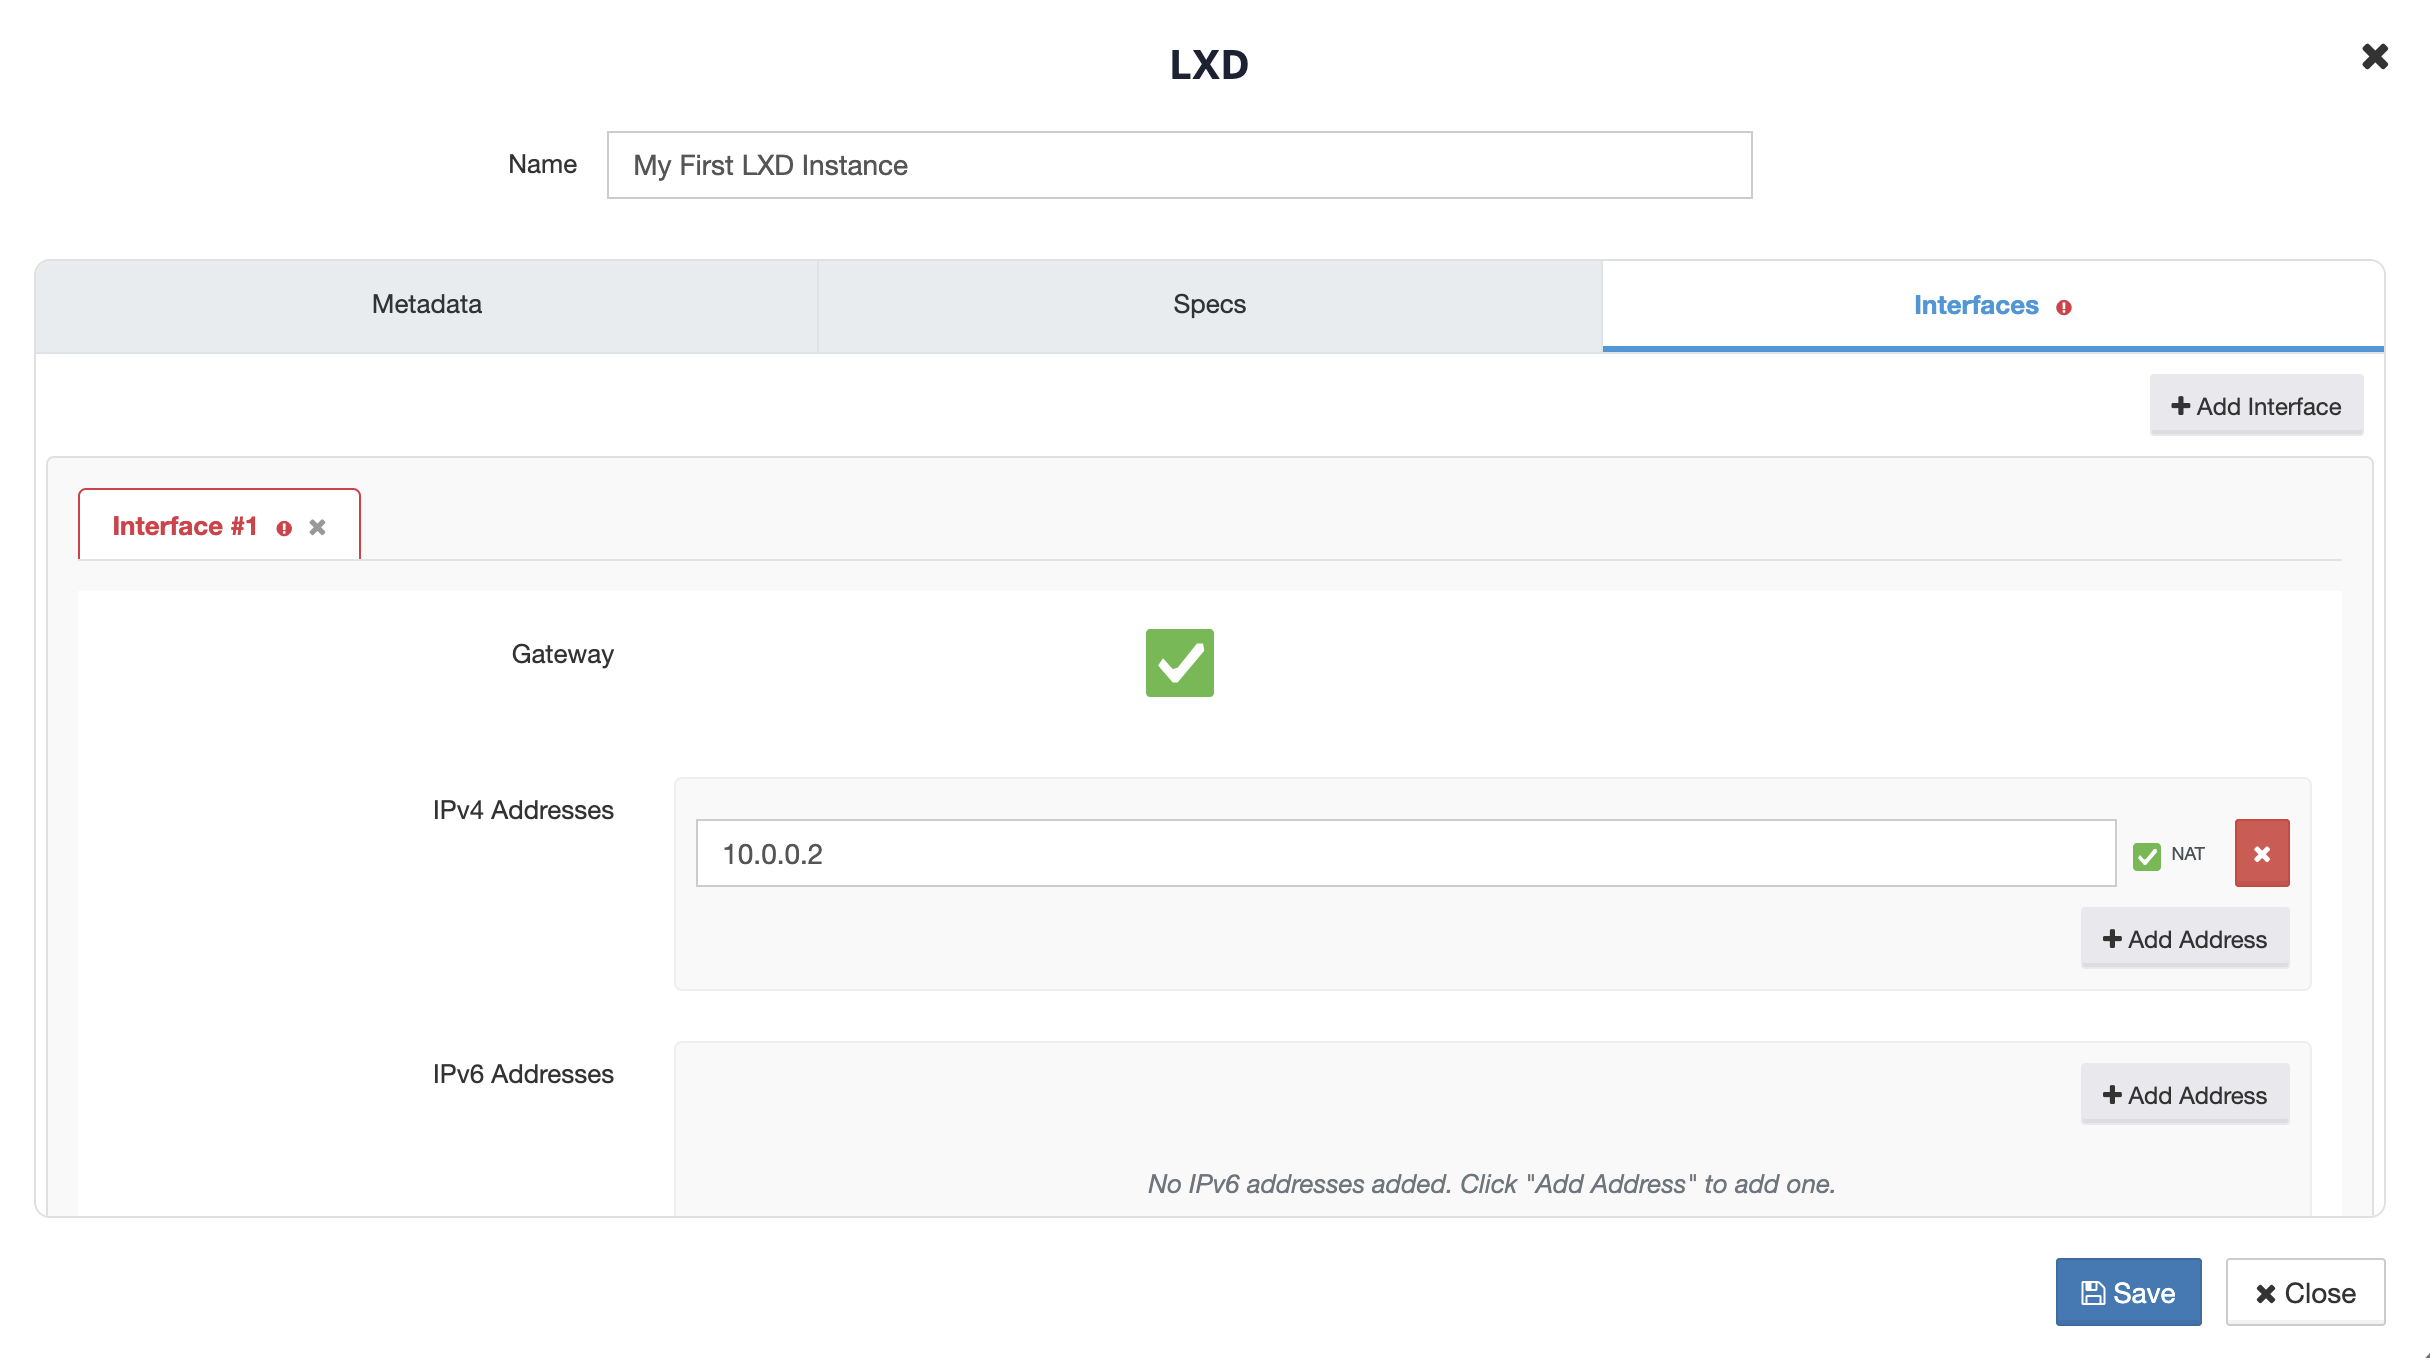
On Interfaces, add an interface, select the private address, and enable NAT when the instance needs a public address.
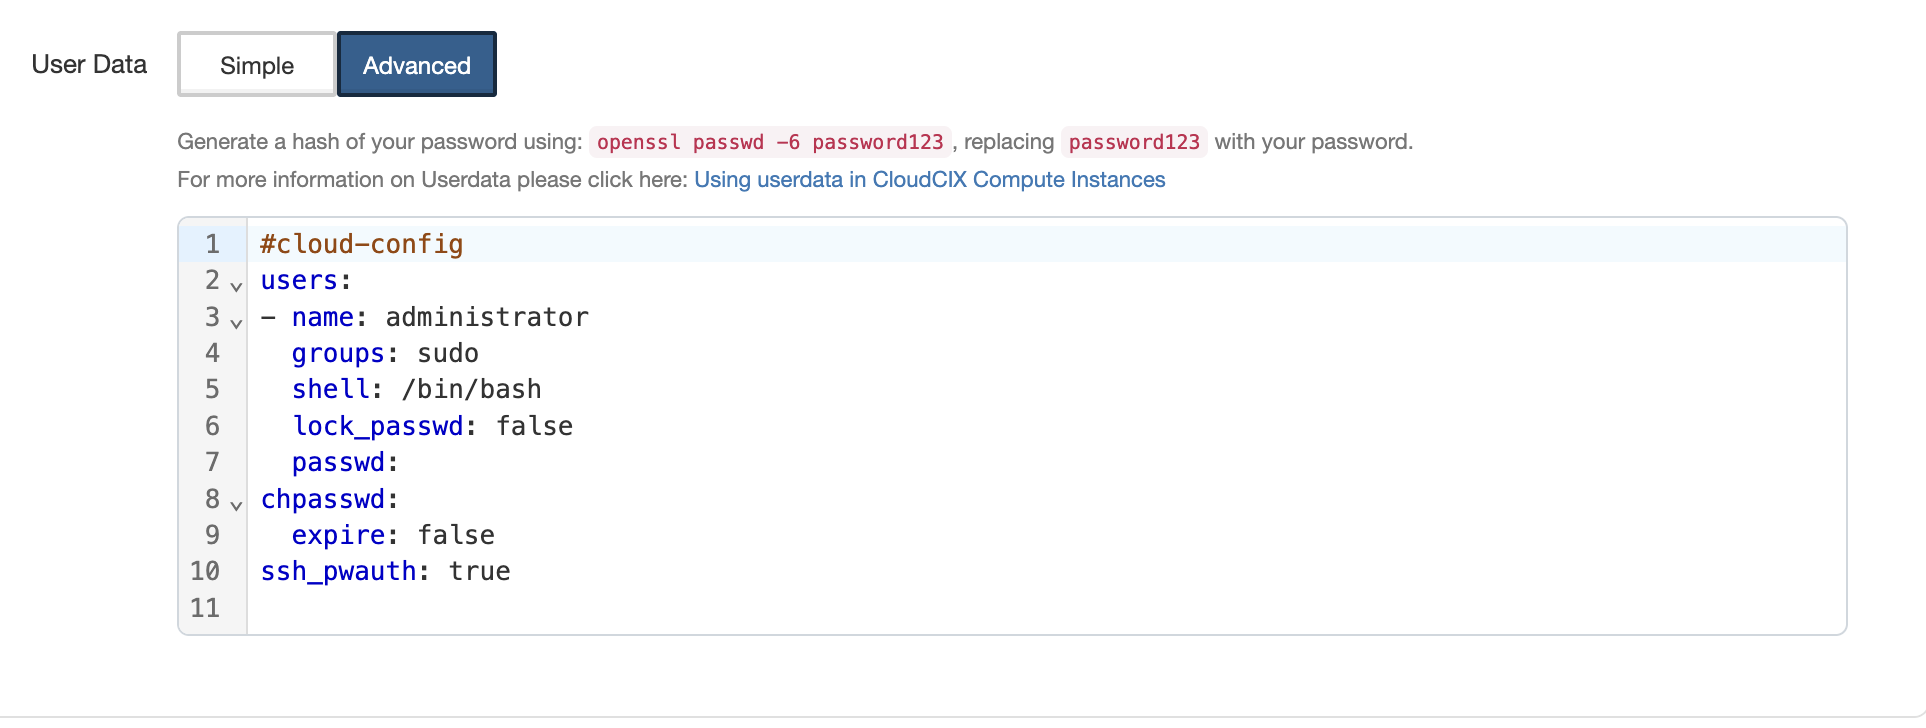
Optionally, on Metadata, choose Advanced under User Data and supply cloud-init YAML to configure the instance at first boot.
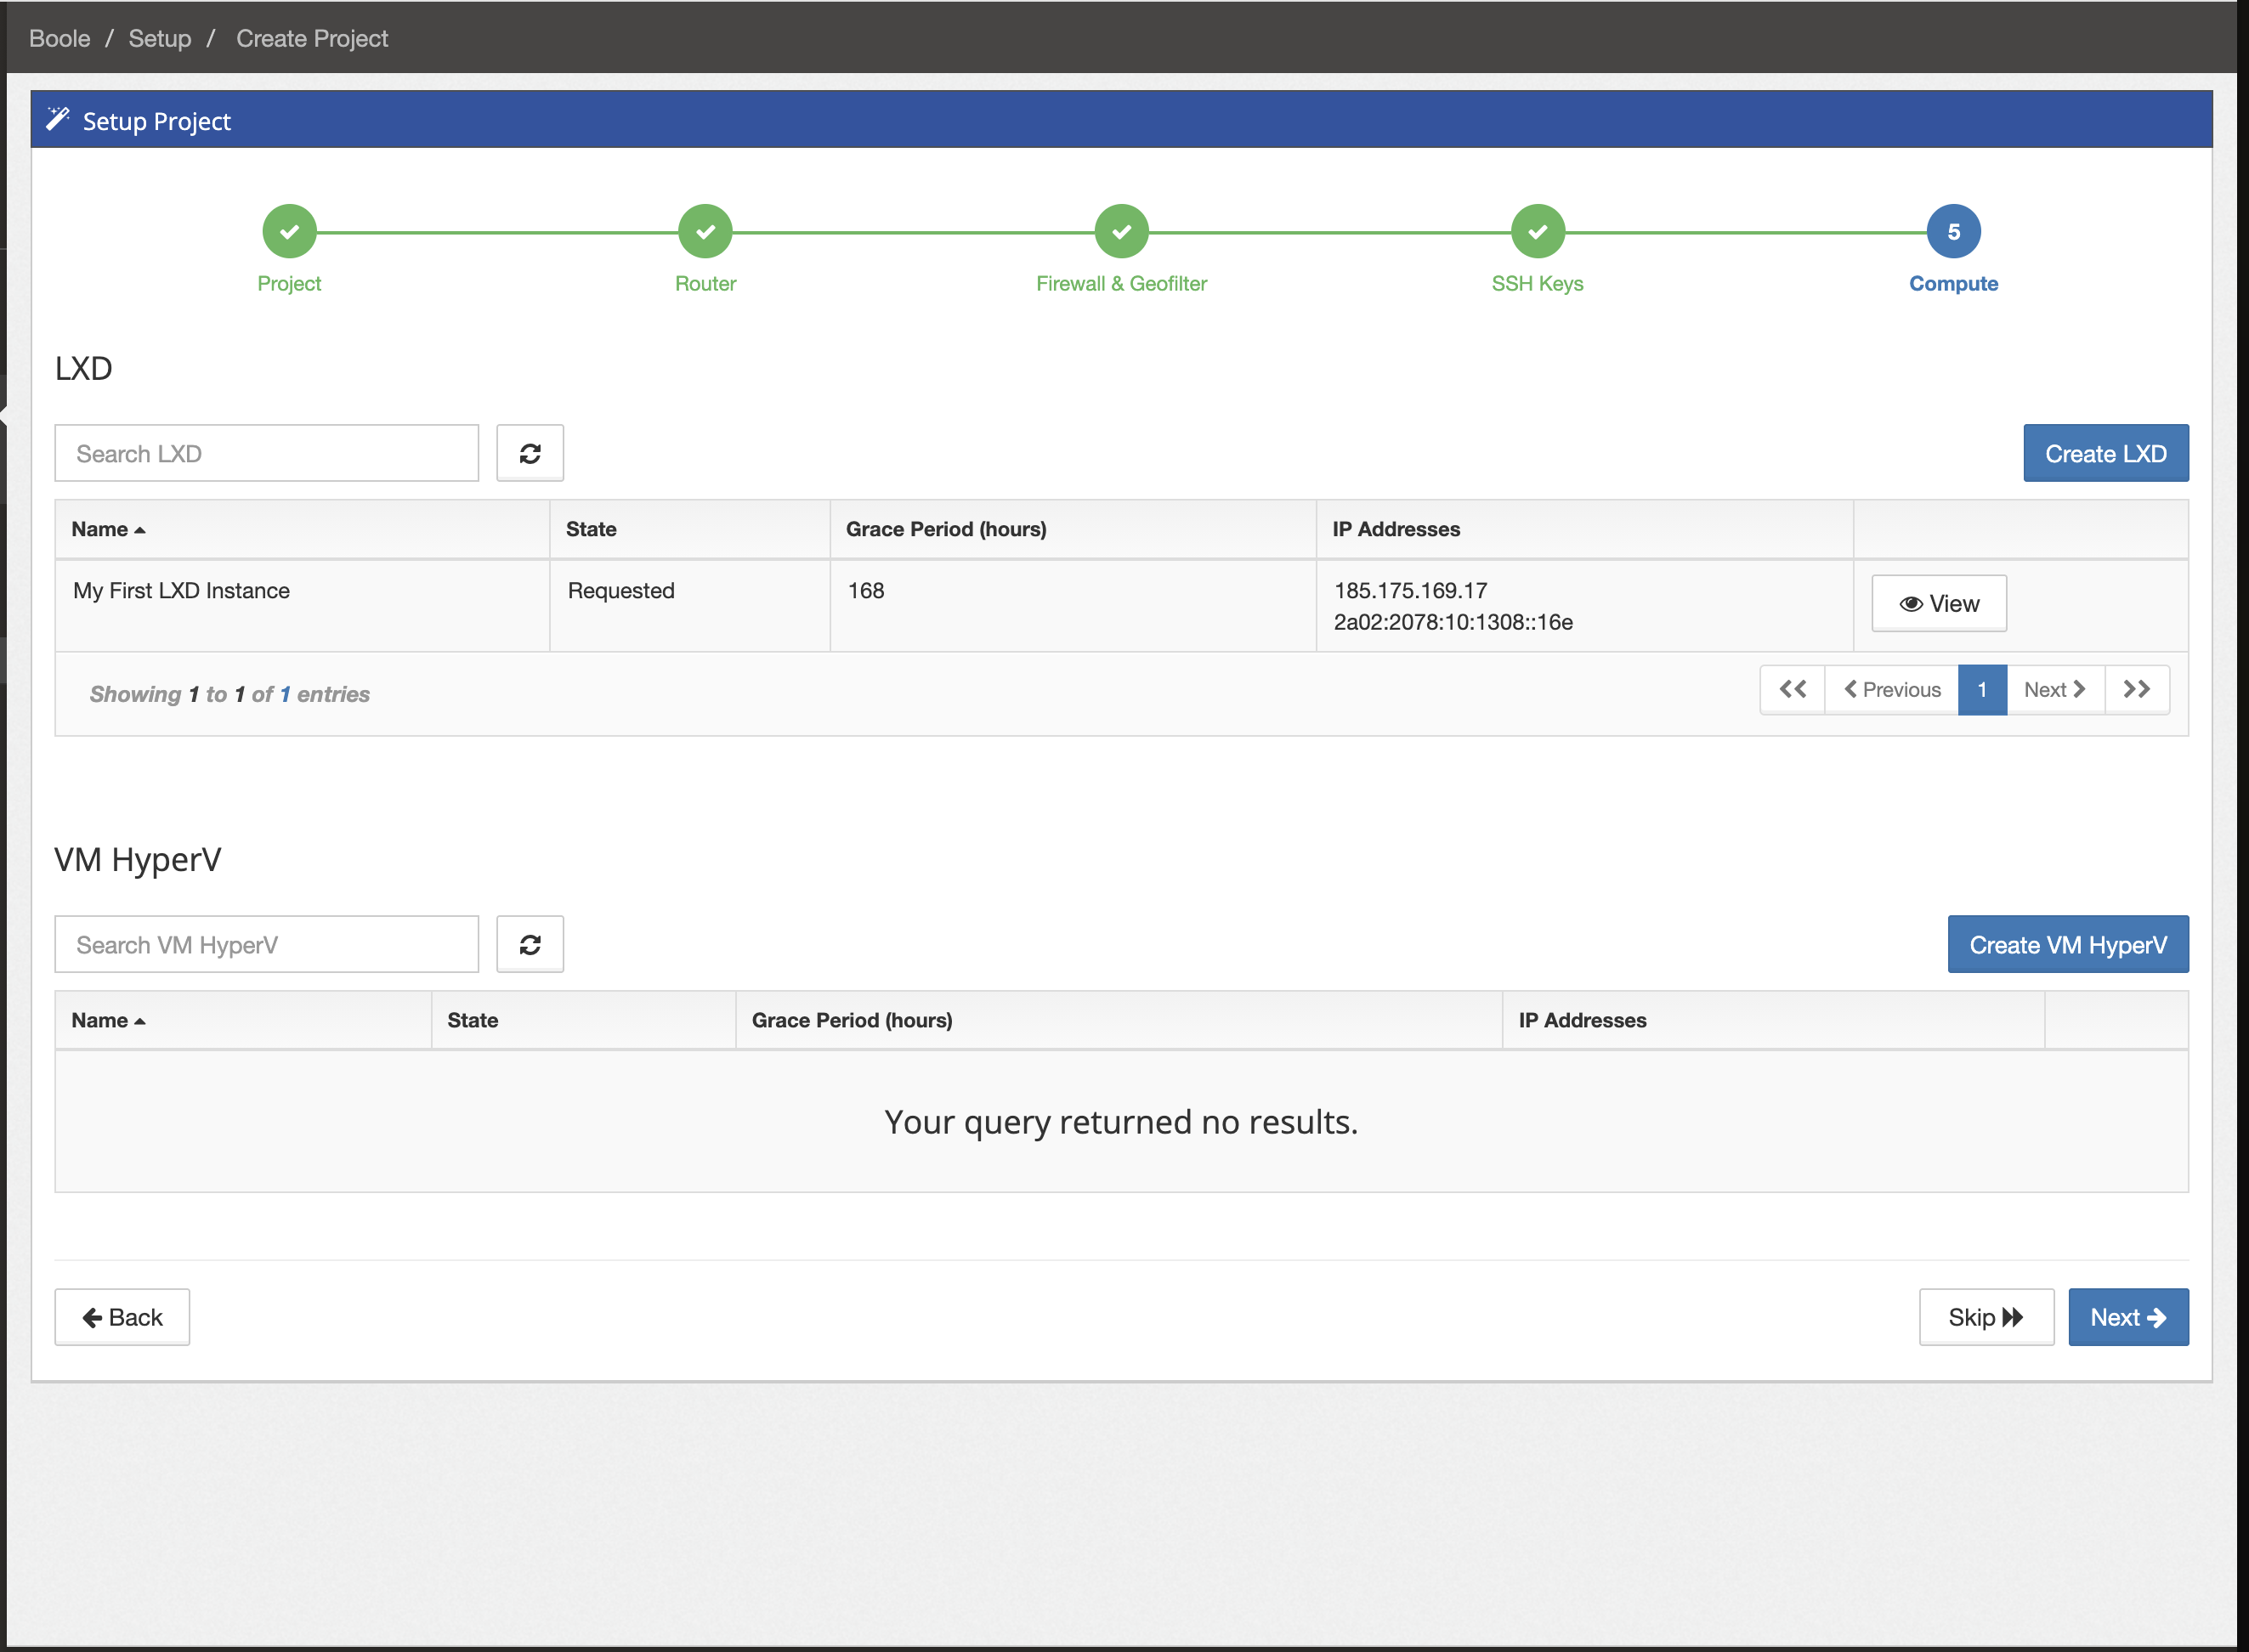
Select Save, wait for the instance to appear in the LXD list, then select Next to finish the wizard.
User data
Choose the mode that suits the setup:
Simple: define the login username and password hash.
Advanced: optionally provide cloud-init YAML, applied when the instance first starts. Use it to create users, install packages, add SSH keys or run first-boot commands.
Do not put a plaintext password into cloud-init. For more detail, see Using userdata in CloudCIX Compute Instances.
For example, this creates a user and installs curl:
#cloud-config
users:
  - name: administrator
    groups: sudo
    shell: /bin/bash
packages:
  - curl
Wait for provisioning
New instances first appear with the Requested state. Refresh the LXD list until provisioning has completed and the instance is running. Record the public address when NAT is enabled.
Optional resources
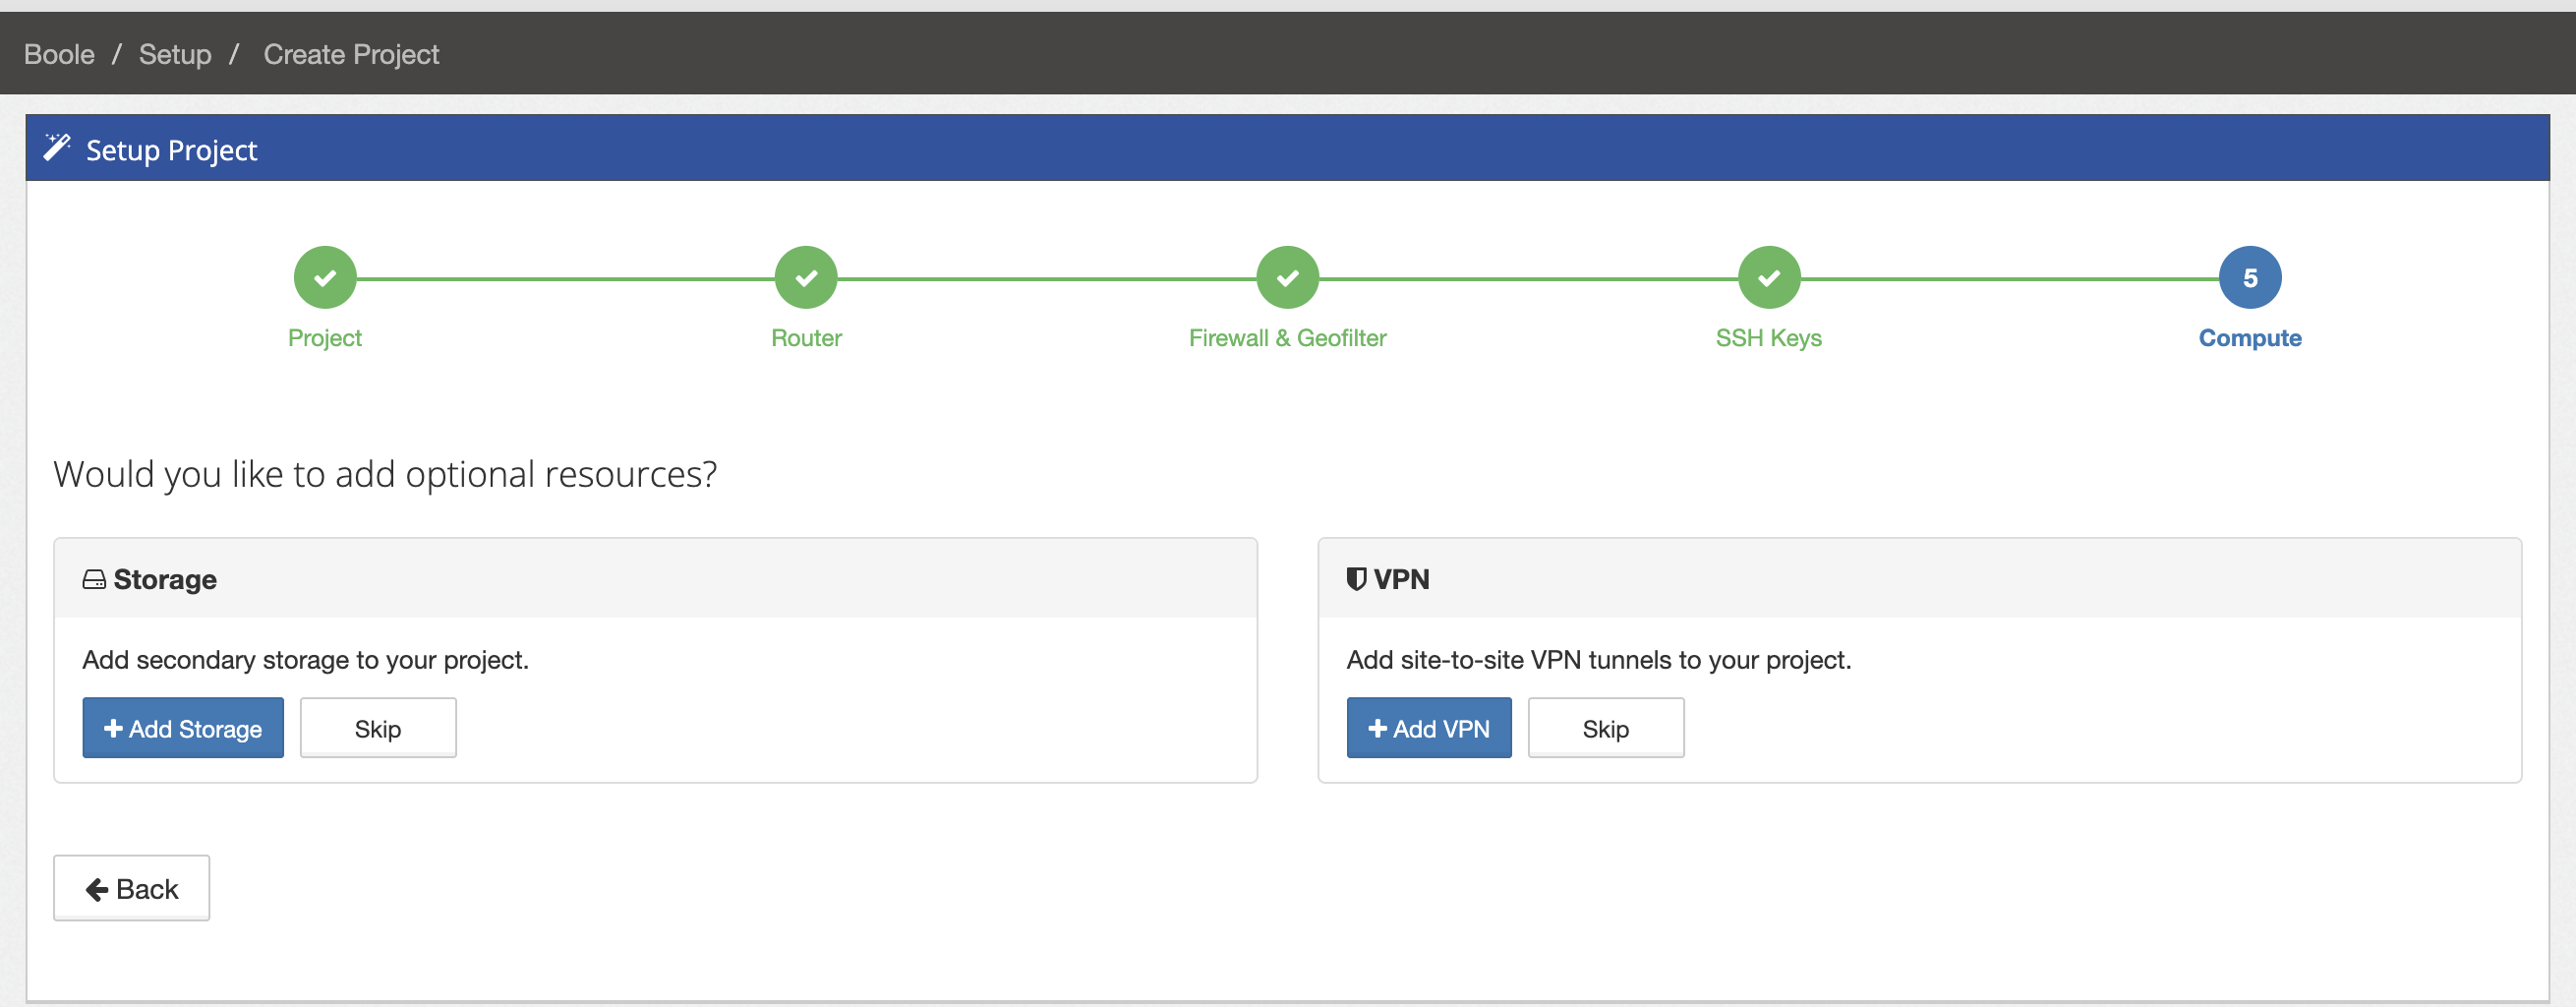
After the compute step, Boole offers secondary storage and site-to-site VPN. Select Add Storage or Add VPN only when the project needs them; otherwise select Skip to complete setup. These resources can also be managed later.
View the project
Note
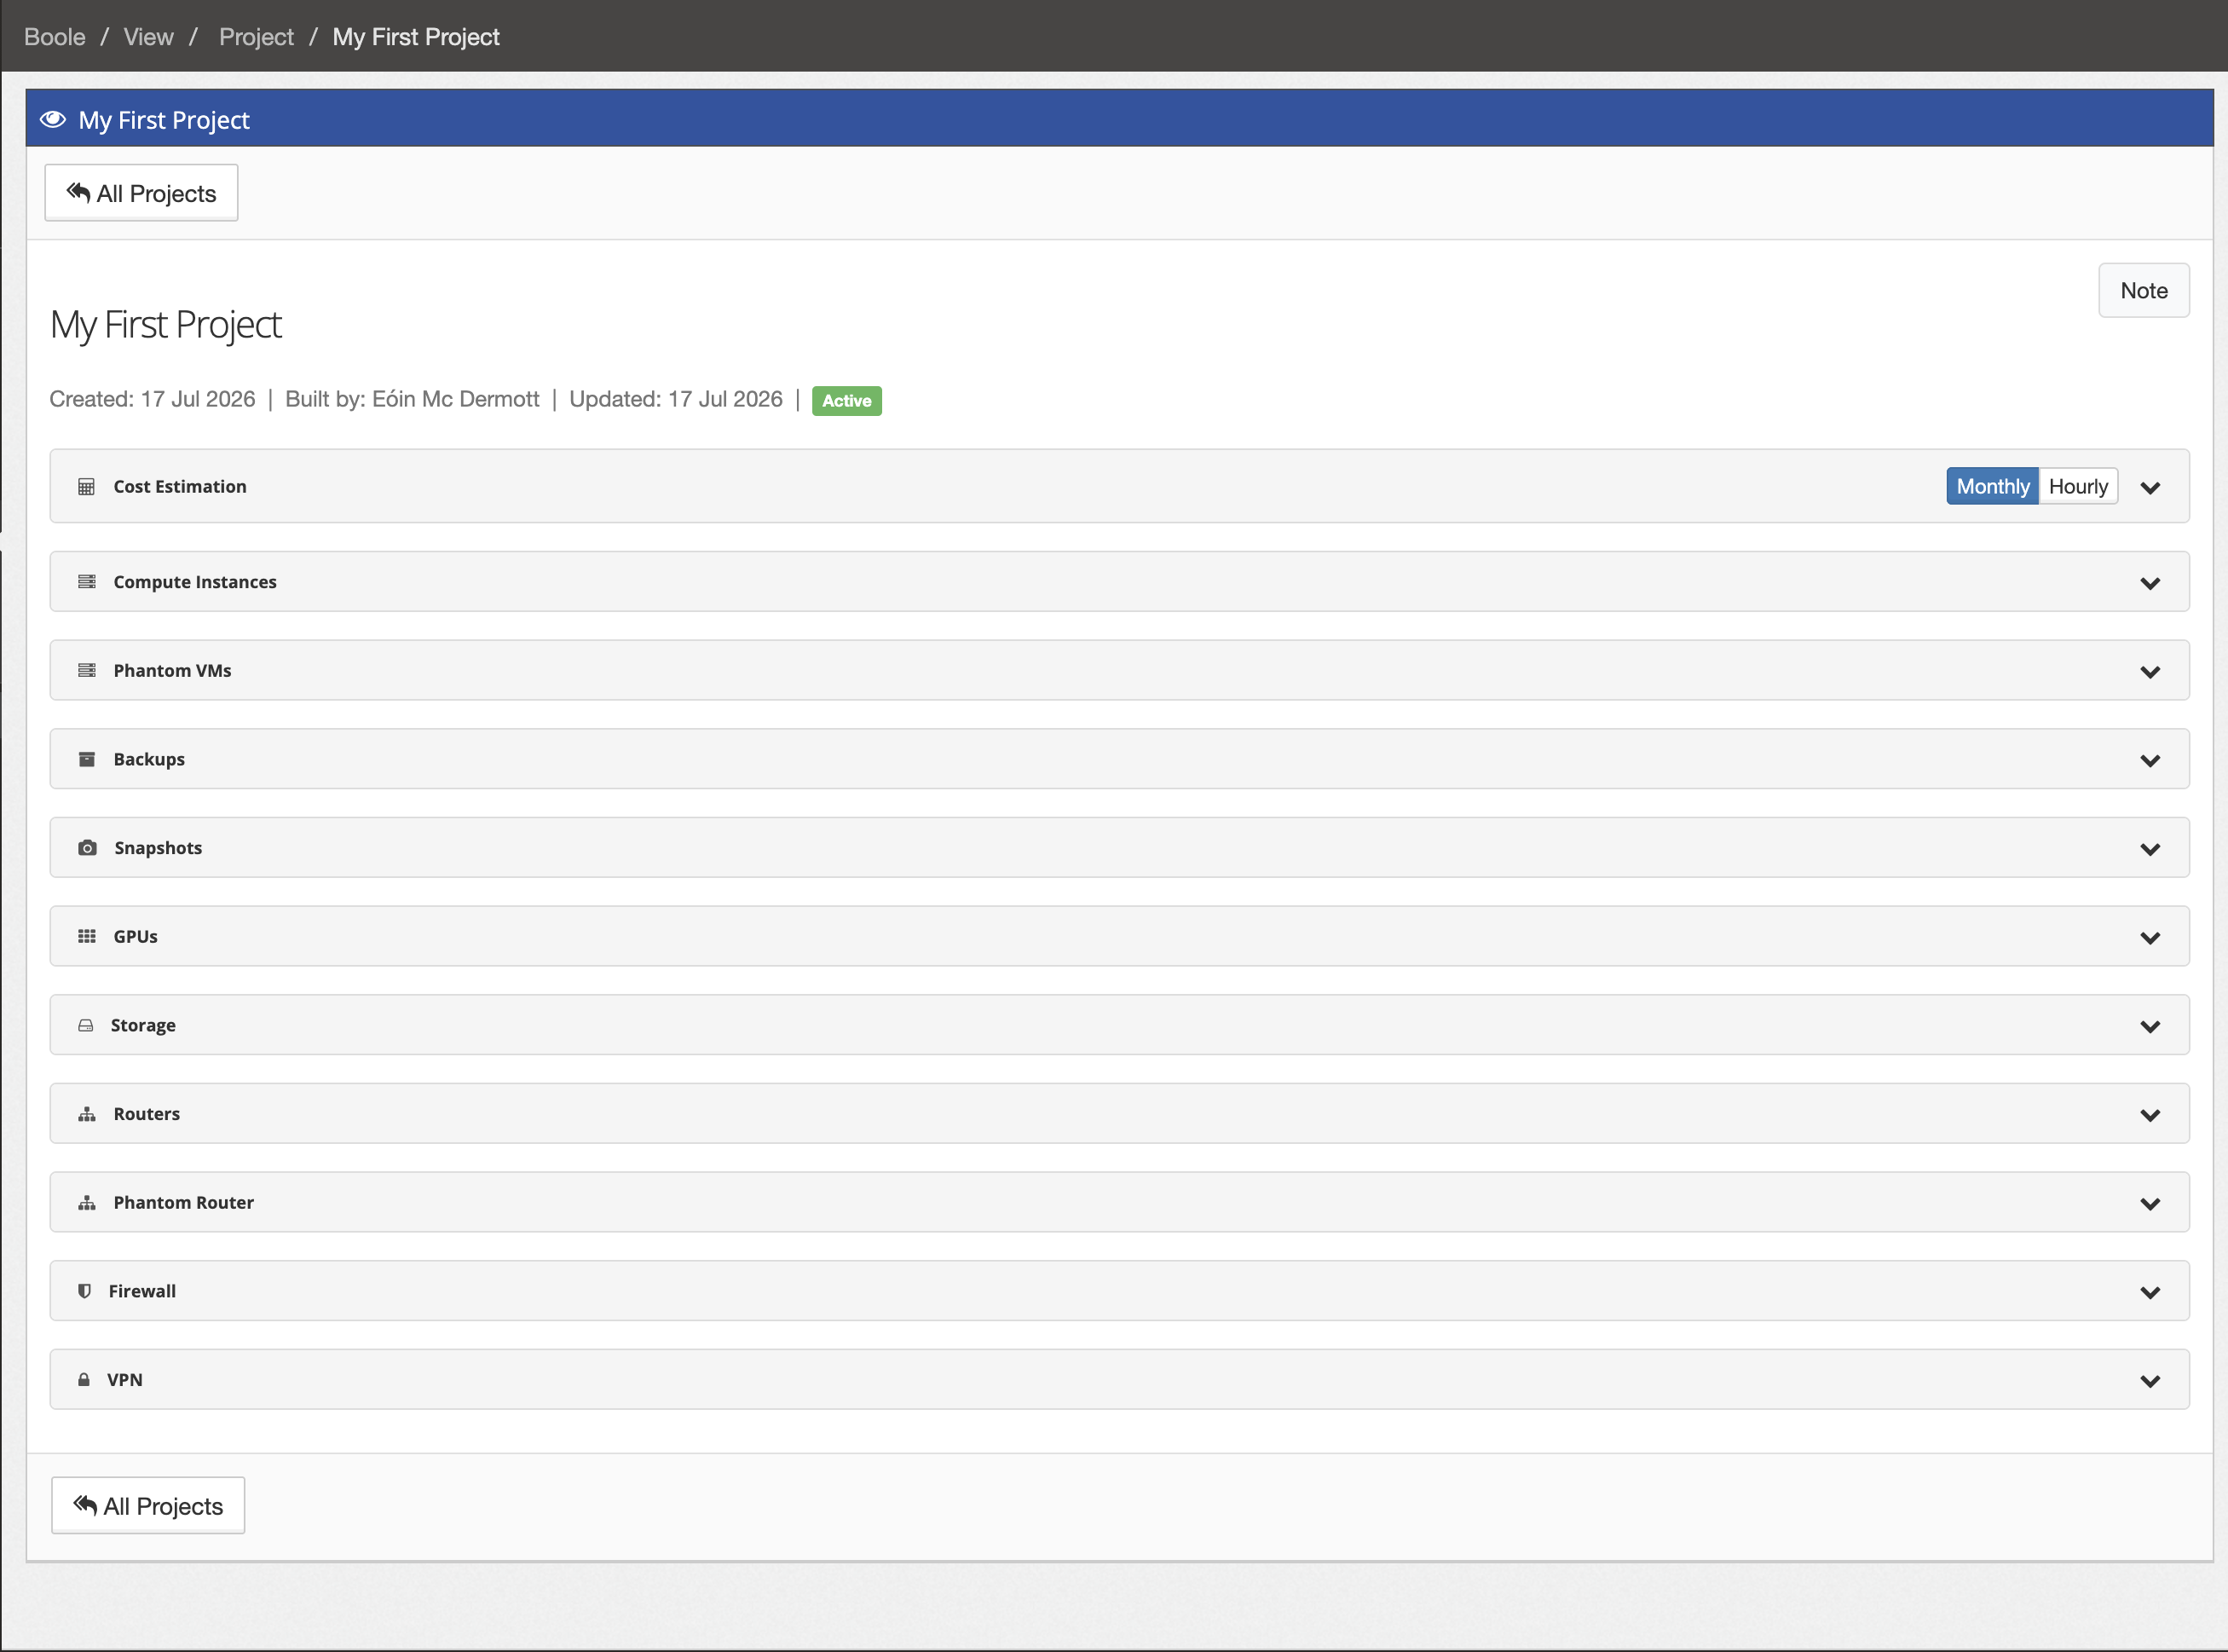
After selecting Finish, wait a few seconds for the project overview to load.
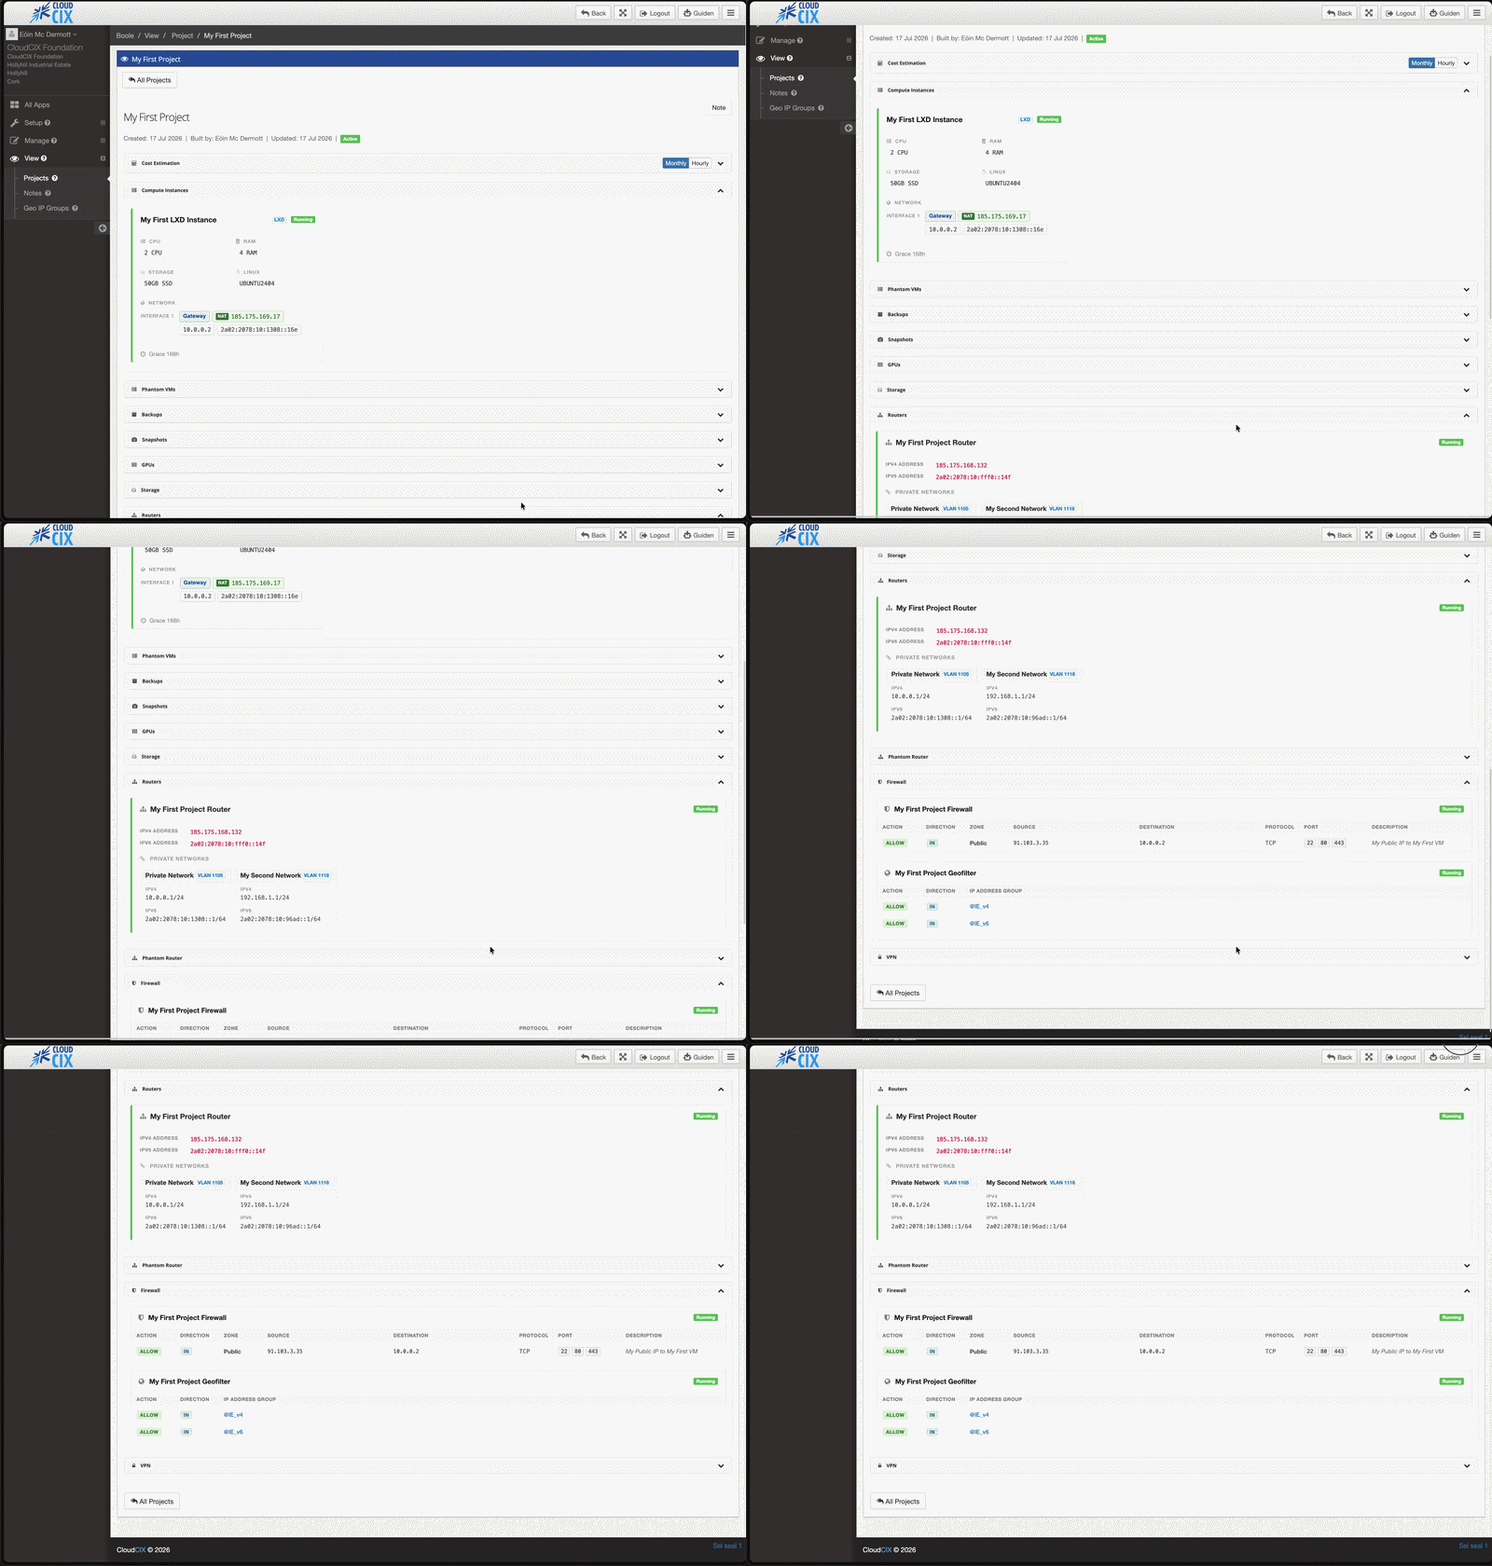
The overview provides a cost estimate and independently expandable sections for compute instances, backups, snapshots, storage, routers, firewall and VPNs. Expand Compute Instances to check the LXD state, allocated resources and network addresses.
Connect to the LXD instance
When the instance is running, NAT is enabled and the firewall allows TCP port 22 from your public IP, connect with the username set in the instance metadata and its public IP address. Specify the saved key file when required:
ssh -i /path/to/private-key administrator@PUBLIC_IP

Create and connect to a Hyper-V VM
Use a Hyper-V VM for Windows workloads. The project router, firewall and geofilter created earlier are reused.
Allow Remote Desktop access
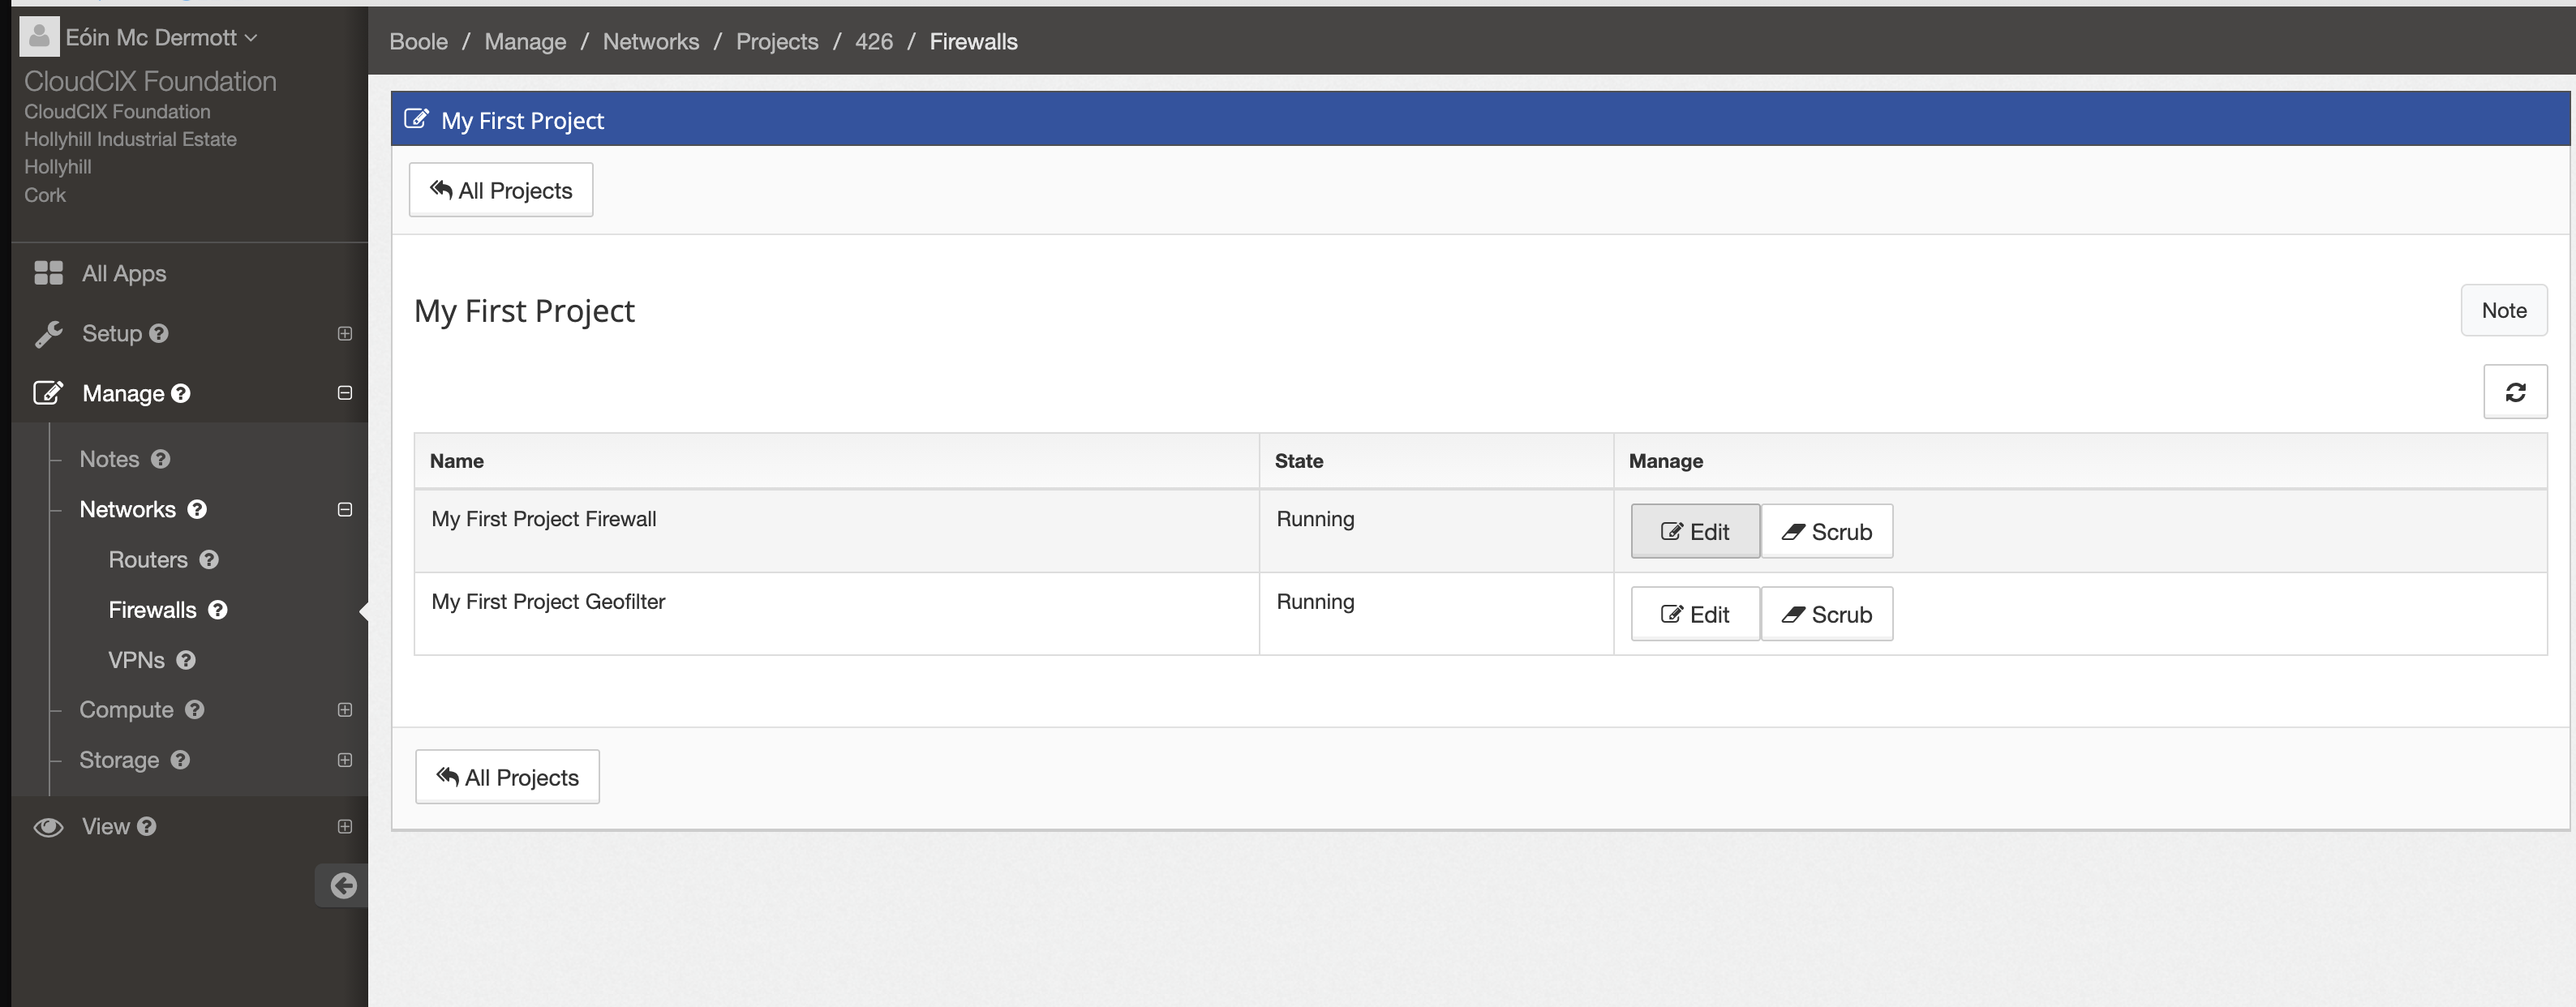
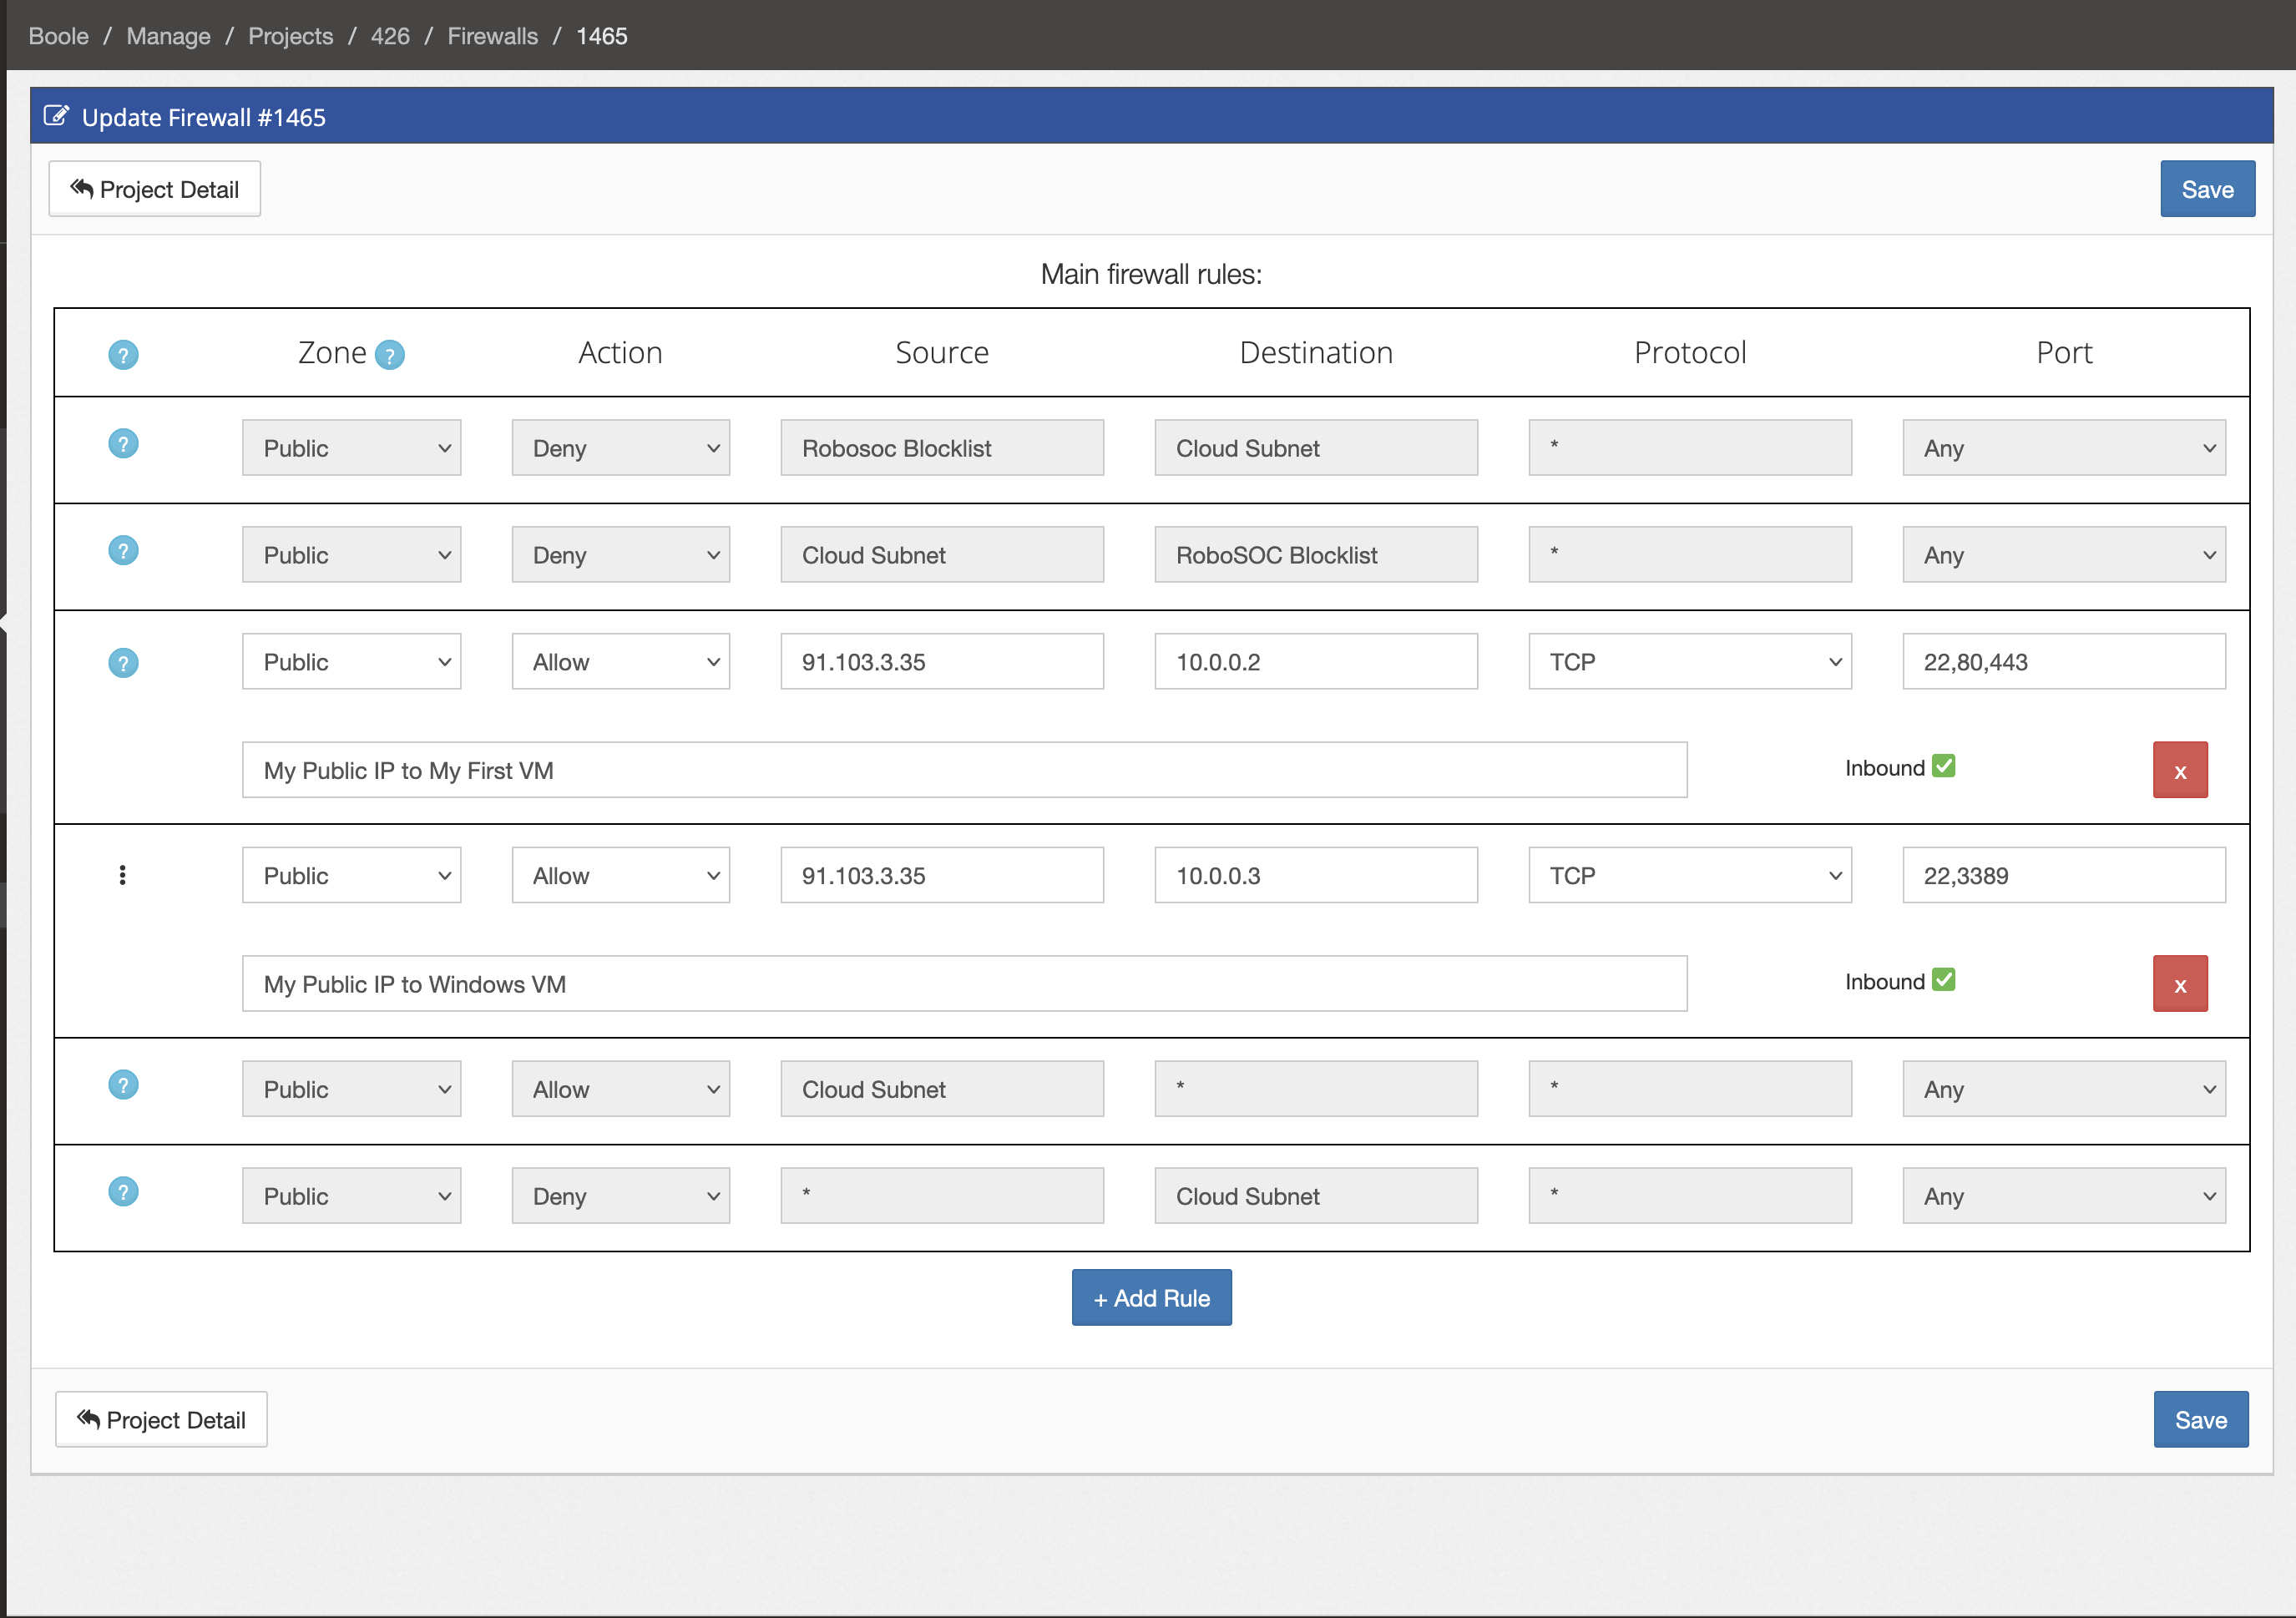
Before creating the VM, open Manage / Networks / Firewalls, select the project and edit its firewall. Add an inbound Allow rule with your current public IP as the source, the VM private address as the destination, TCP as the protocol, and port 3389 for Remote Desktop. Restrict the source to trusted addresses.
Create the VM
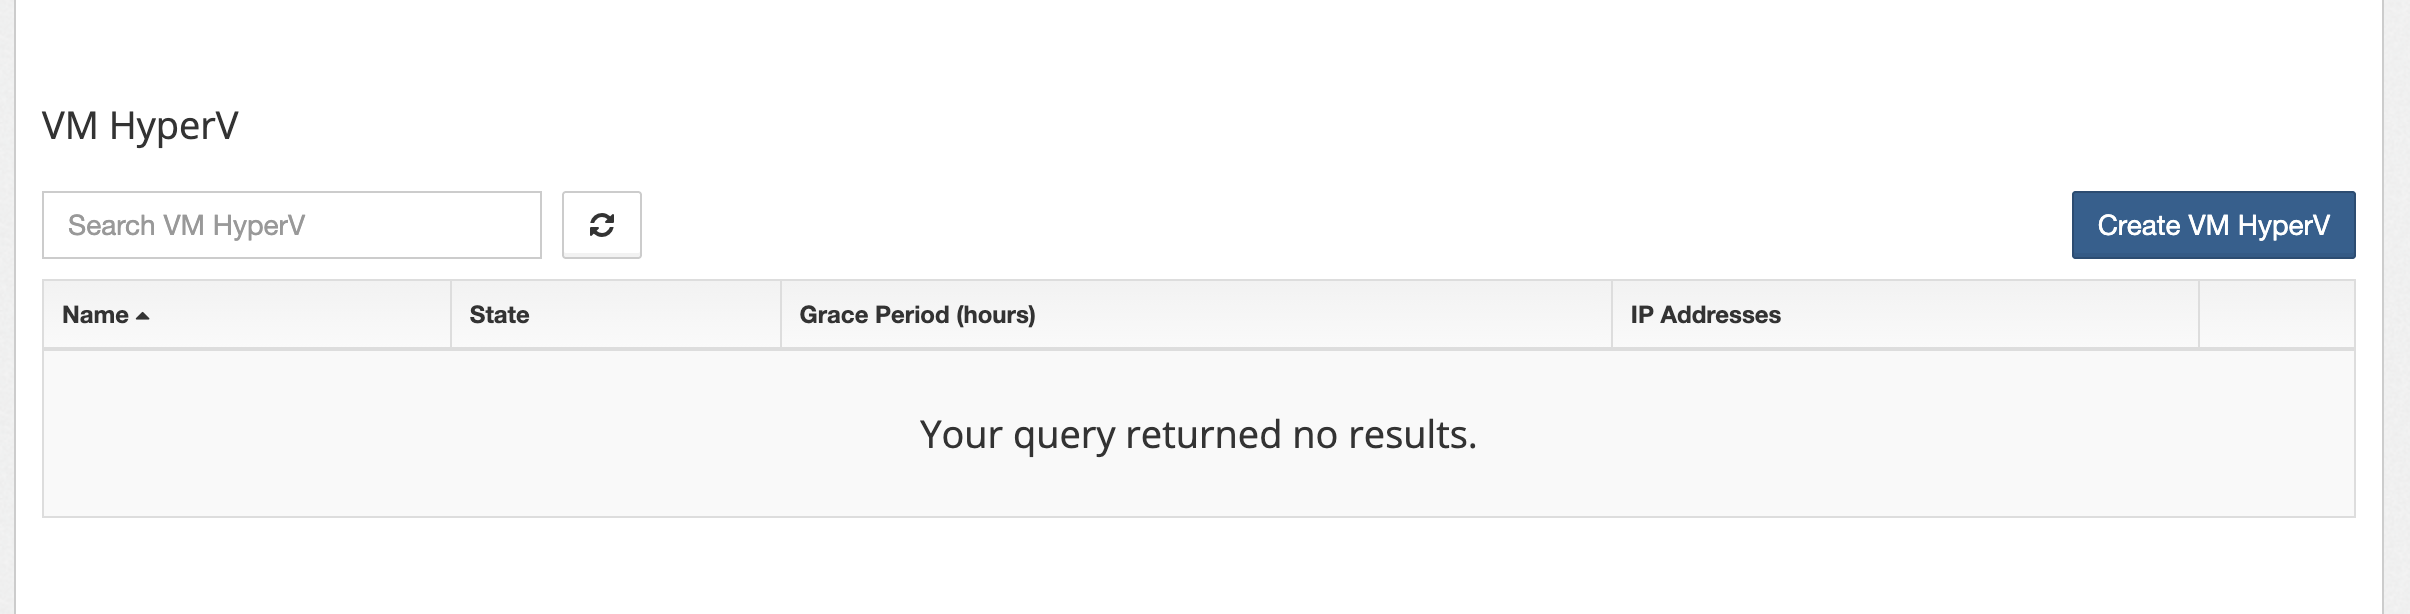
From Boole’s Manage / Compute / Instances, select Create VM Hyper-V.
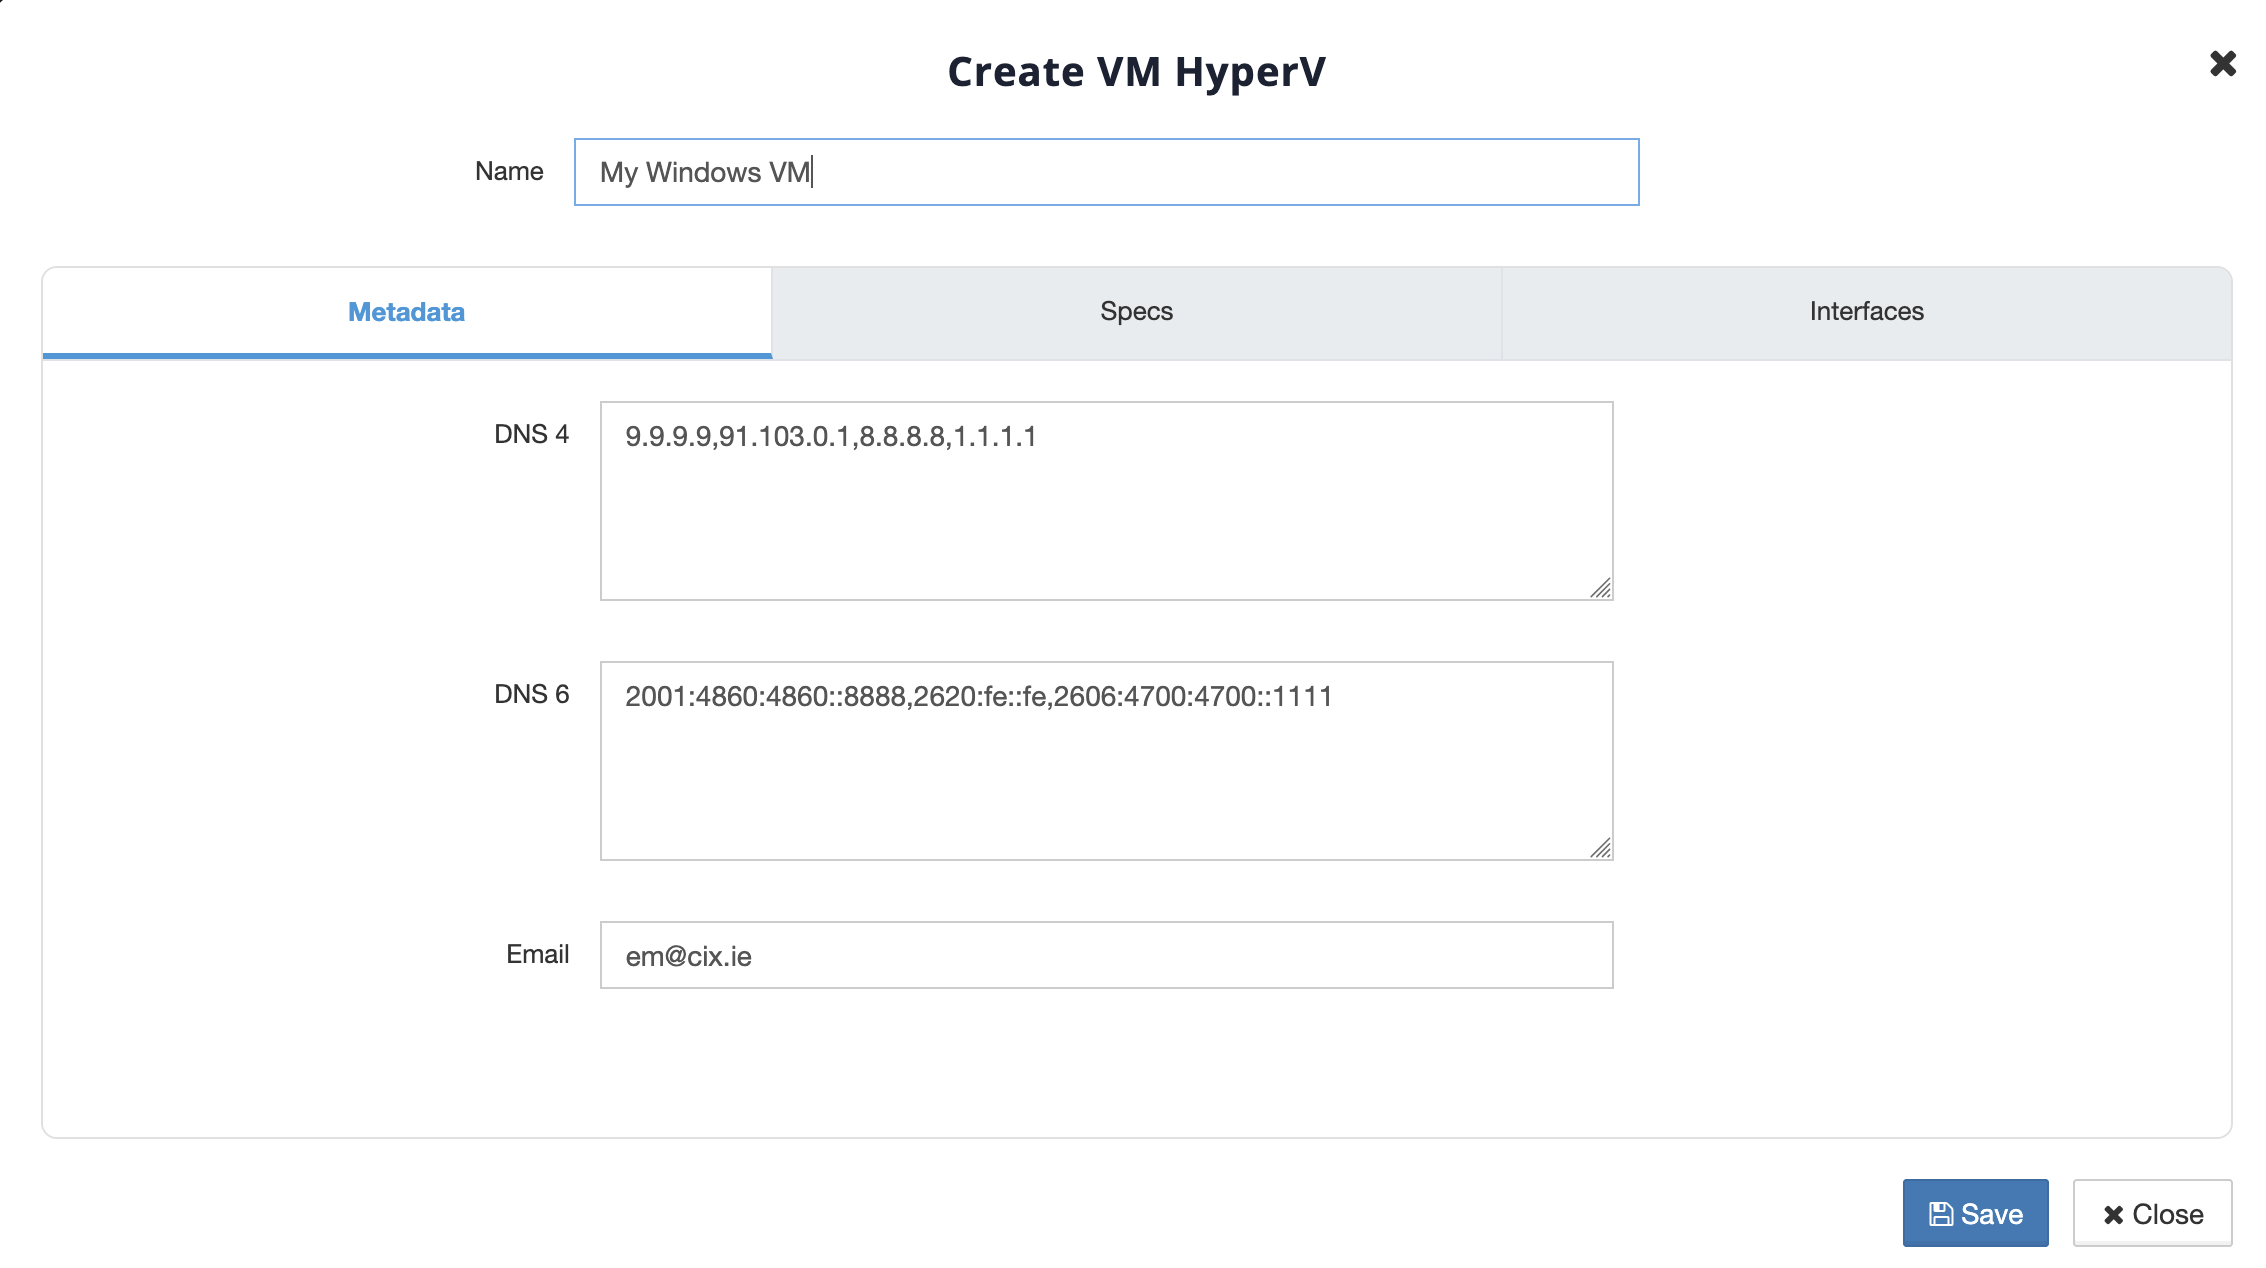
On Metadata, enter a descriptive name, review the DNS servers, and enter the email address that should receive the build credentials.
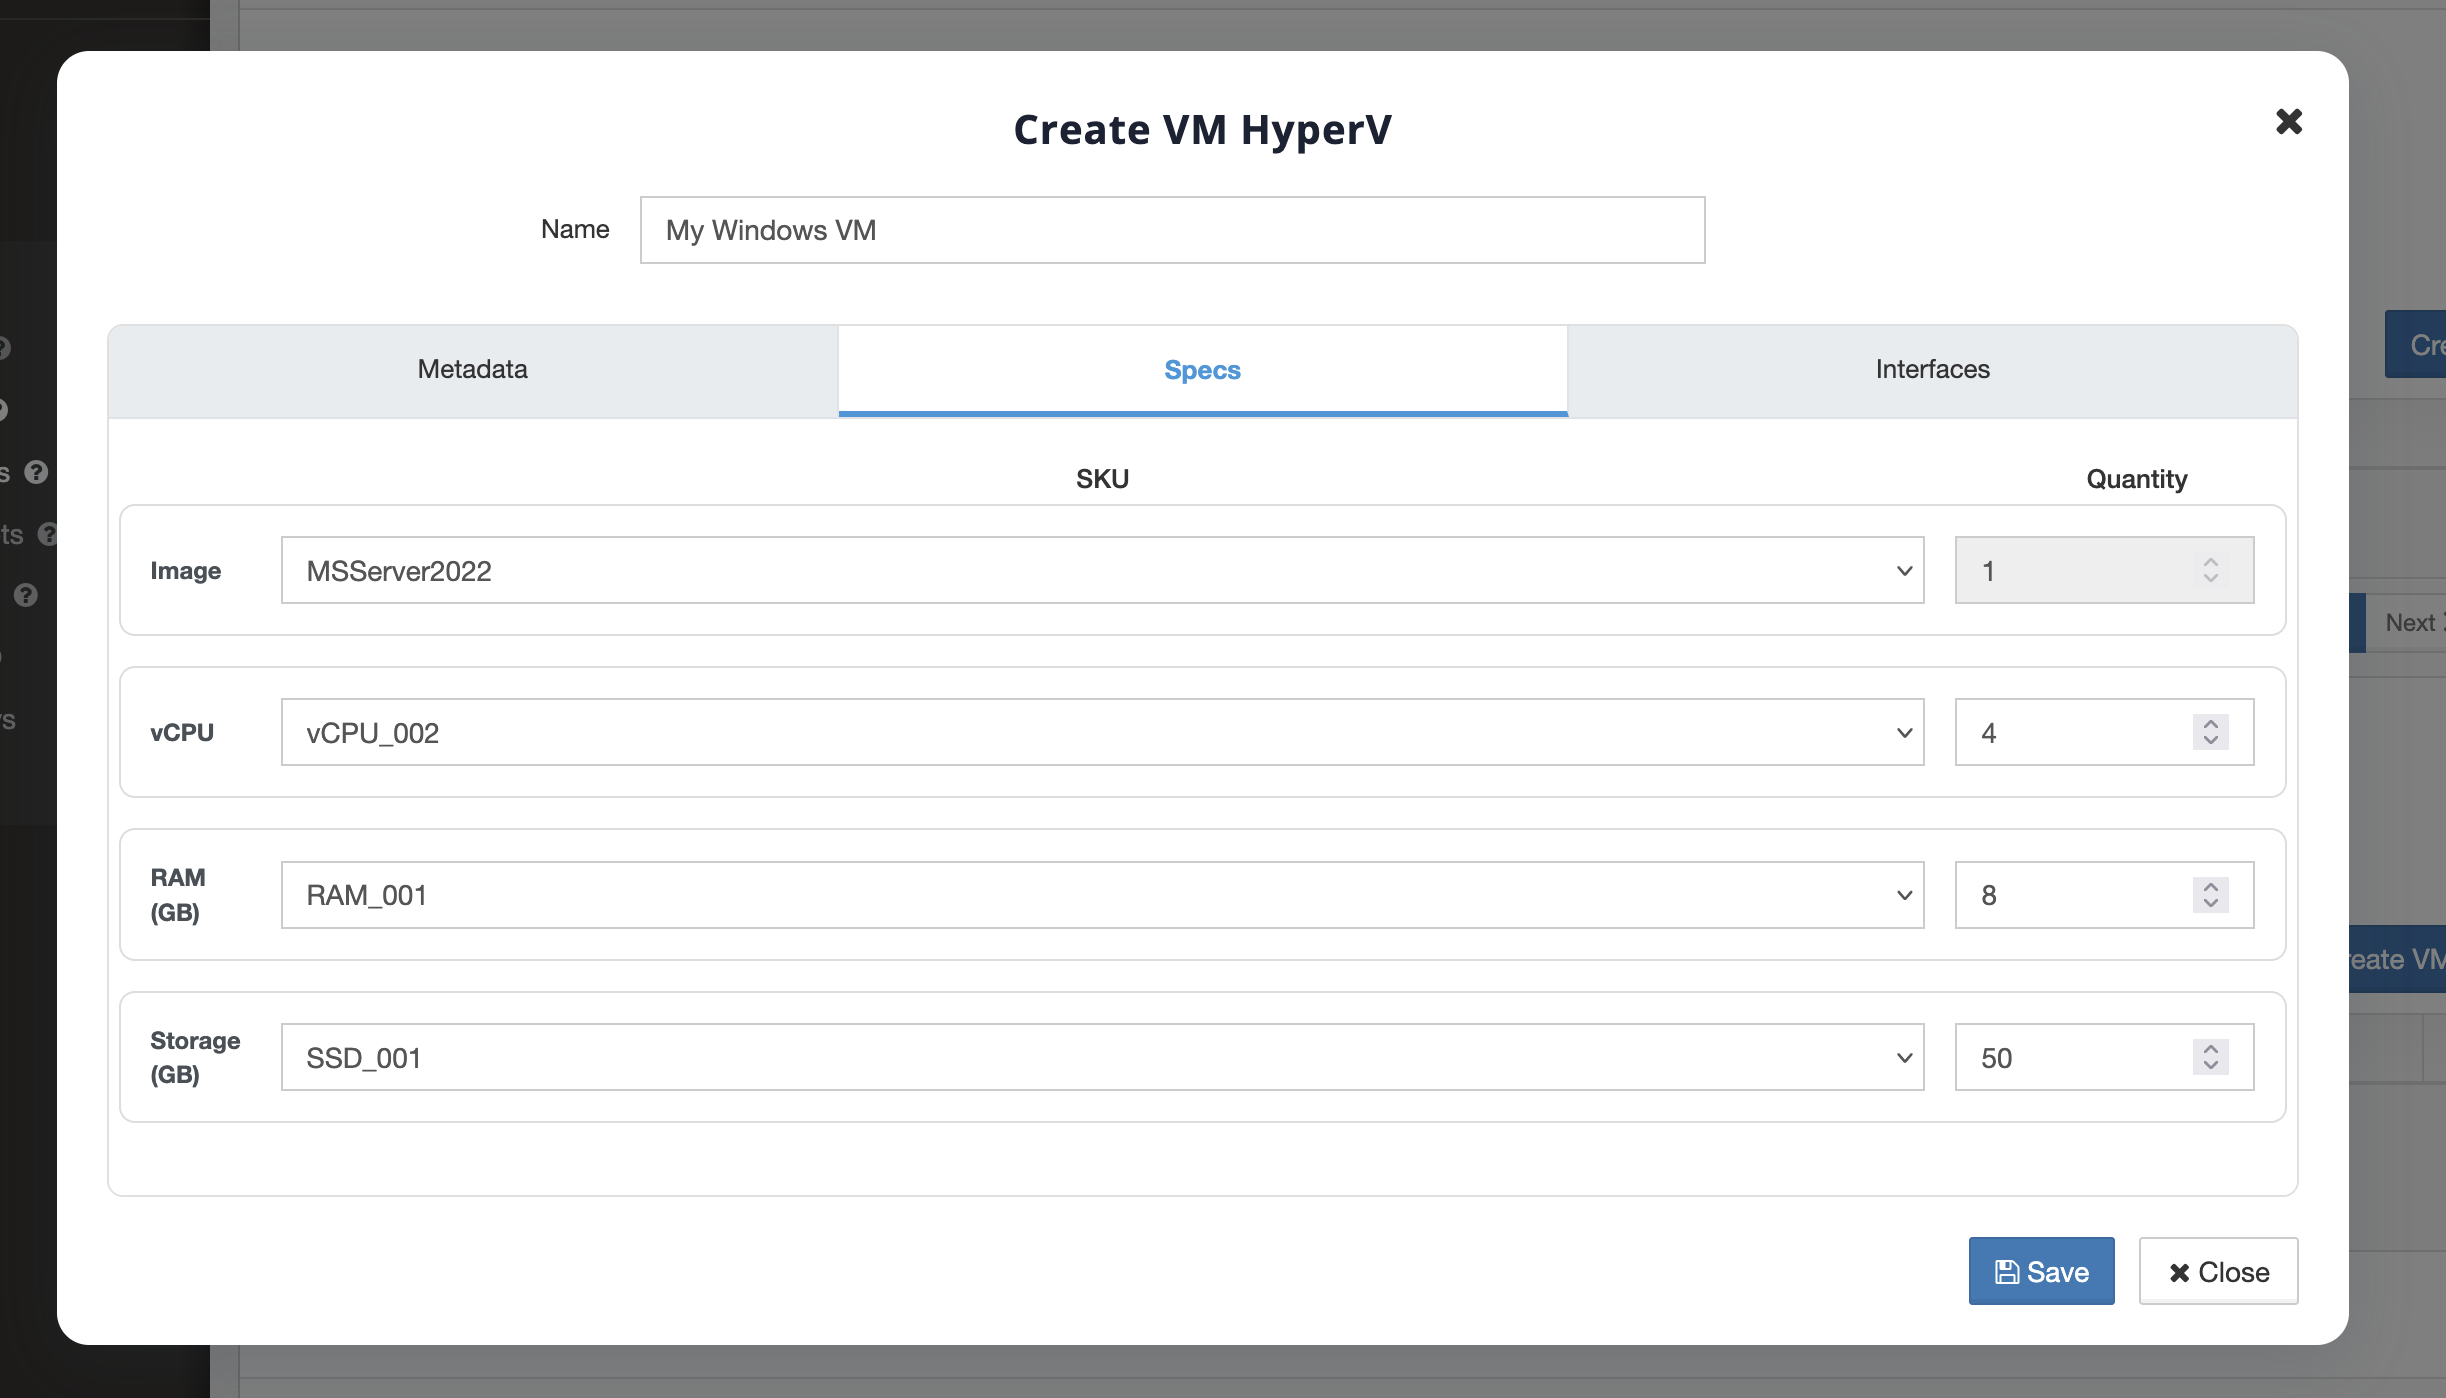
On Specs, select the Windows image, vCPU, RAM and storage required.
On Interfaces, add an interface, select its private IPv4 address, and enable NAT to assign a public address.
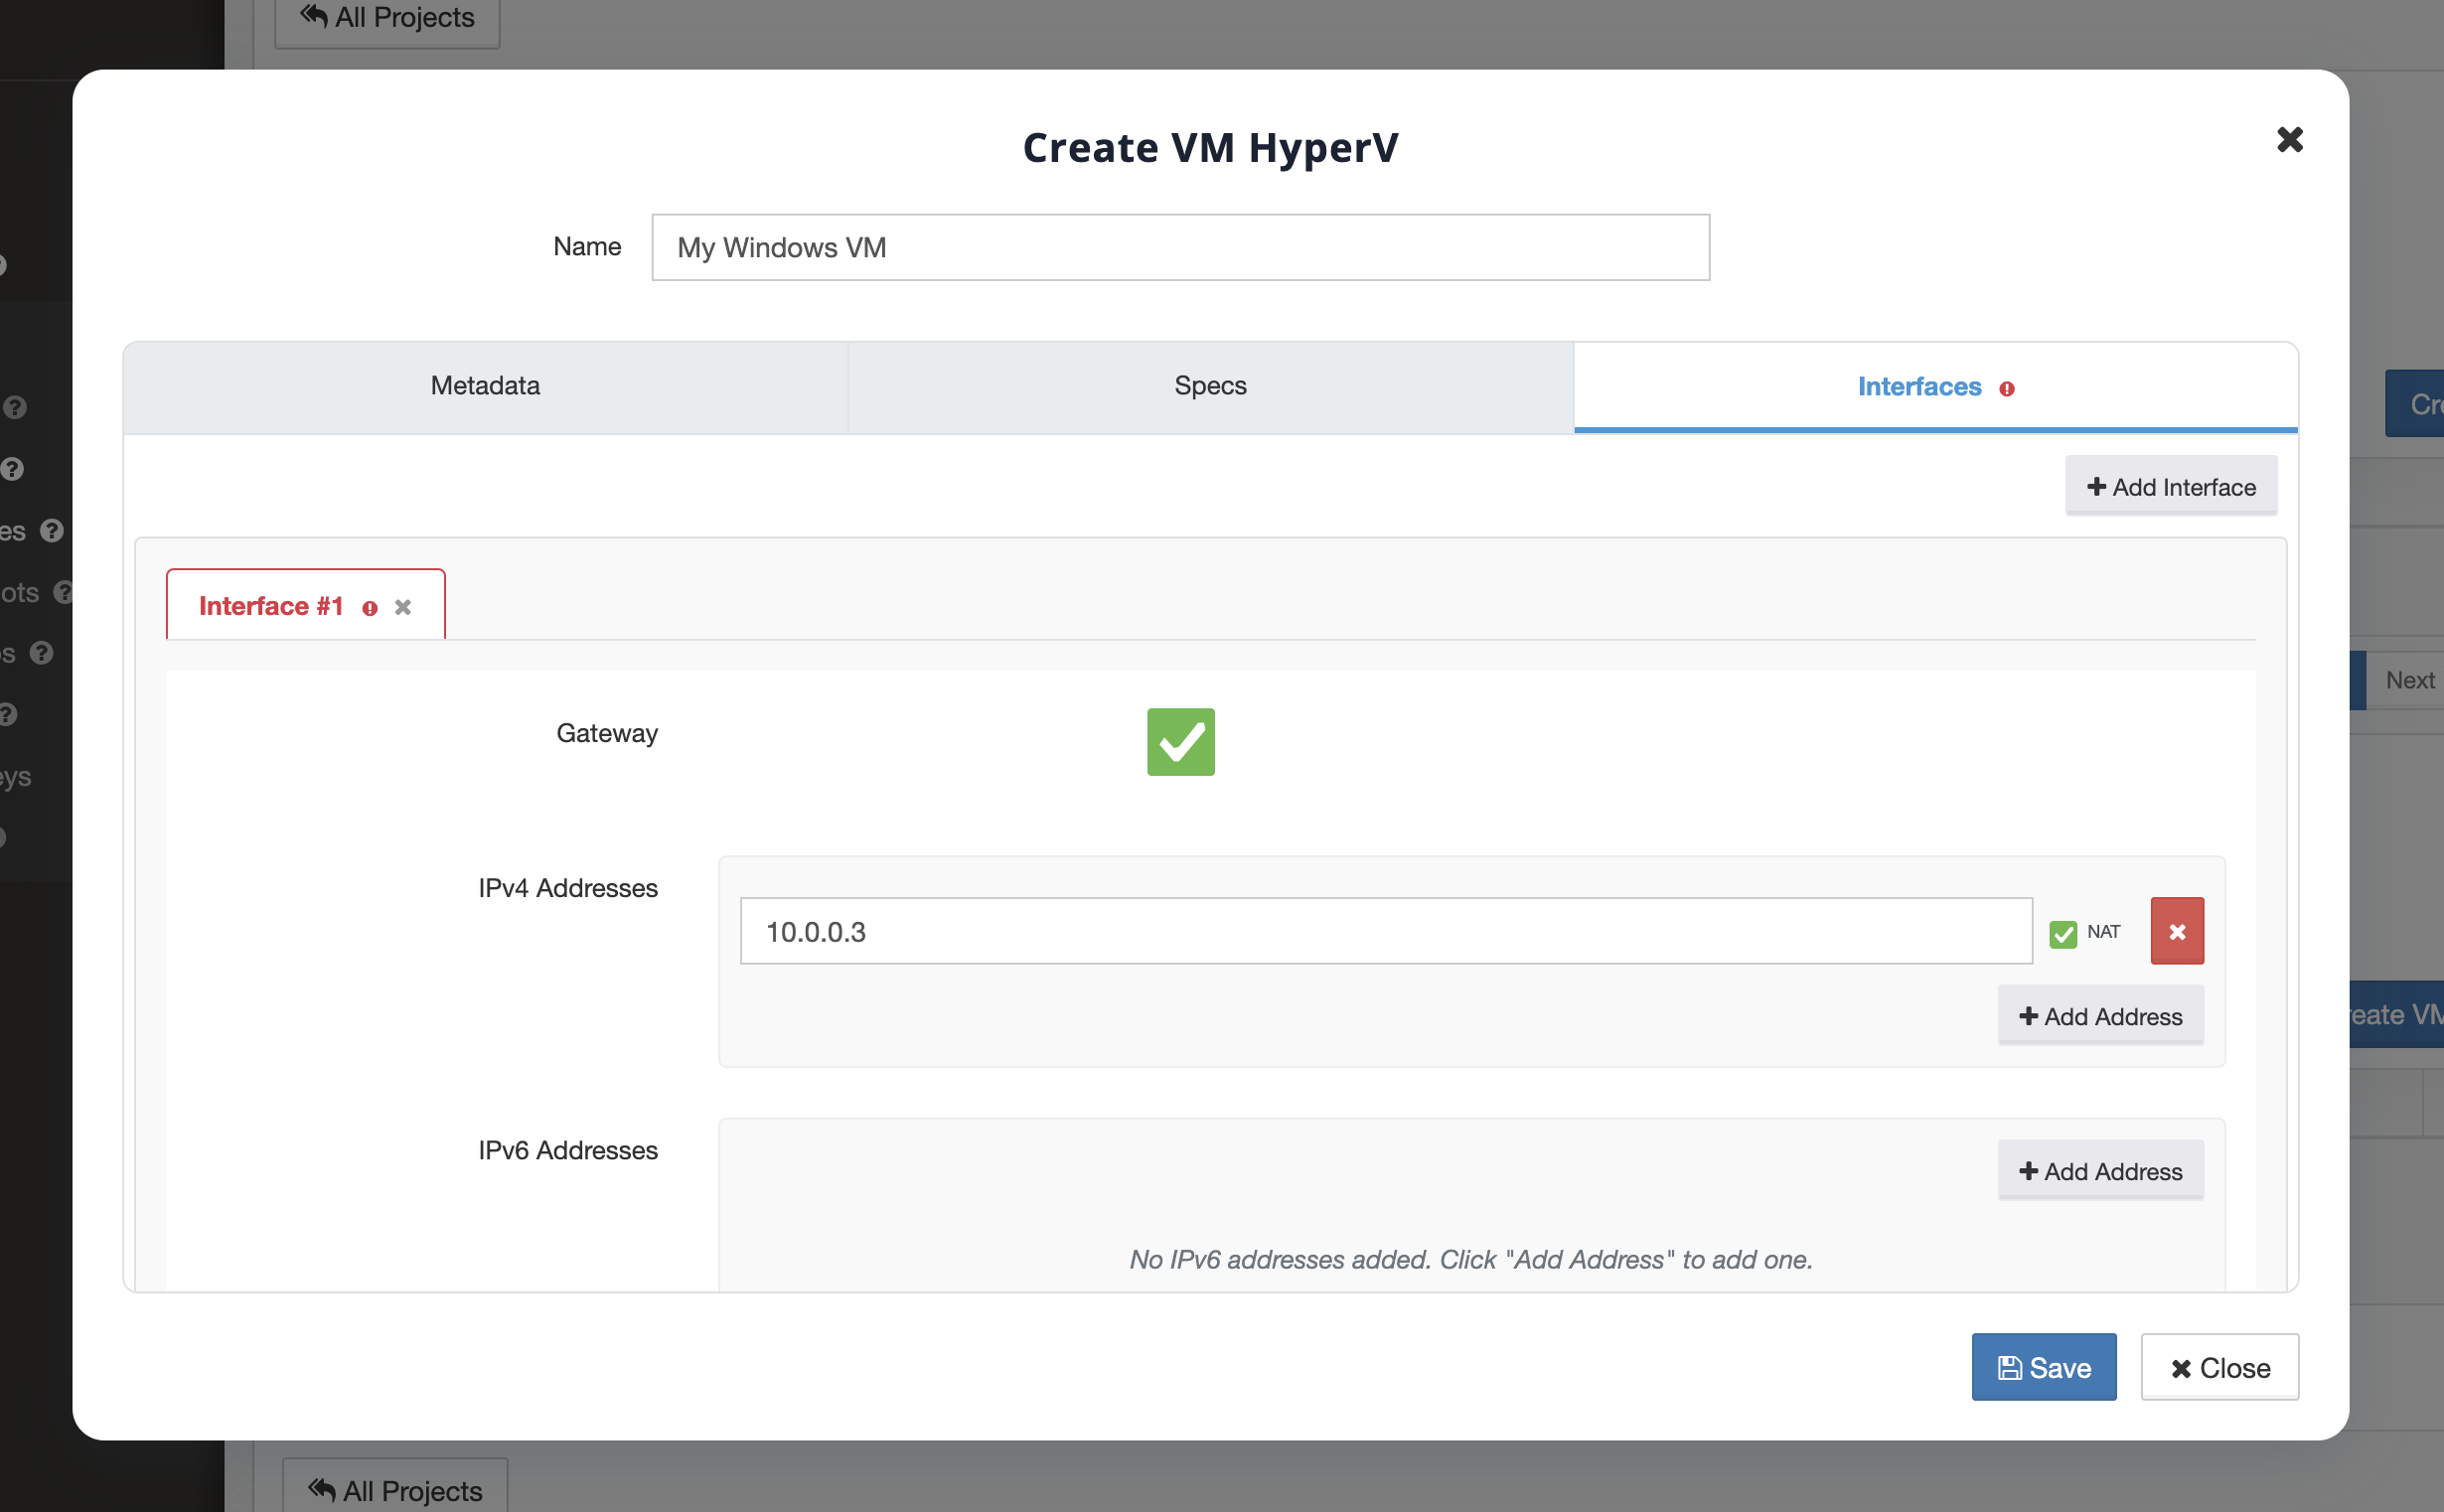
Select Save and wait for the build-complete email before connecting.
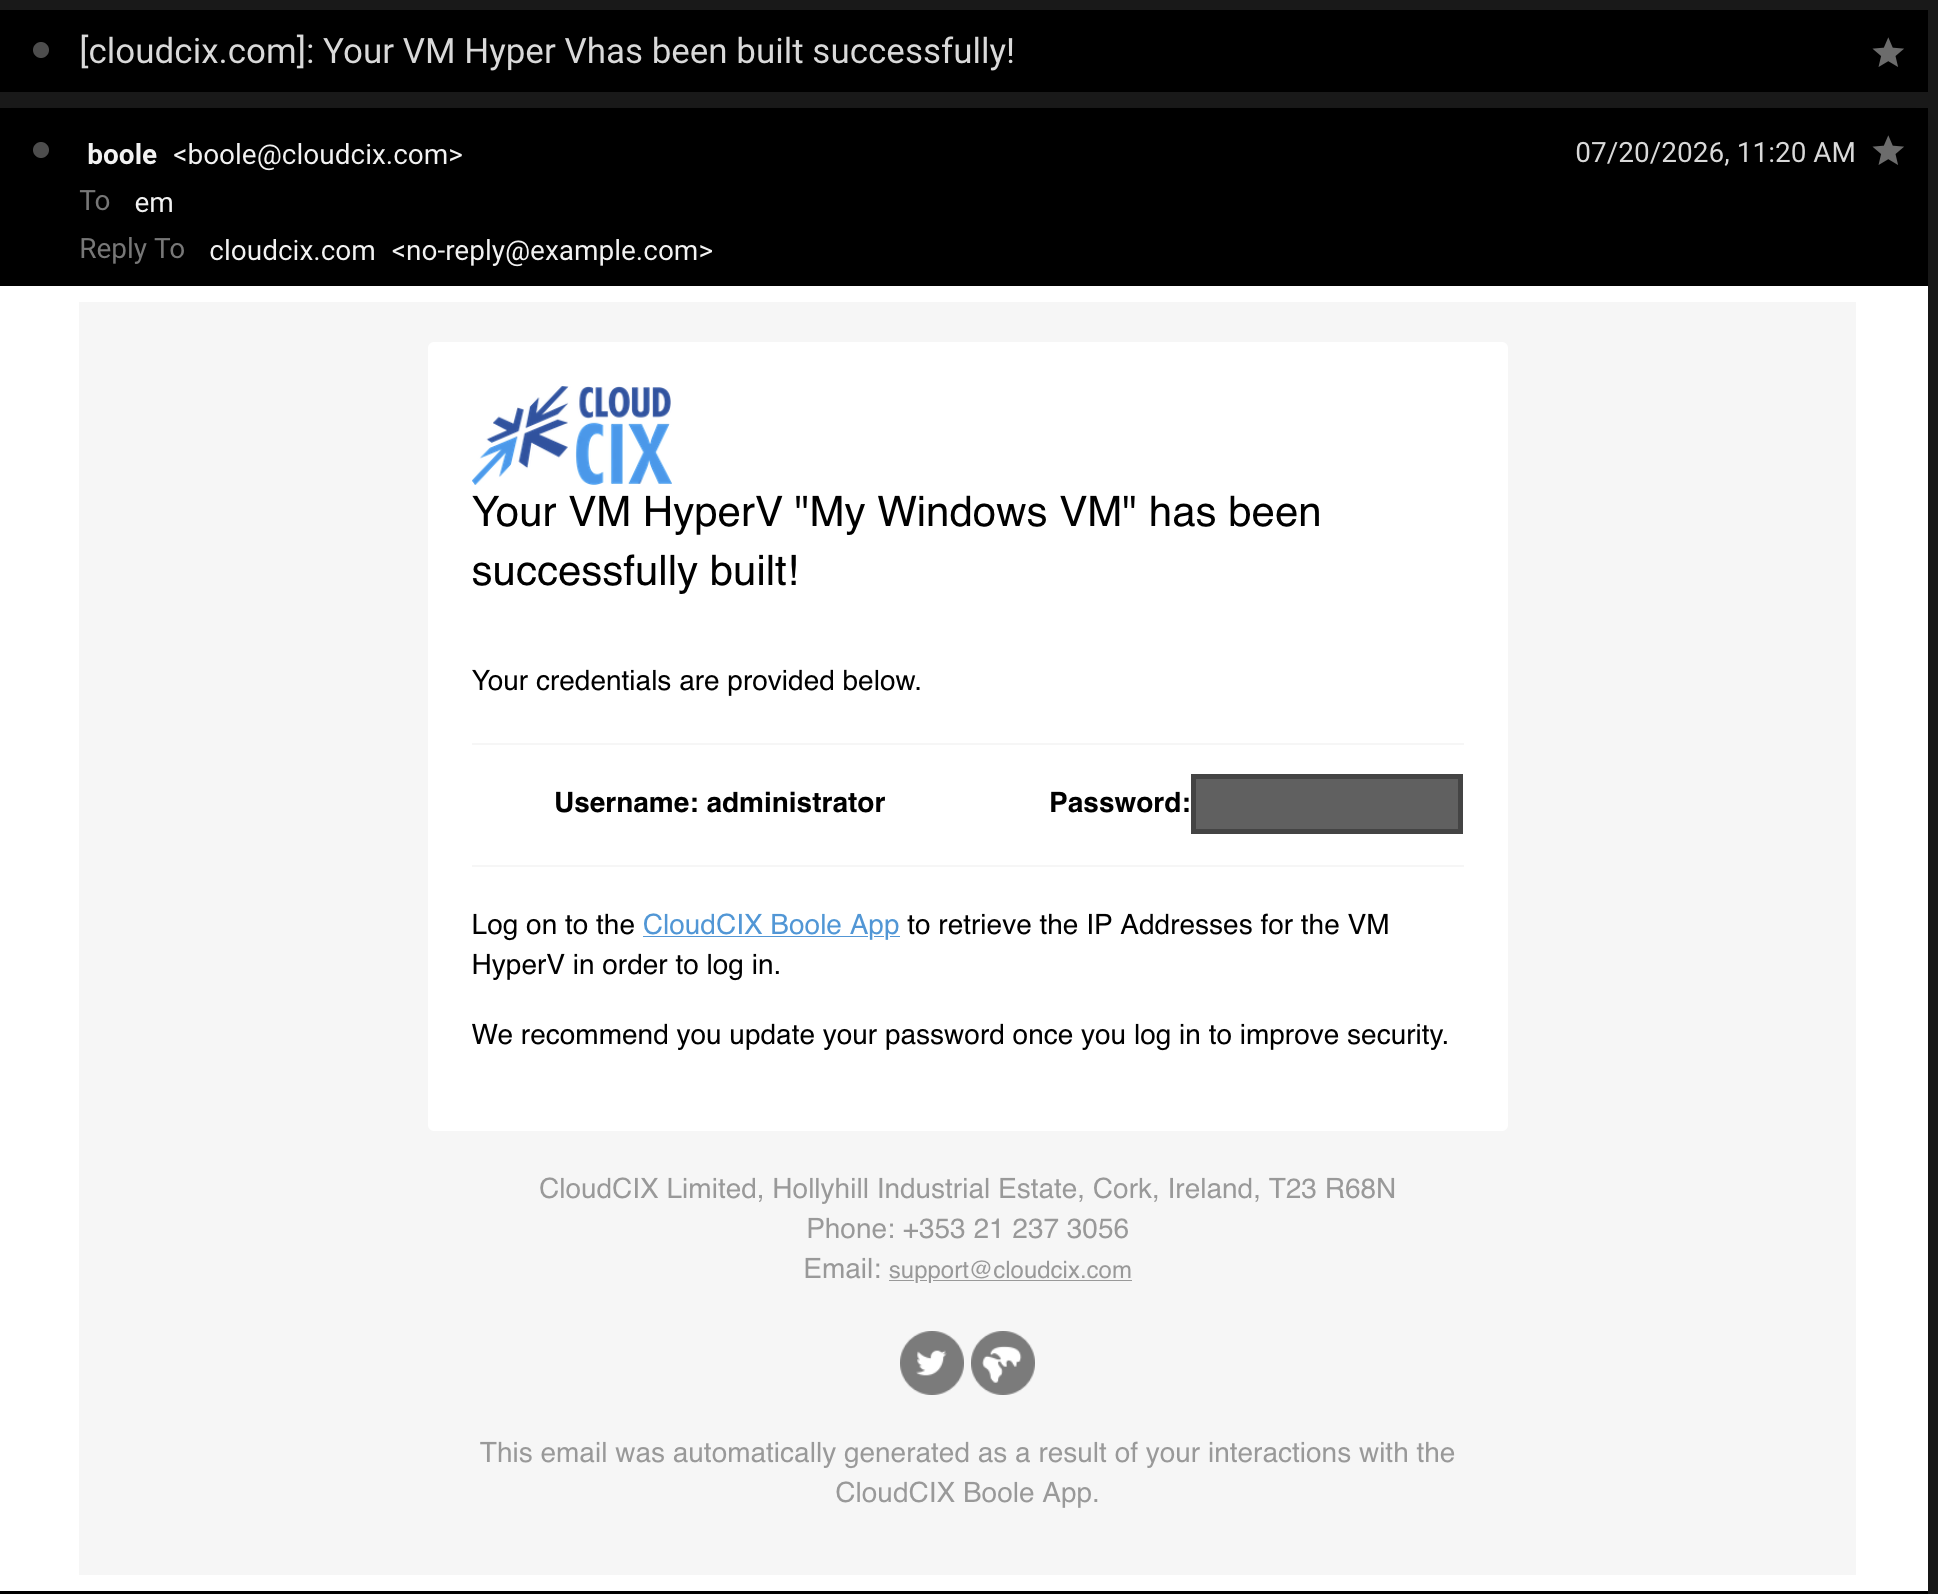
The build-complete email supplies the administrator username and initial password. Keep this information confidential and change the password after the first login.
Connect with Windows App
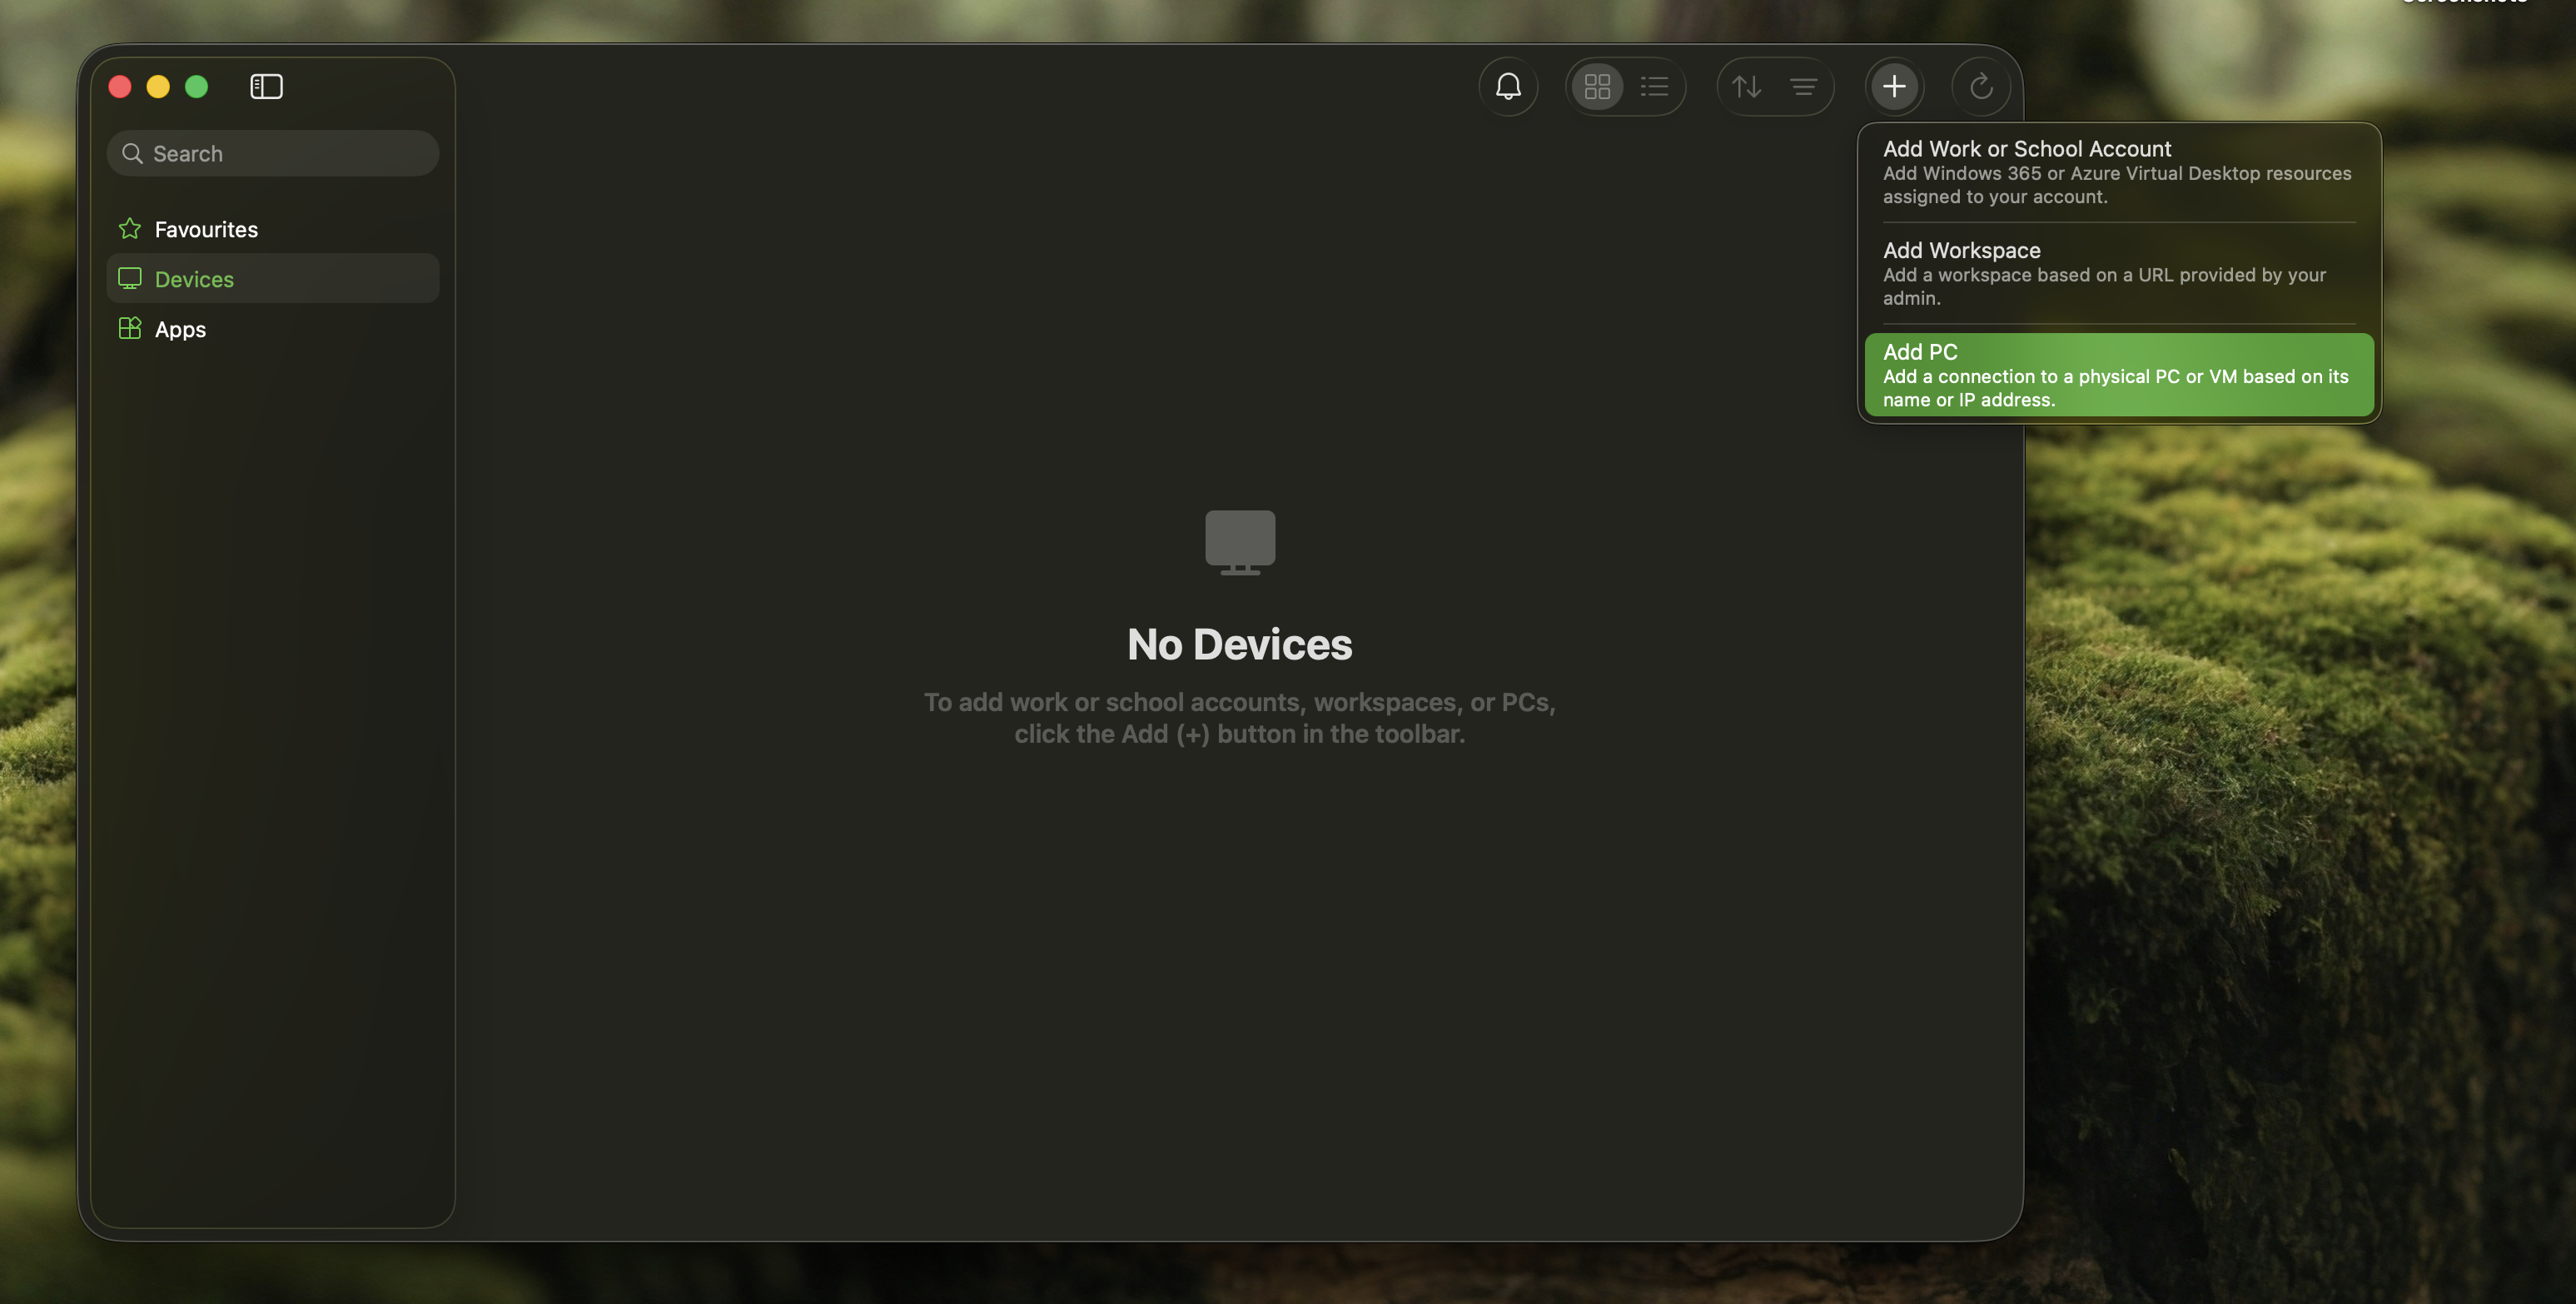
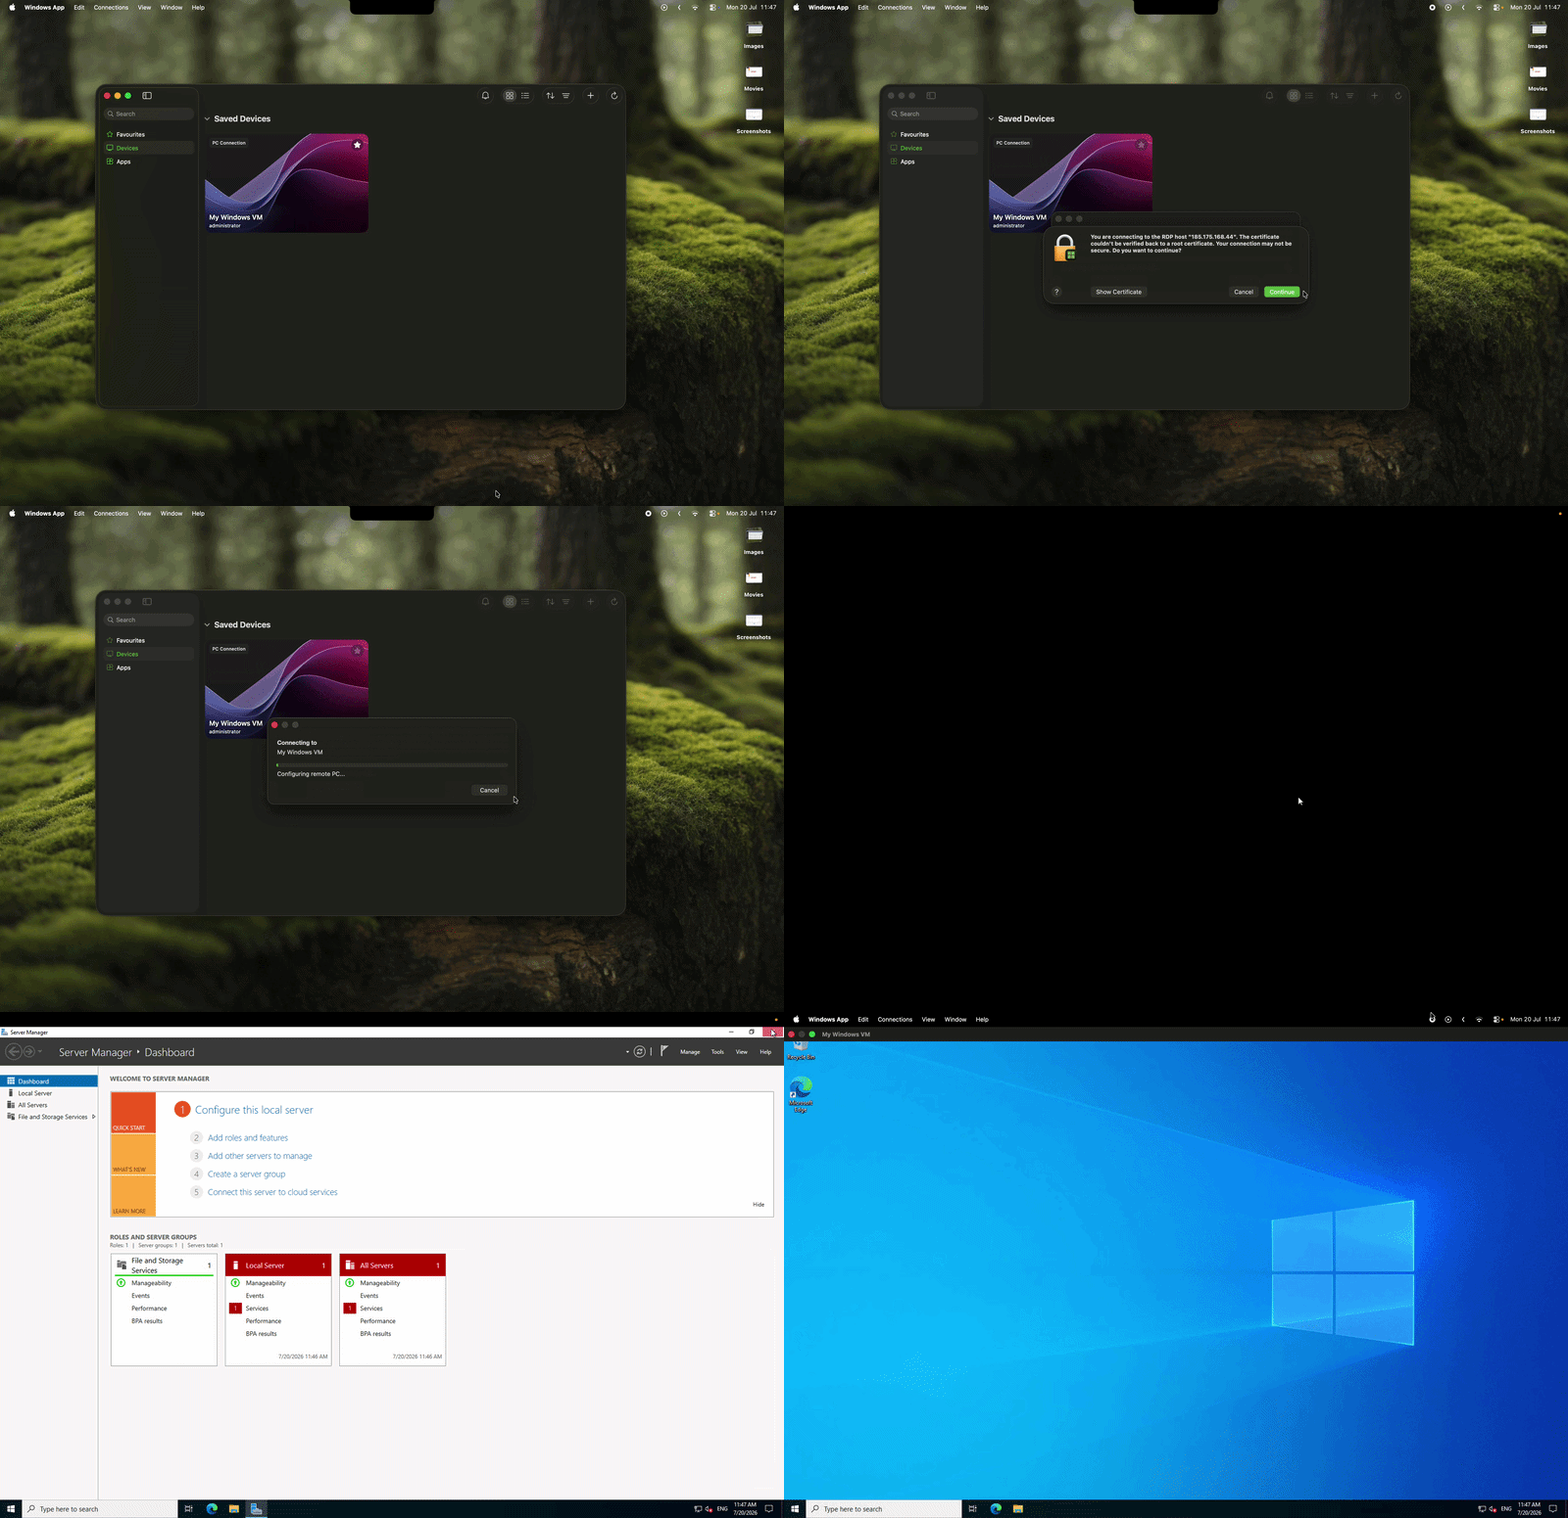
On macOS, open Windows App and select Devices. Select the + button, then Add PC.
Enter the VM public IP address as PC name, choose Ask when required, and give the connection a friendly name. Select Add.
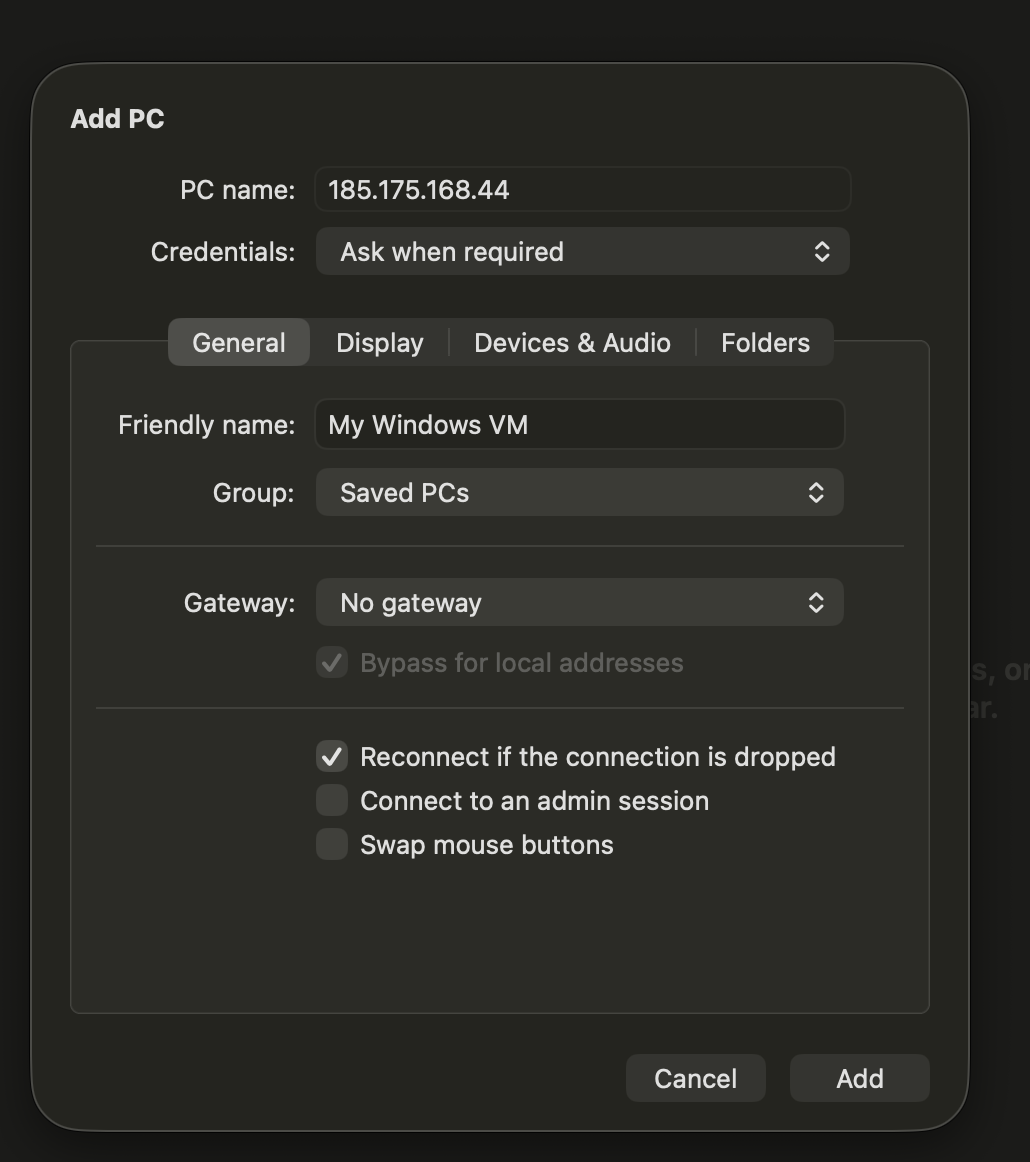
Open the saved PC and enter the credentials from the build-complete email.
Connect with Remmina on Linux
Important
Before connecting, make sure the VM has a public IP address through NAT and that its firewall allows inbound TCP port 3389.
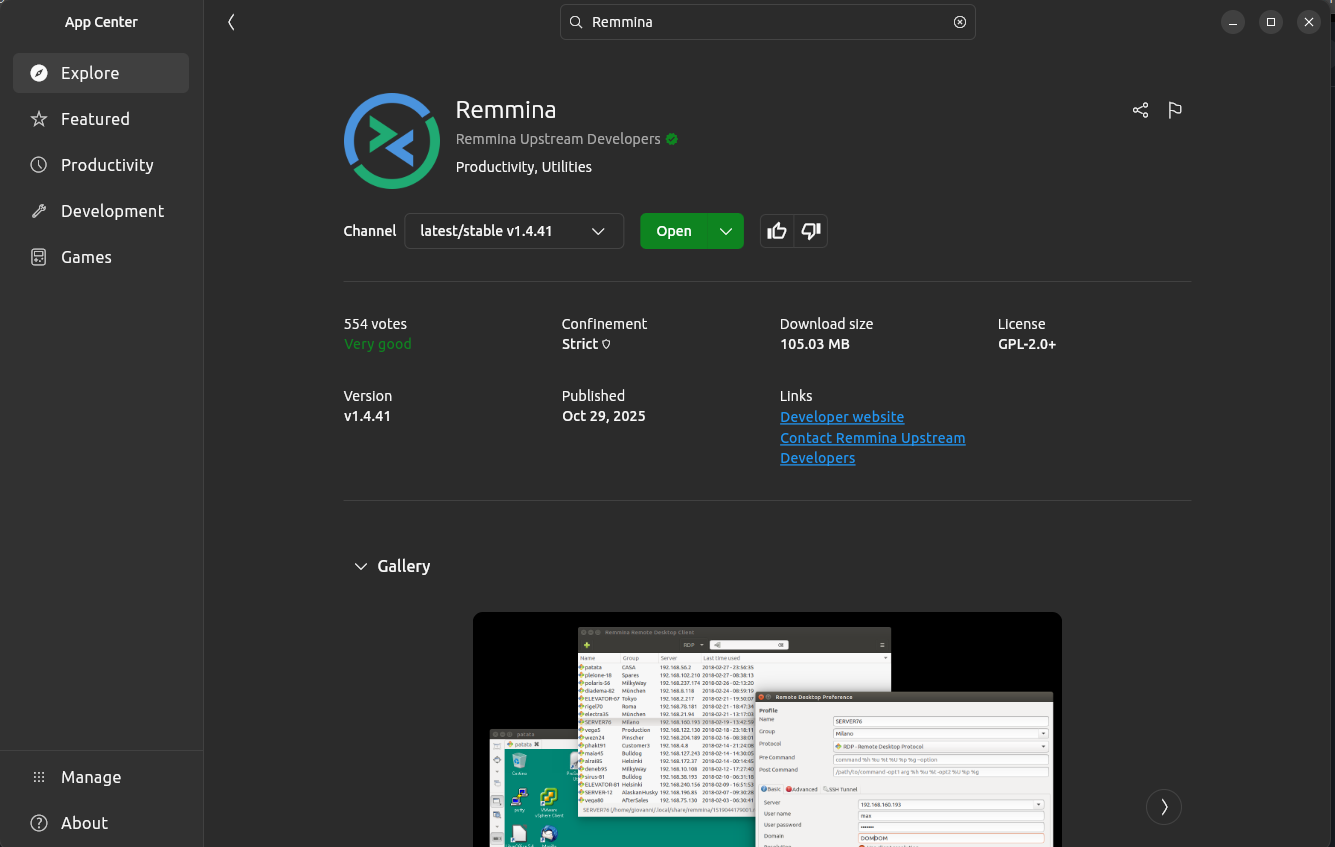
Install and open Remmina.
Select the + button to create a new connection profile.

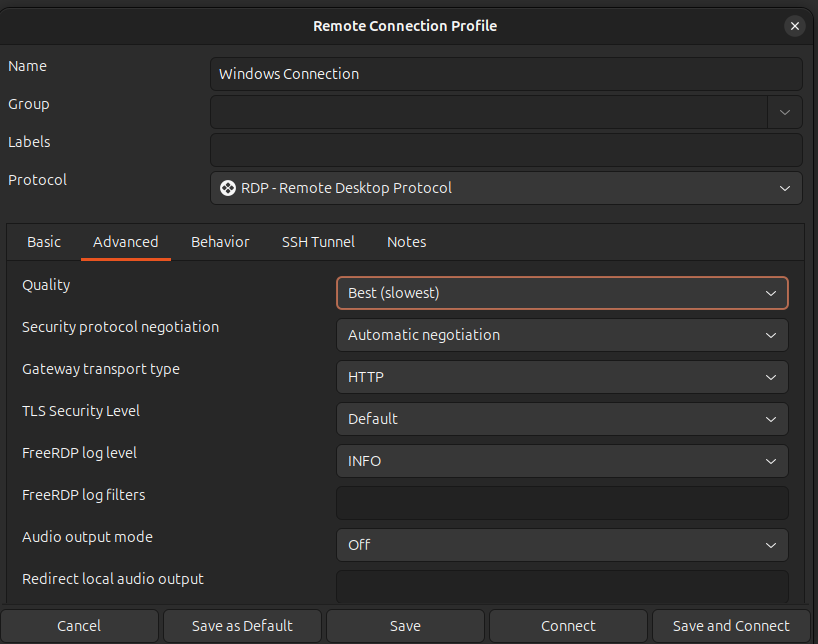
Set the protocol to RDP. Enter a name for the connection, the VM public IP address as Server, and
administratorwith the password from the build-complete email.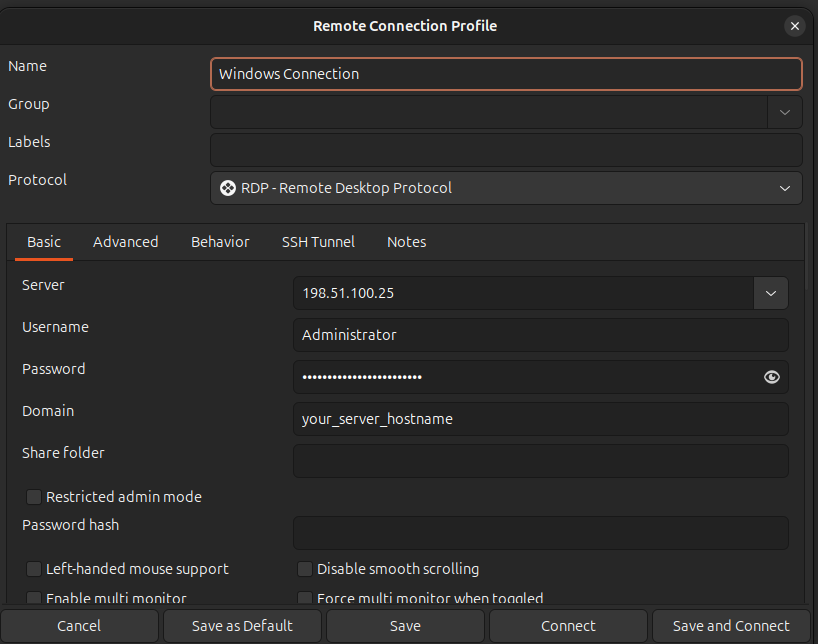
Leave the display and network settings at their defaults unless you have a specific requirement.
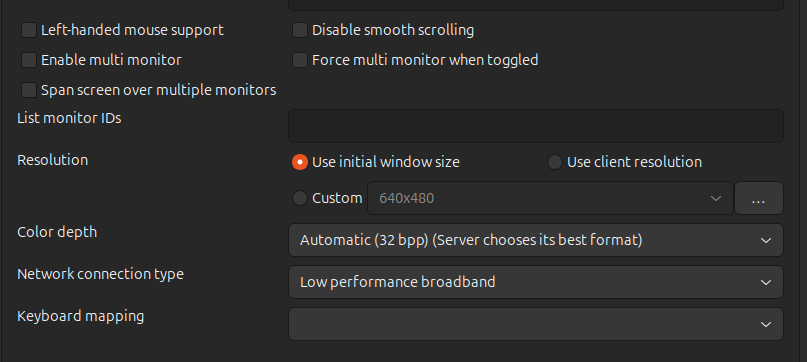
In the Advanced tab, keep the default security negotiation settings unless your organisation requires different settings. Select Save and Connect.
Create a snapshot
A snapshot is a quick point-in-time checkpoint for an LXD instance. Create one before a risky change; it remains with the instance and is not a replacement for a backup.
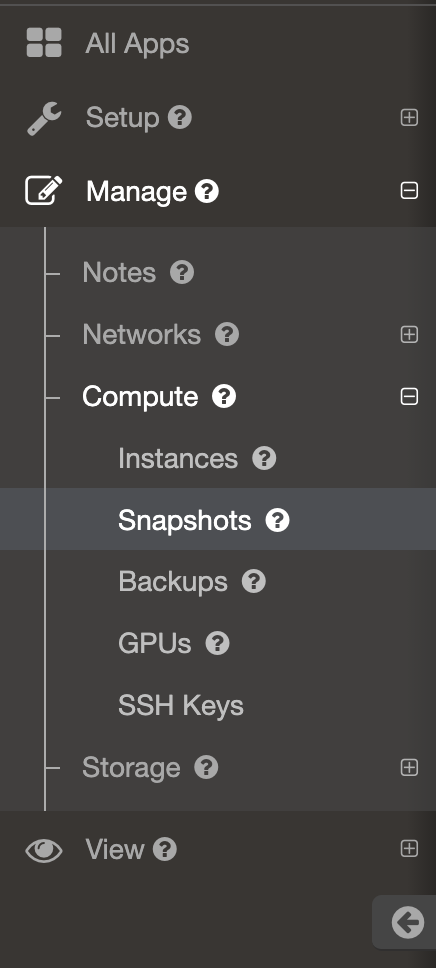
Expand Manage, then Compute, and select Snapshots.
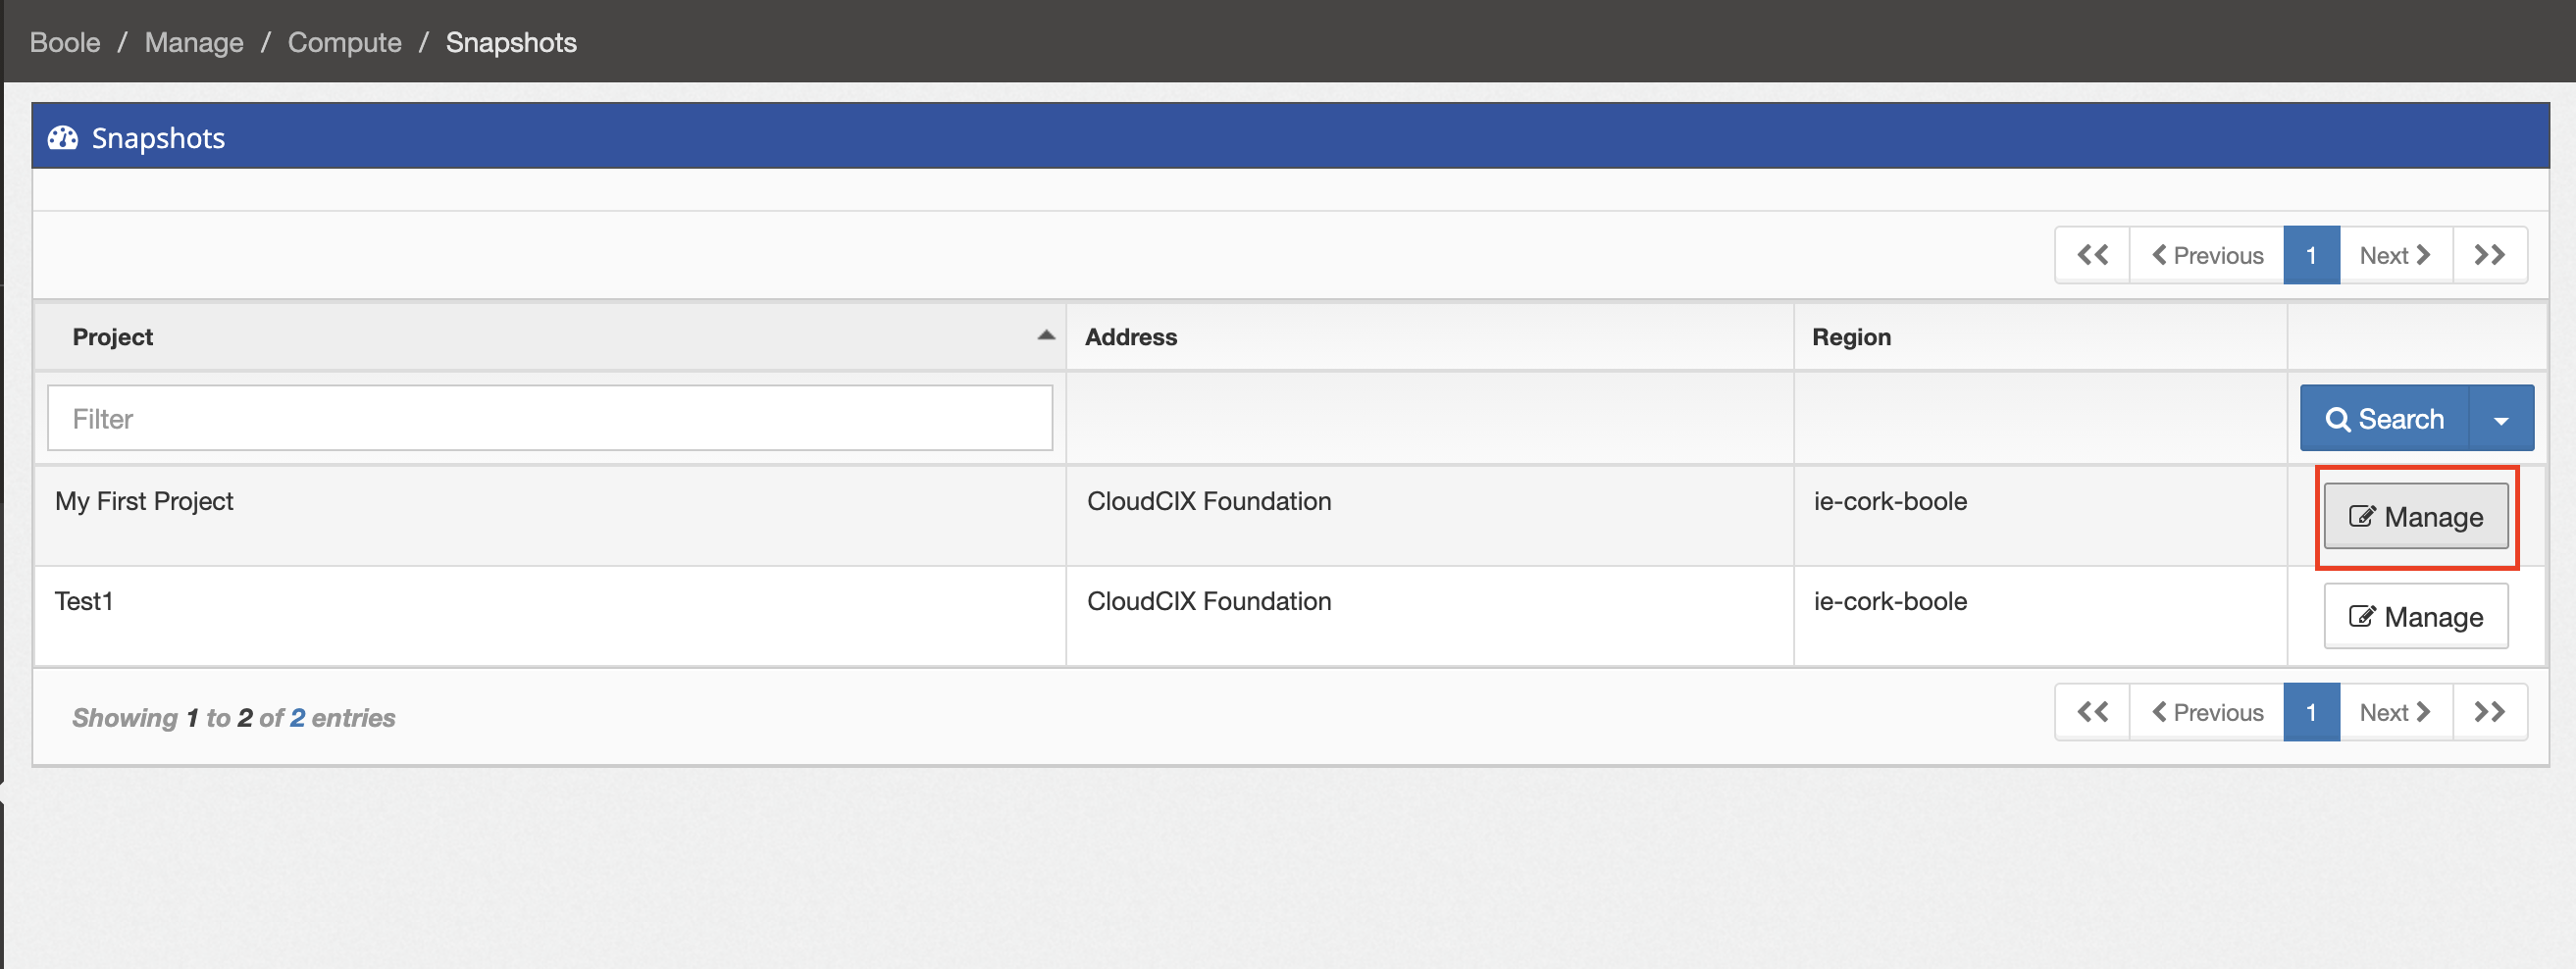
Select Manage beside the project.
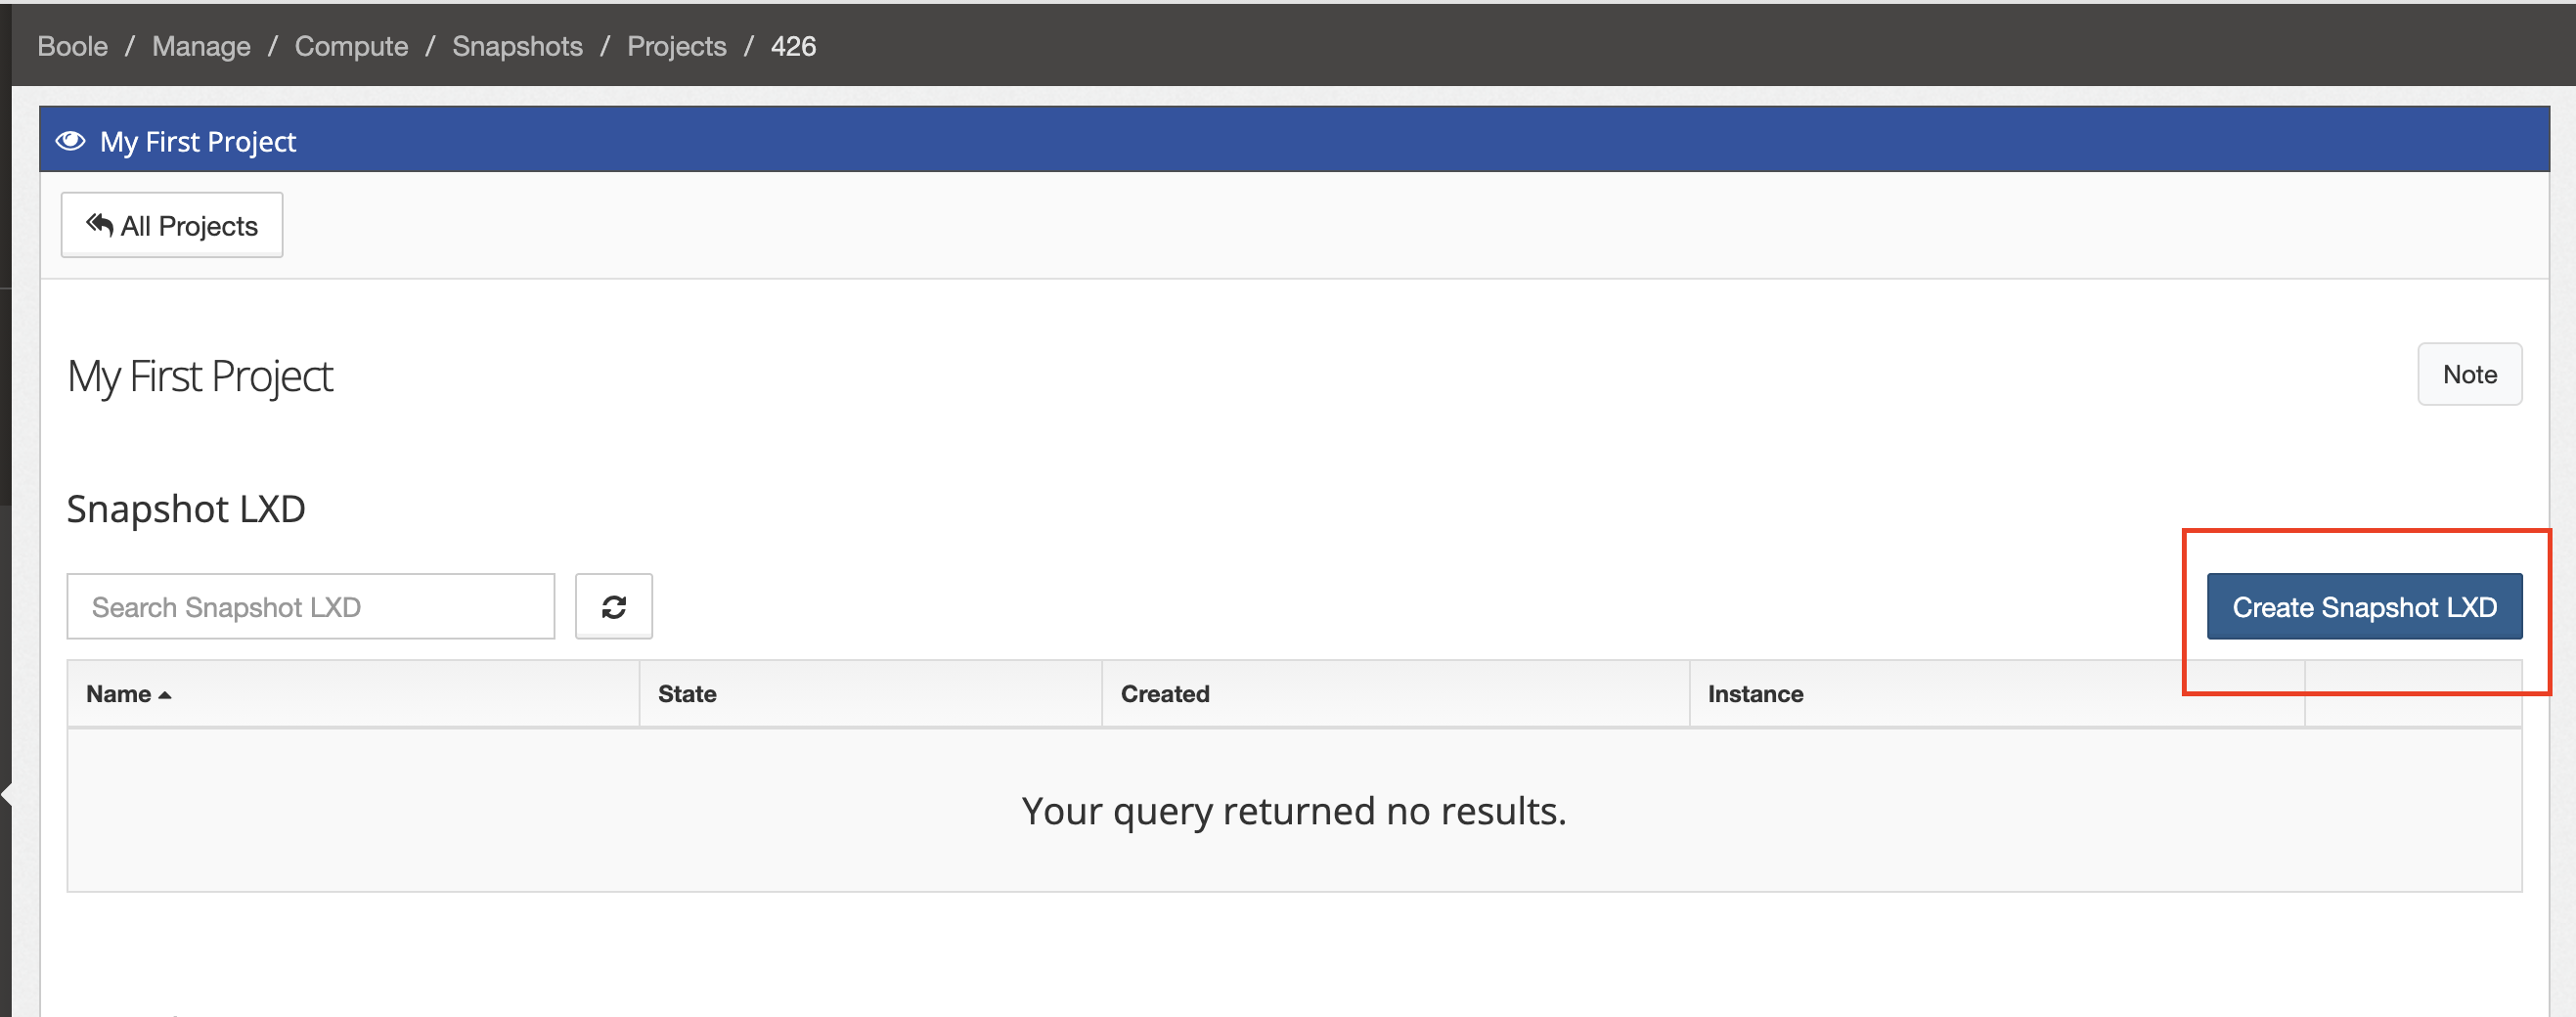
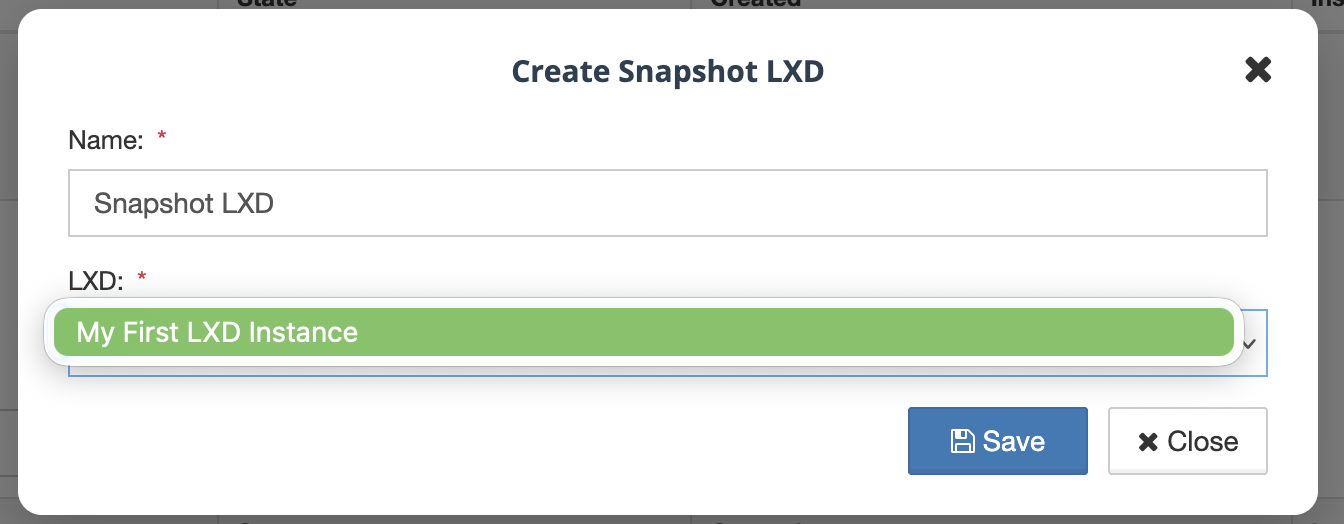
Under Snapshot LXD, select Create Snapshot LXD.
Enter a meaningful name, choose the LXD instance, and select Save.
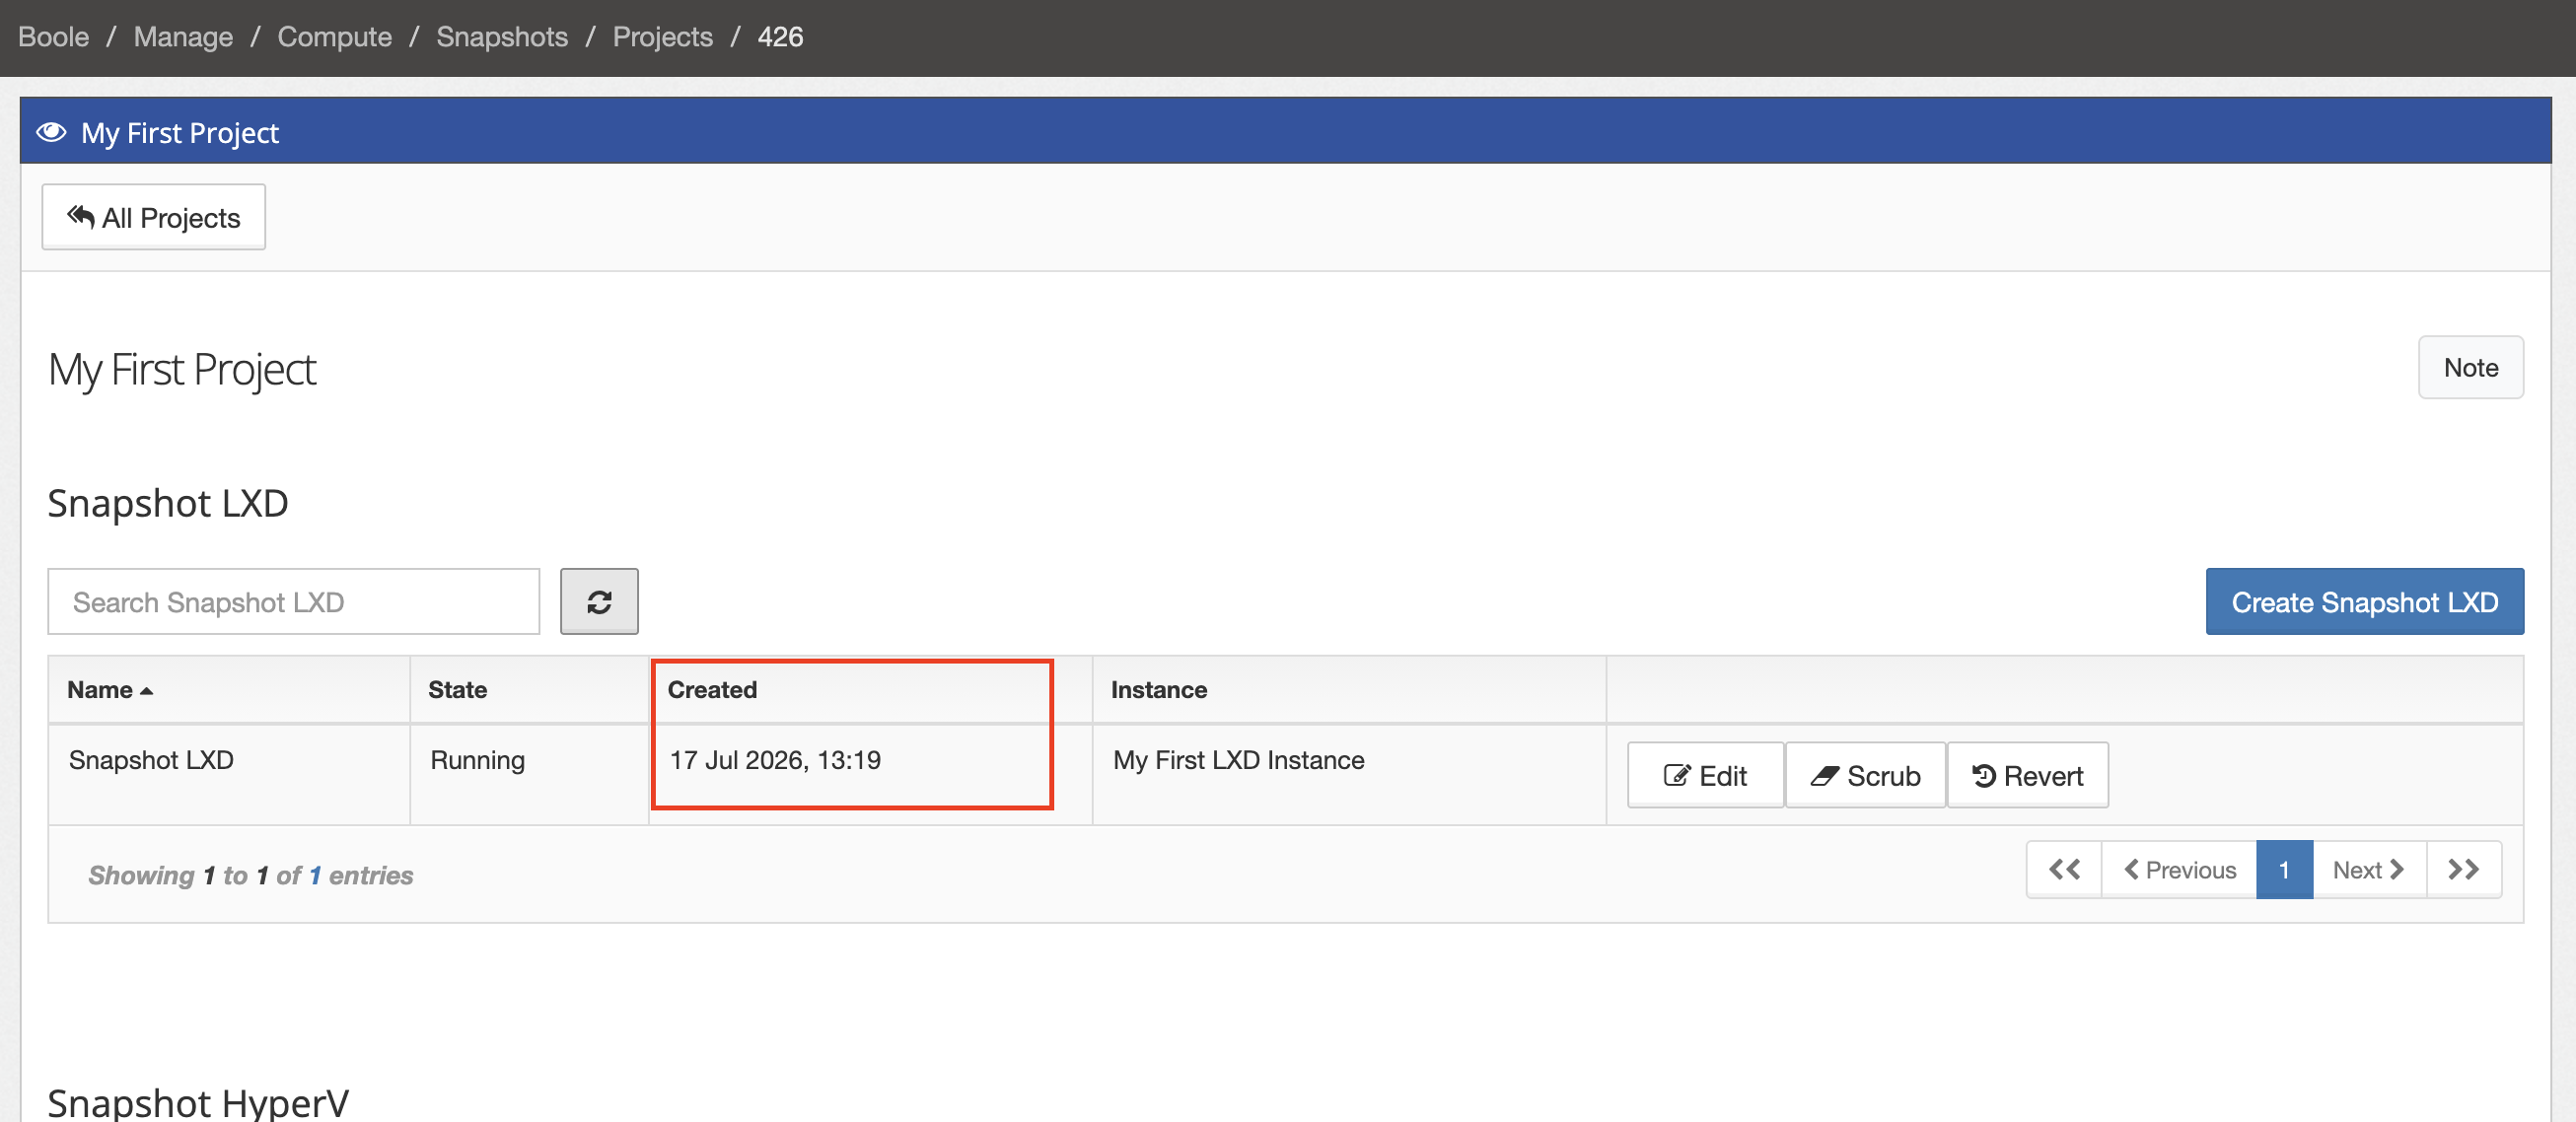
When the snapshot is ready, it is listed against the instance with a Running state and its creation timestamp. Use Revert only when you intend to discard later changes.
Create a backup
A backup is a separate copy of the instance for recovery from data loss or infrastructure failure. It takes longer to create than a snapshot.
Expand Manage, then Compute, and select Backups.
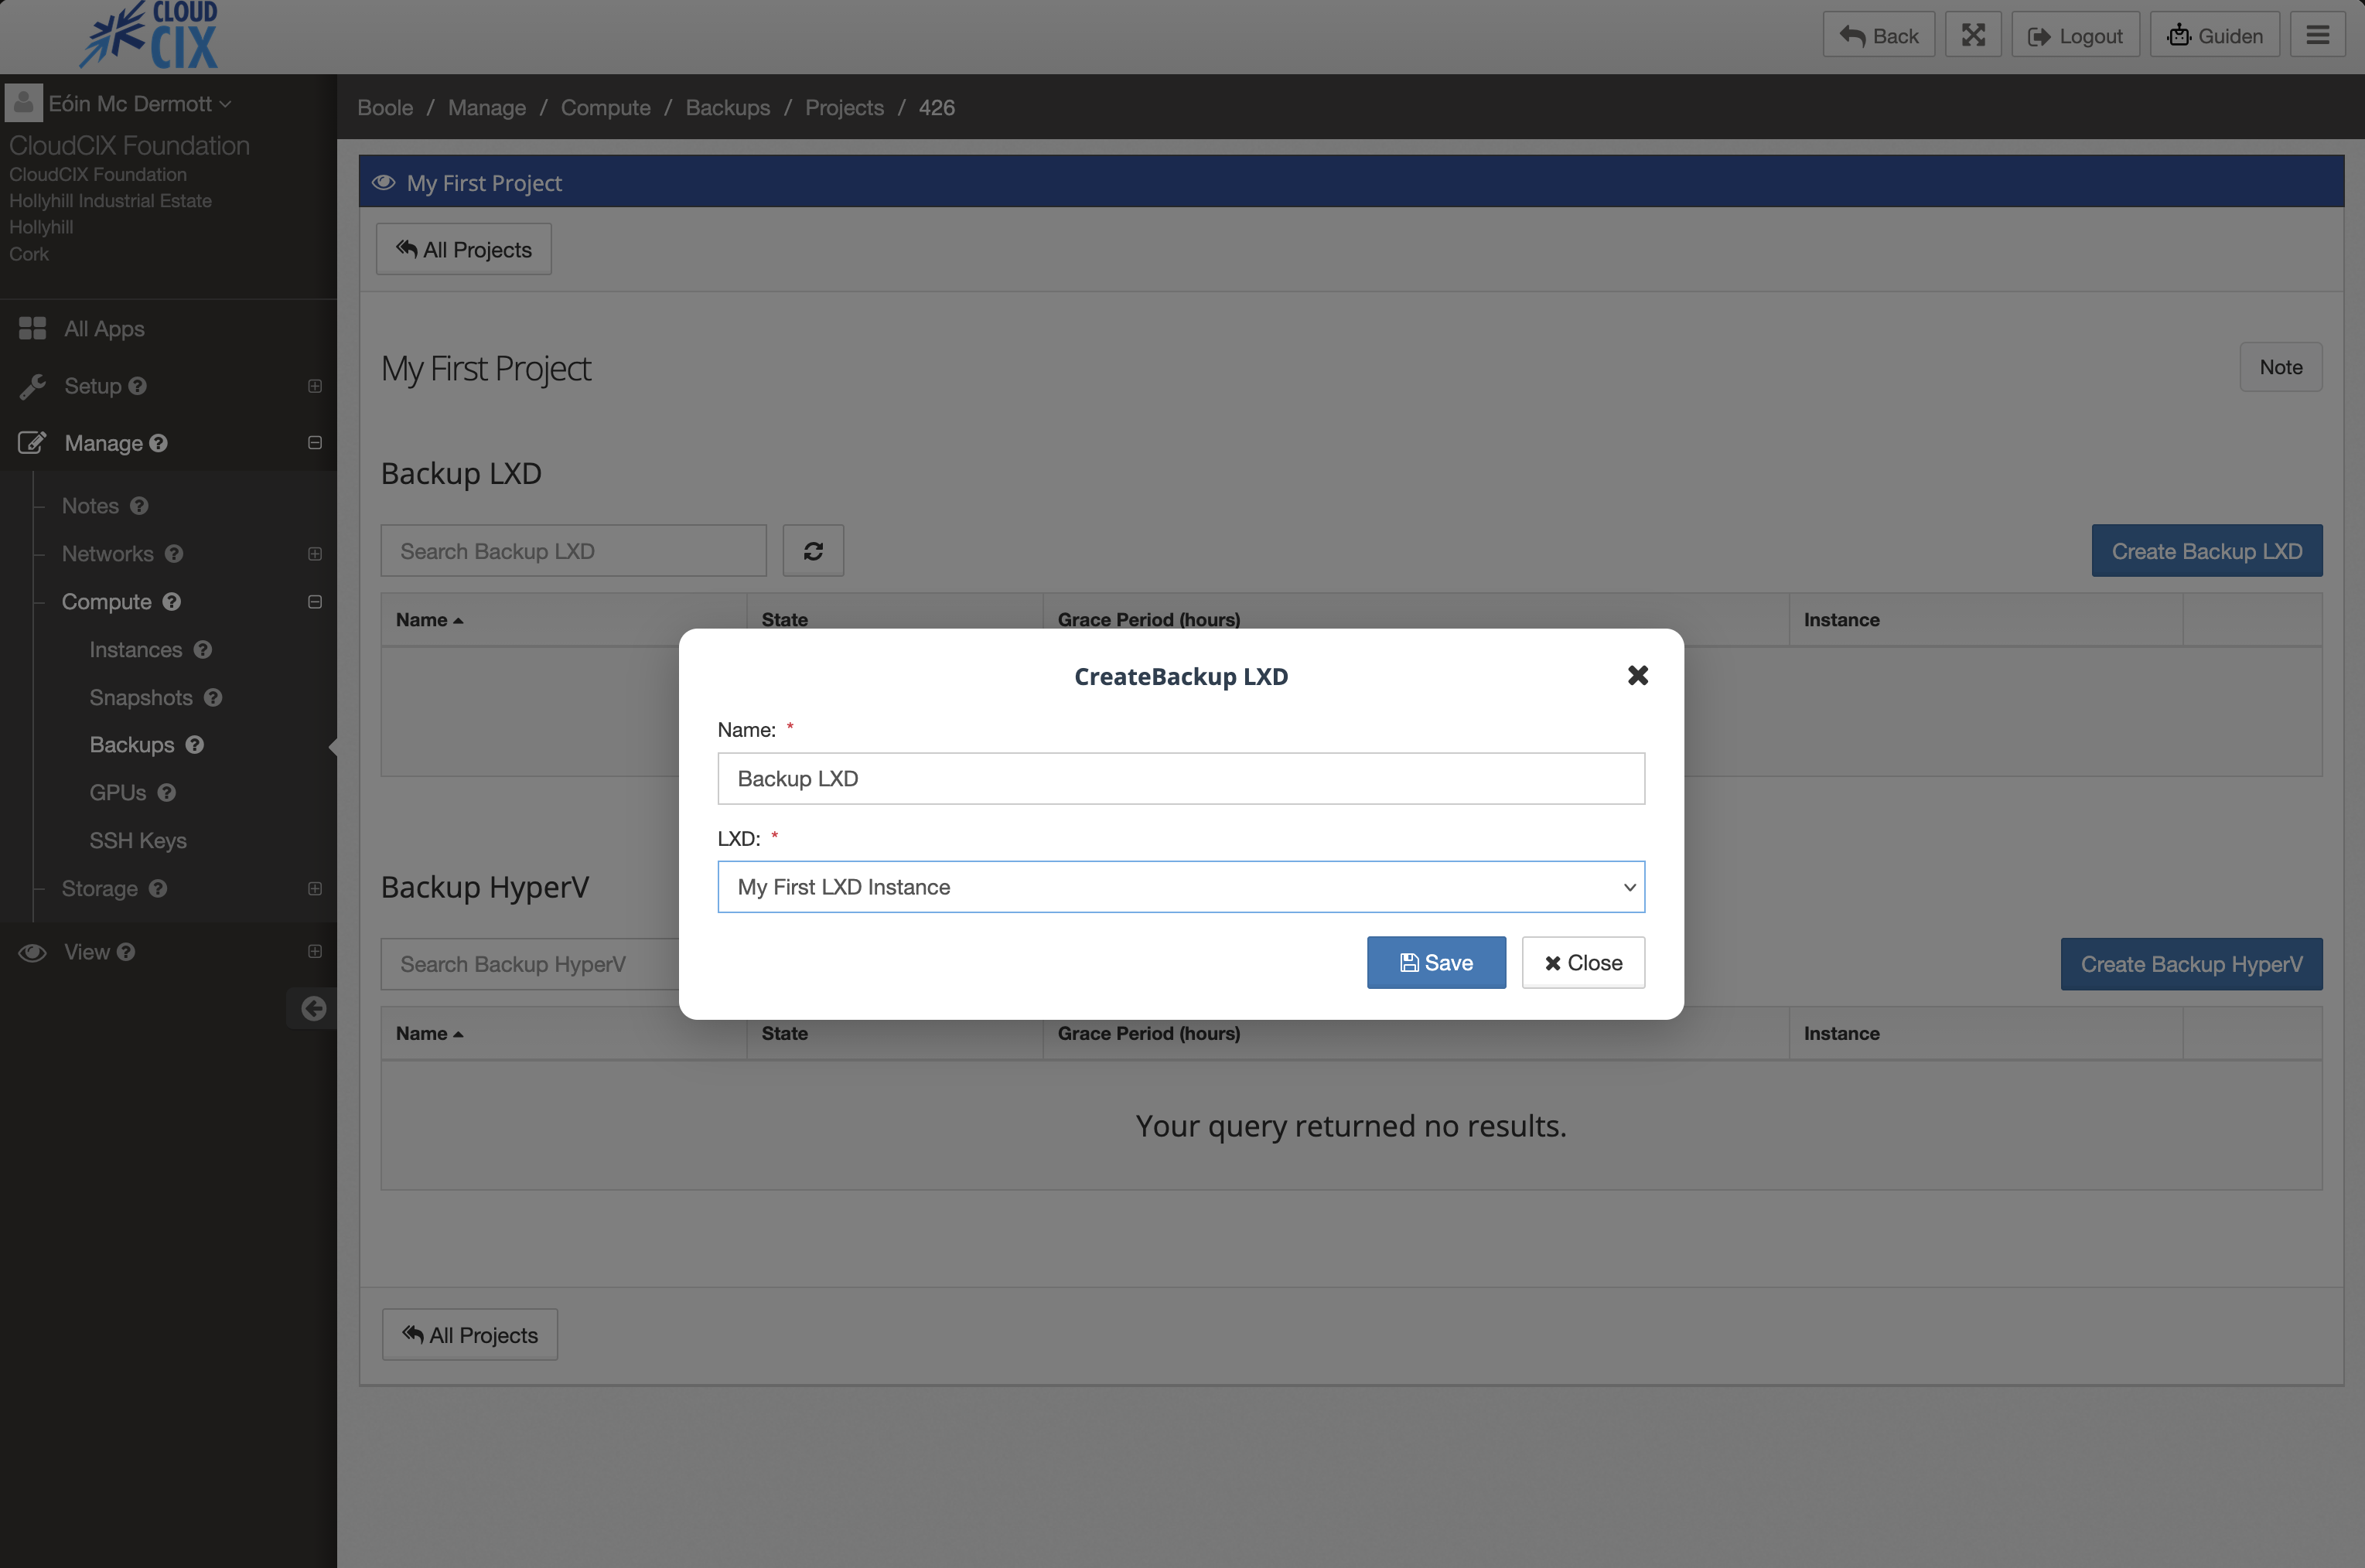
Select Manage beside the project, then Create Backup LXD.
Enter a descriptive name, select the LXD instance, and select Save.
The backup appears in the project’s Backups section after processing has completed.