4.4 PodNet A Installation
Installing the CloudCIX PodNet A Box
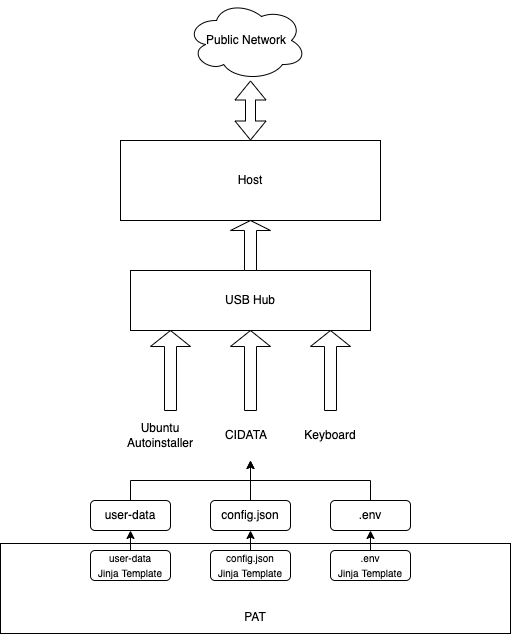
Using the 3 files from the podnet-a folder downloaded from Step 4.2 or 4.3, copy them to an USB drive and name the drive as CIDATA
user-data
config.json
meta-data
Connect Installer Bootable drive, CIDATA drive and Key board to USB Hub and then connect to the bare metal server.
Connect one Ethernet Cable (A minimum of 1Gig) from Public Network to one of the NIC port on this server.
To install the ISO on a bare metal server, boot into the external drive Ubuntu Auto Installer USB thumb drive from BIOS on your appliance. Once the server boots from the external drive it will install the host operating system and configures steps in user-data.
After the server reboots, the CloudCIX Pod Installer program will be launched.
Verify all “podnet_a_install” tests have pass by selecting “Pod Utility” then “Test Results”.
Configure the subsequent Network interfaces for Management, OOB, Private and Inter Networks one by one.
The Pod installer will run “podnet_a_validate” tests after the installation. Once all tests have passed, proceed to Step 4.5 PodNet B Installation.