SSH Connect
This tutorial explains the steps required to connect to a VM in CloudCIX using SSH. On Linux and Mac systems you can use terminal. On Windows systems you will need to install a terminal program such as PuTTY or via PowerShell.
Note
If you have multiple VMs in a project, you might consider connecting to one via SSH from outside and then connecting to the other VMs from that first VM. If you do this, the first VM that you connect to is referred to as a Jump Host.
There are five steps required to make an SSH connection.
1) Set up NAT for the VM
In order to reach a VM it must have a public IP. This requires the VM to be associated with a public IP, as well as the private IP that you have assigned.
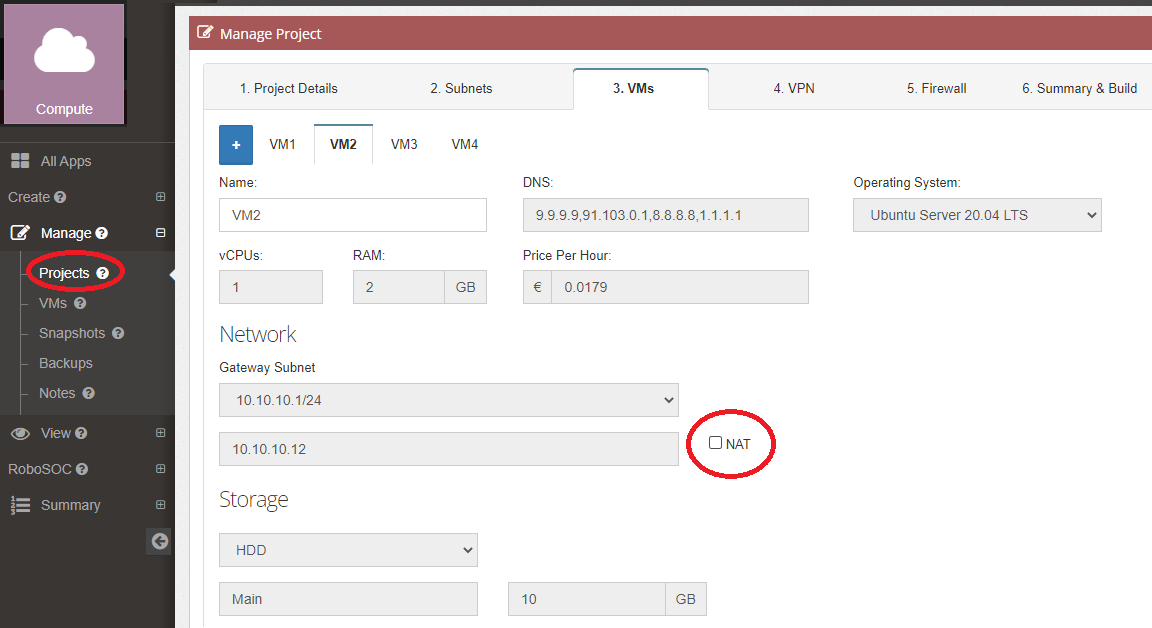
In the Compute App select the Manage / Projects menu item.
Select the project containing the VM you want to NAT to.
Make sure the NAT tick box after the IP you wish to NAT, is ticked. See the image below.
If the NAT tick box wasn’t already ticked, you will have to go to the Summary and Build tab and Build the project again.
After the project is built, you can proceed.
2) Find your PC’s Public IP Address
To open the project firewall to allow SSH traffic, you must know the local public IPv4 address of the host you wish to connect from.
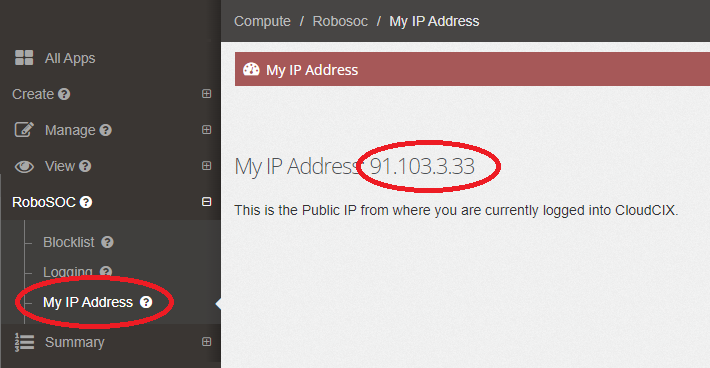
In the Compute App select the RoboSOC / My IP Address menu item.
Note the IP Address displayed. This will be the Source IP Address when creating an allow firewall rule.
3) Find your VM’s Private and Public IP Addresses
To SSH into a VM you must know the public IP that was assigned to the VM when NAT was created.
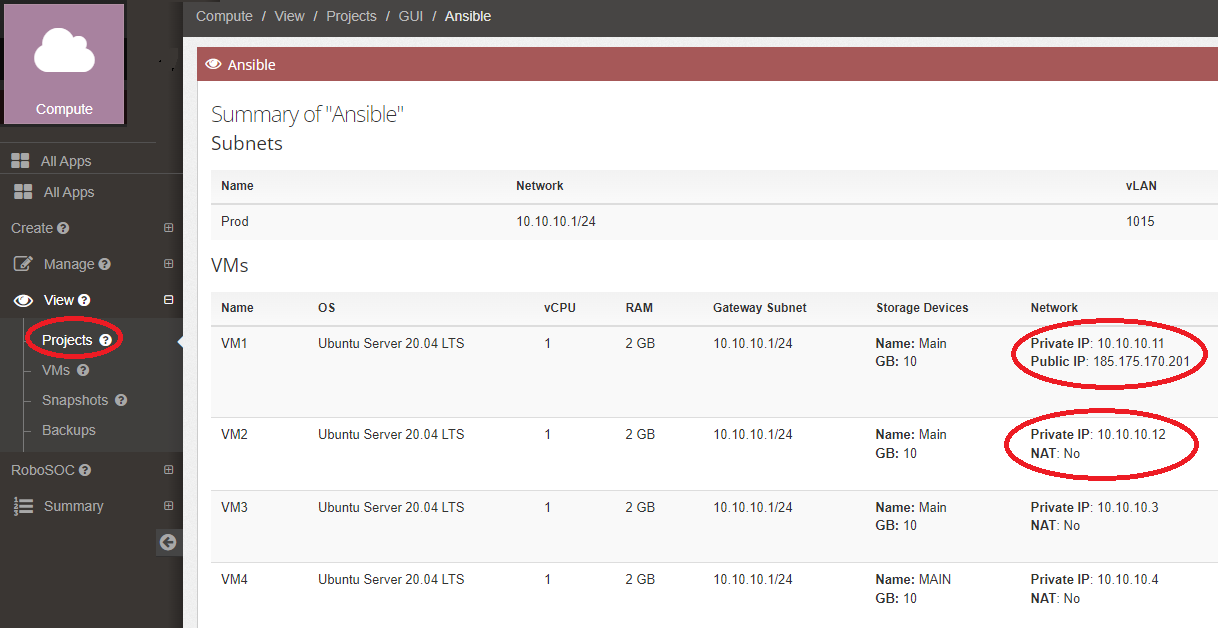
In the Compute App select the View / Projects menu item.
Select the project containing the VM you want to connect to.
Record the Private IP and Public IP for the VM you wish to access. See the image below.
If the Private IP has not been NATed, then NAT: No will be written under the Private IP and Step 1) above was not completed correctly.
4) Create an Allow Firewall rule
Knowing your PC’s Public IP Address and the Private Address of the VM, you are ready to create a firewall rule to allow access.
In the compute App select the Manage / Projects menu item.
Select the project containing the VM that you want to connect to.
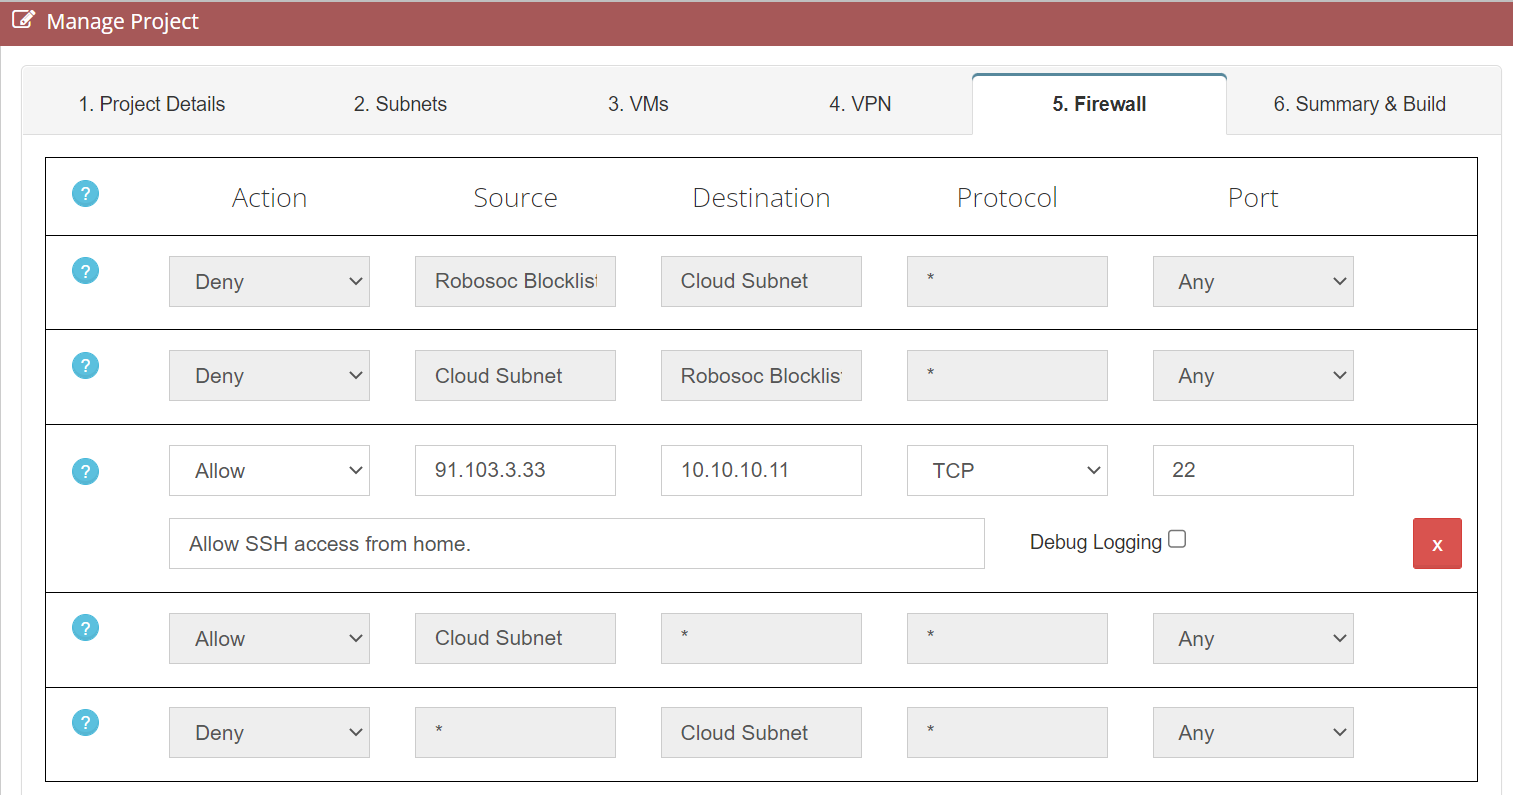
Select the Firewall tab.
- Create a new rule.
Set the Action to Allow.
Set the Source to your PC’s Public IP Address.
Set the Destination to the Private IP of the VM.
Set the Protocol to TCP.
Set the Port to 22.
Enter a description for the rule to remind you of its purpose.
5) SSH into the VM
You can now SSH sucessfully into your VM.
The SSH command must use the VM Public IP from step 3.
The SSH commmand takes the format <username>@<ipaddress>.
- An example SSH command based on the above data would be…
You will be asked for the password that was supplied by email when the VM was built.