Conversion of Windows ISO file to Robot supported VHDx formatted file
Creates a Windows VHDx file for Hyper-V VM from a Windows-ISO file.
Step 1, Download the Windows ISO file of your choice to support.
CloudCIX recommends to use PAT’s Station for working environment. This eases transfer of the files to the desired locations as mentioned in the following steps.
It is recommending to download Windows ISO files from Microsoft’s website.
Download the file onto PAT’s Station and SCP transfer the file to your Test Pod appliance.
scp <windows iso file path> administrator@[<IP6>::6000:1]:/home/administrator/
The downloaded file must be placed in Pod appliance’s Robot network drive location ie /etc/cloudcix/robot/ and modifiy the ownership and access permissions as follows:
sudo cp <windows iso file> /etc/cloudcix/robot/
sudo chown nobody:nogroup /etc/cloudcix/robot/<windows iso file>
sudo chmod 775 /etc/cloudcix/robot/<windows iso file>
Step 2, Prepare Windows Host for Conversion
A Windows HyperV host is required to convert the ISO to its VHDx file.
CloudCIX uses a third party software for conversion. https://github.com/x0nn/Convert-WindowsImage
Clone the repo on to HyperV host and Run the Convert-WindowsImage.ps1 script in Powershell ISE/Visual Studio Code.
The script needs exact Powershell 5.1 with administrator rights
- This script supports conversion of following Windows versions:
Windows 7, 8, 8.1
Windows 10 / all versions
Windows 11 / all versions
It supports both in UEFI and BIOS partition format.
Step 3, ISO to VHDX Conversion
Mount the Robot network drive on the HyperV host. Open CMD terminal as Administrator and Run the following command.
mount -o nolock \robot.<poad-name>.<organisation_url>etccloudcixrobot Z:

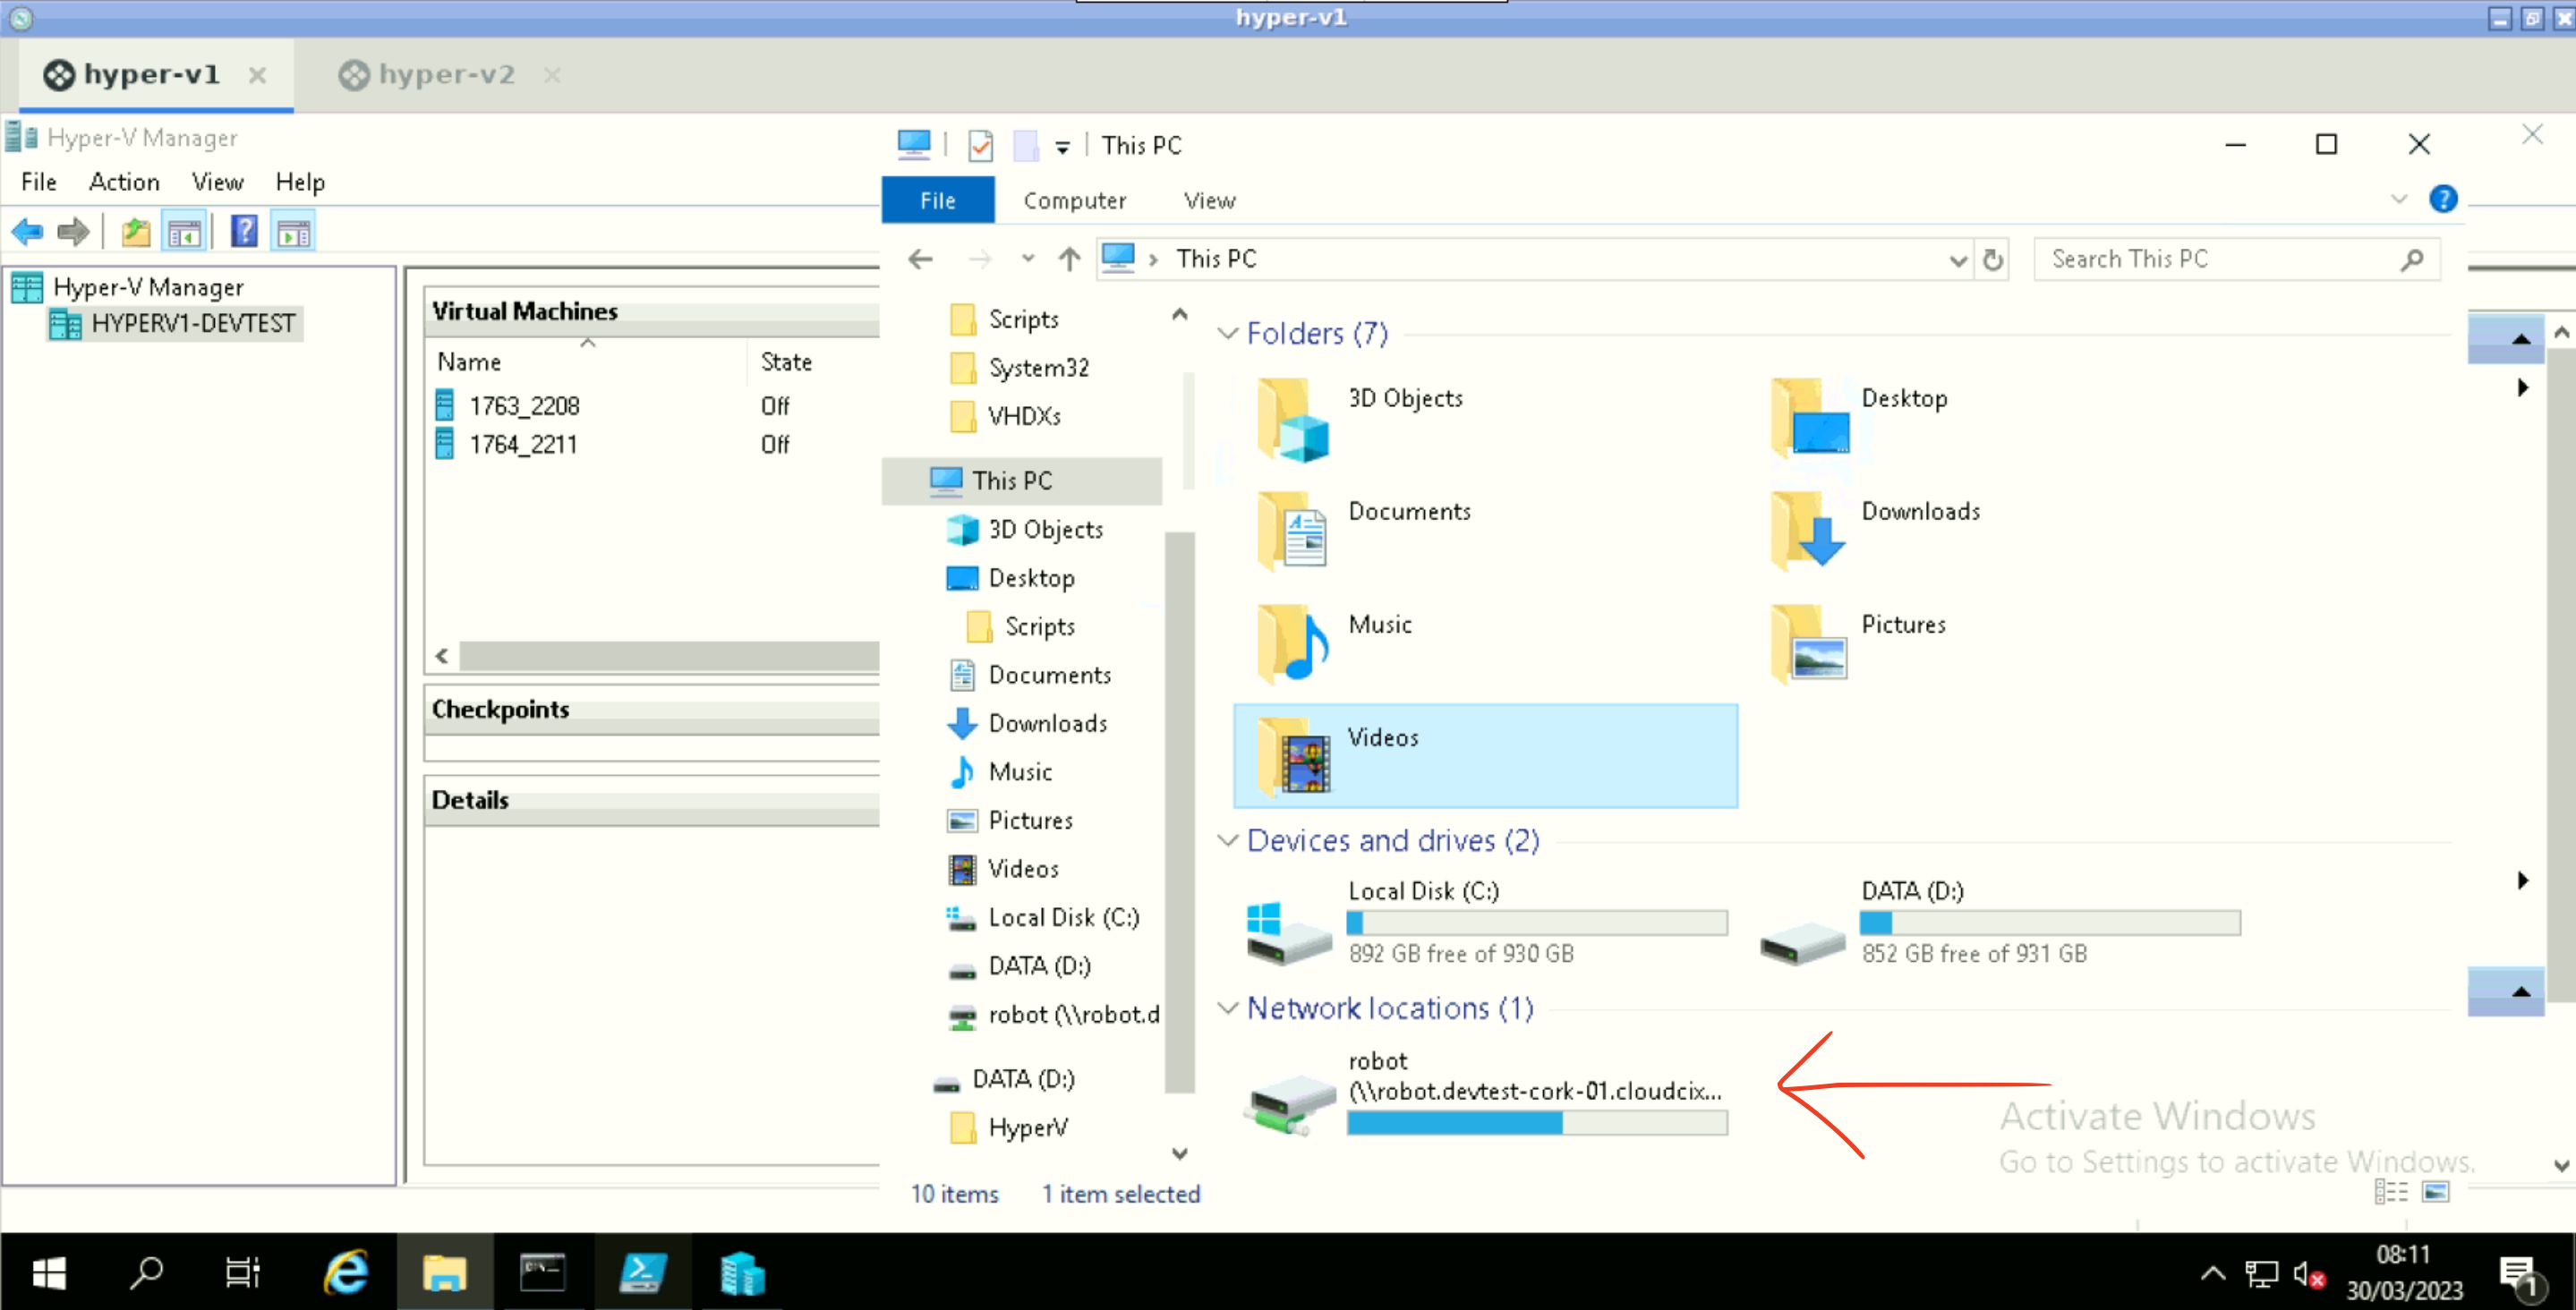
Copy the downloaded Windows ISO file from the Robot drive to C: drive.
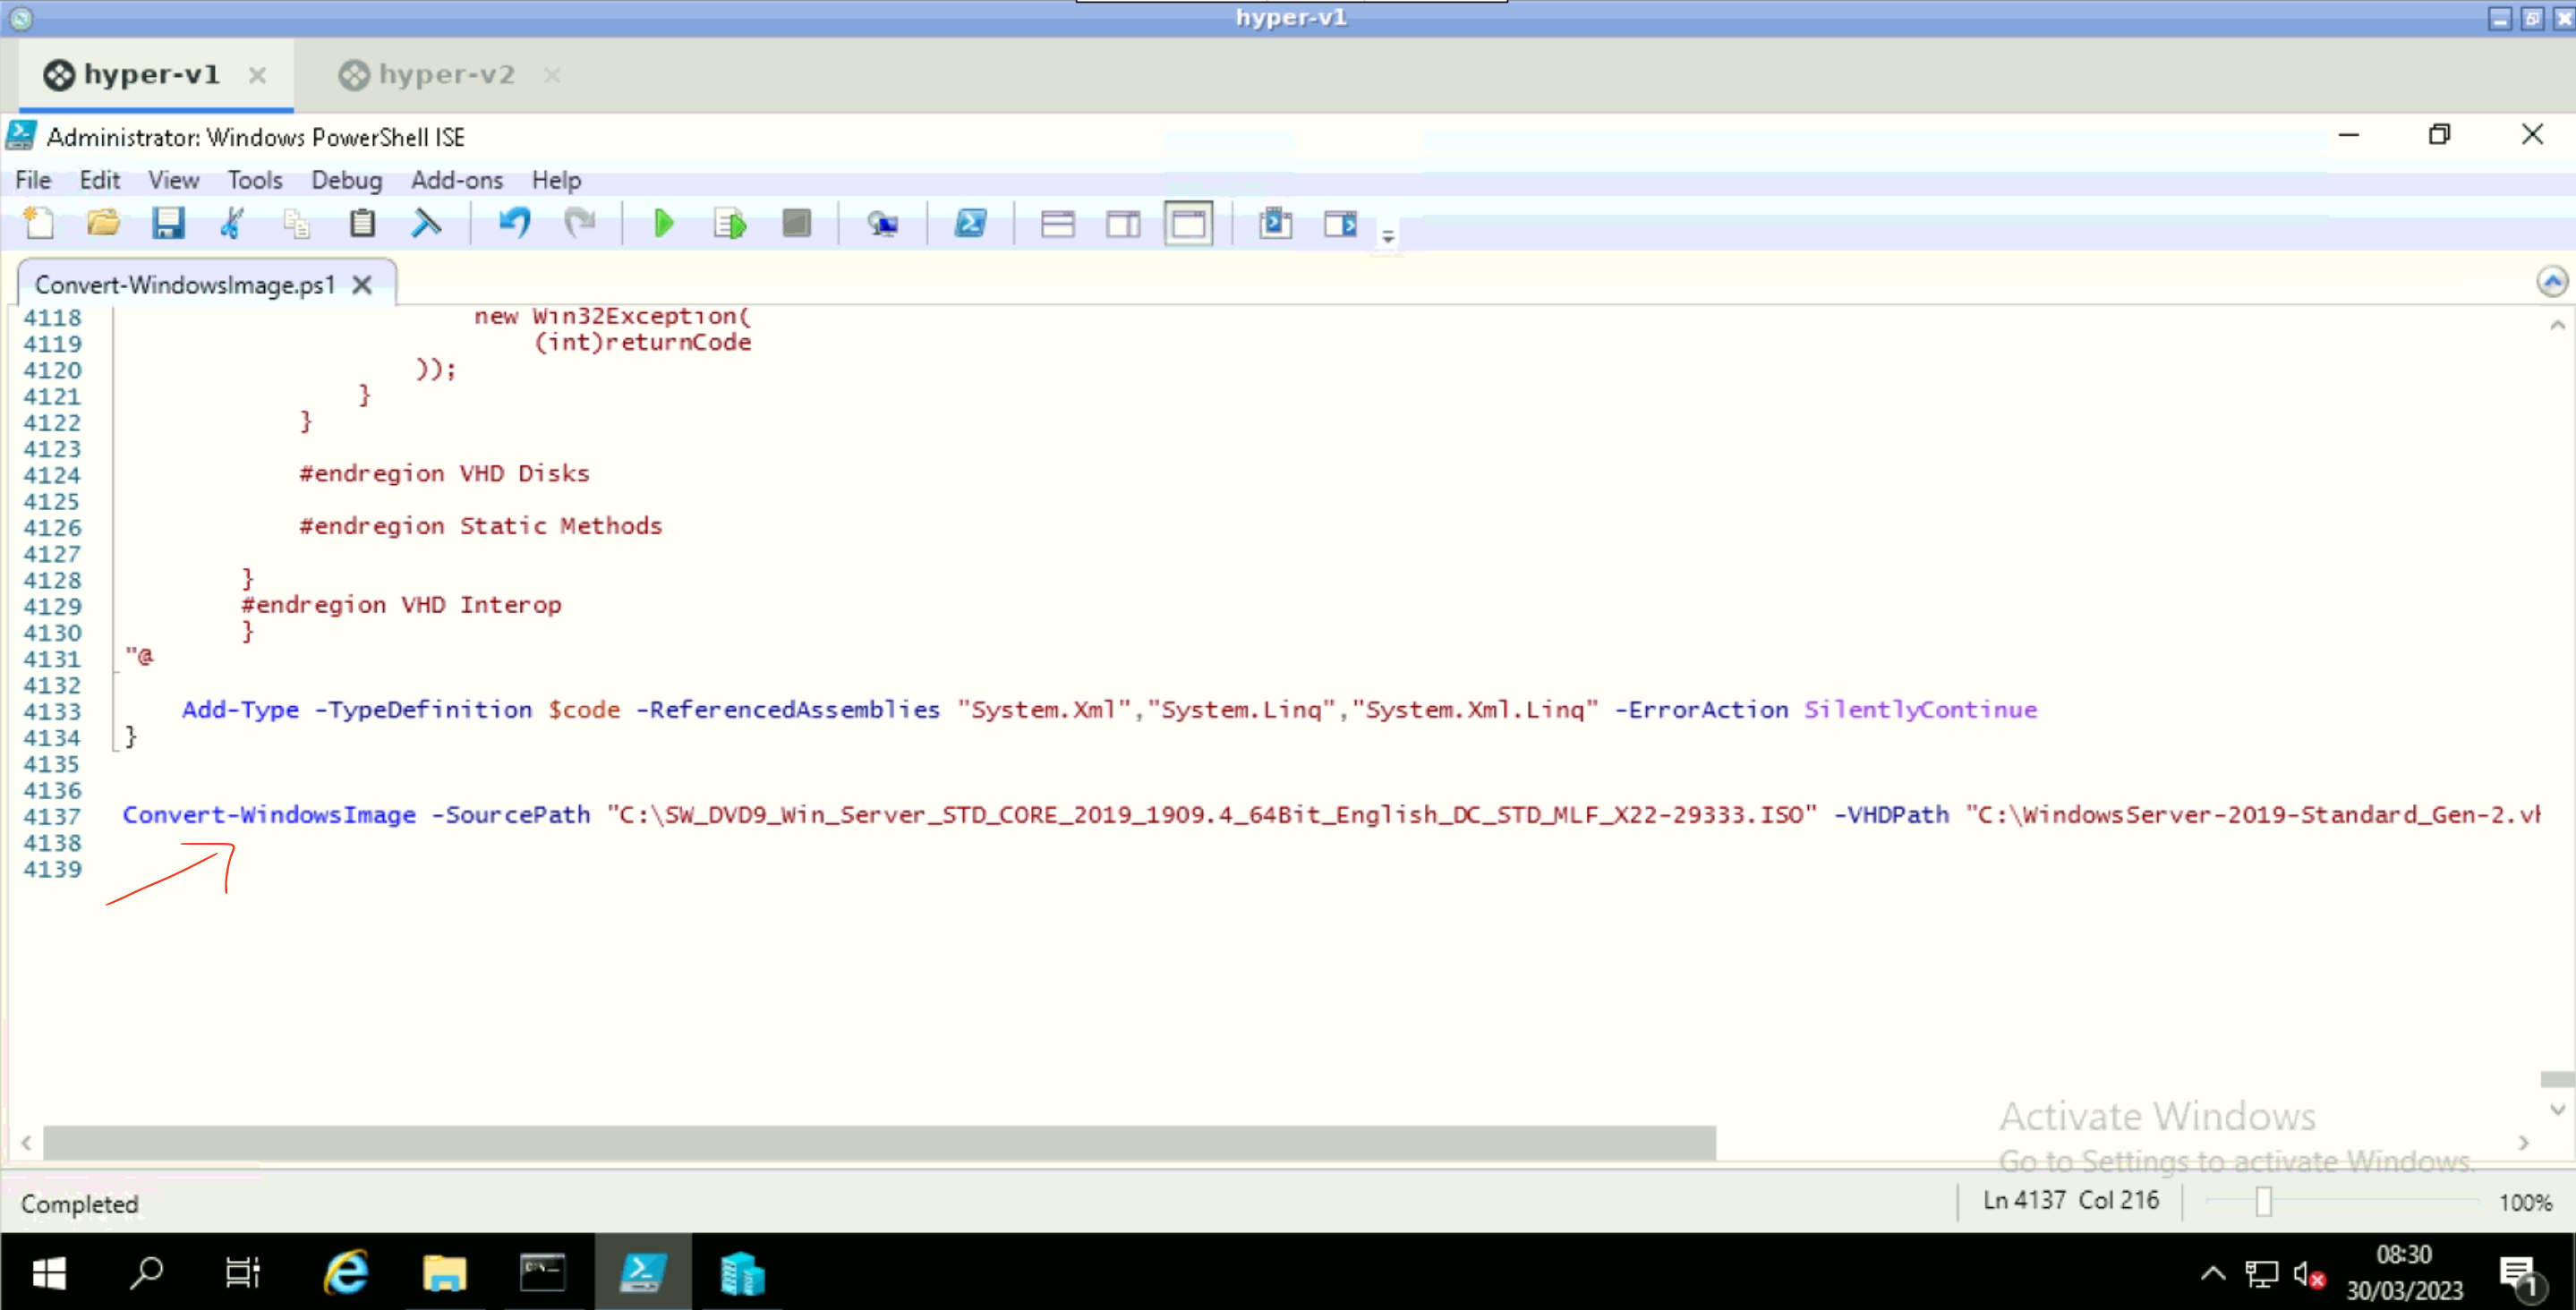
Open the Convert-WindowsImage.ps1 script file in Windows Powershell ISE as an Administrator.
Go to the bottom of the file and add the following command line and Run:
Convert-WindowsImage -SourcePath “C:<windows iso file>” -VHDFormat “VHDX” -DiskLayout “UEFI” -VHDPath “C:<Windows Server Name>.vhdx”
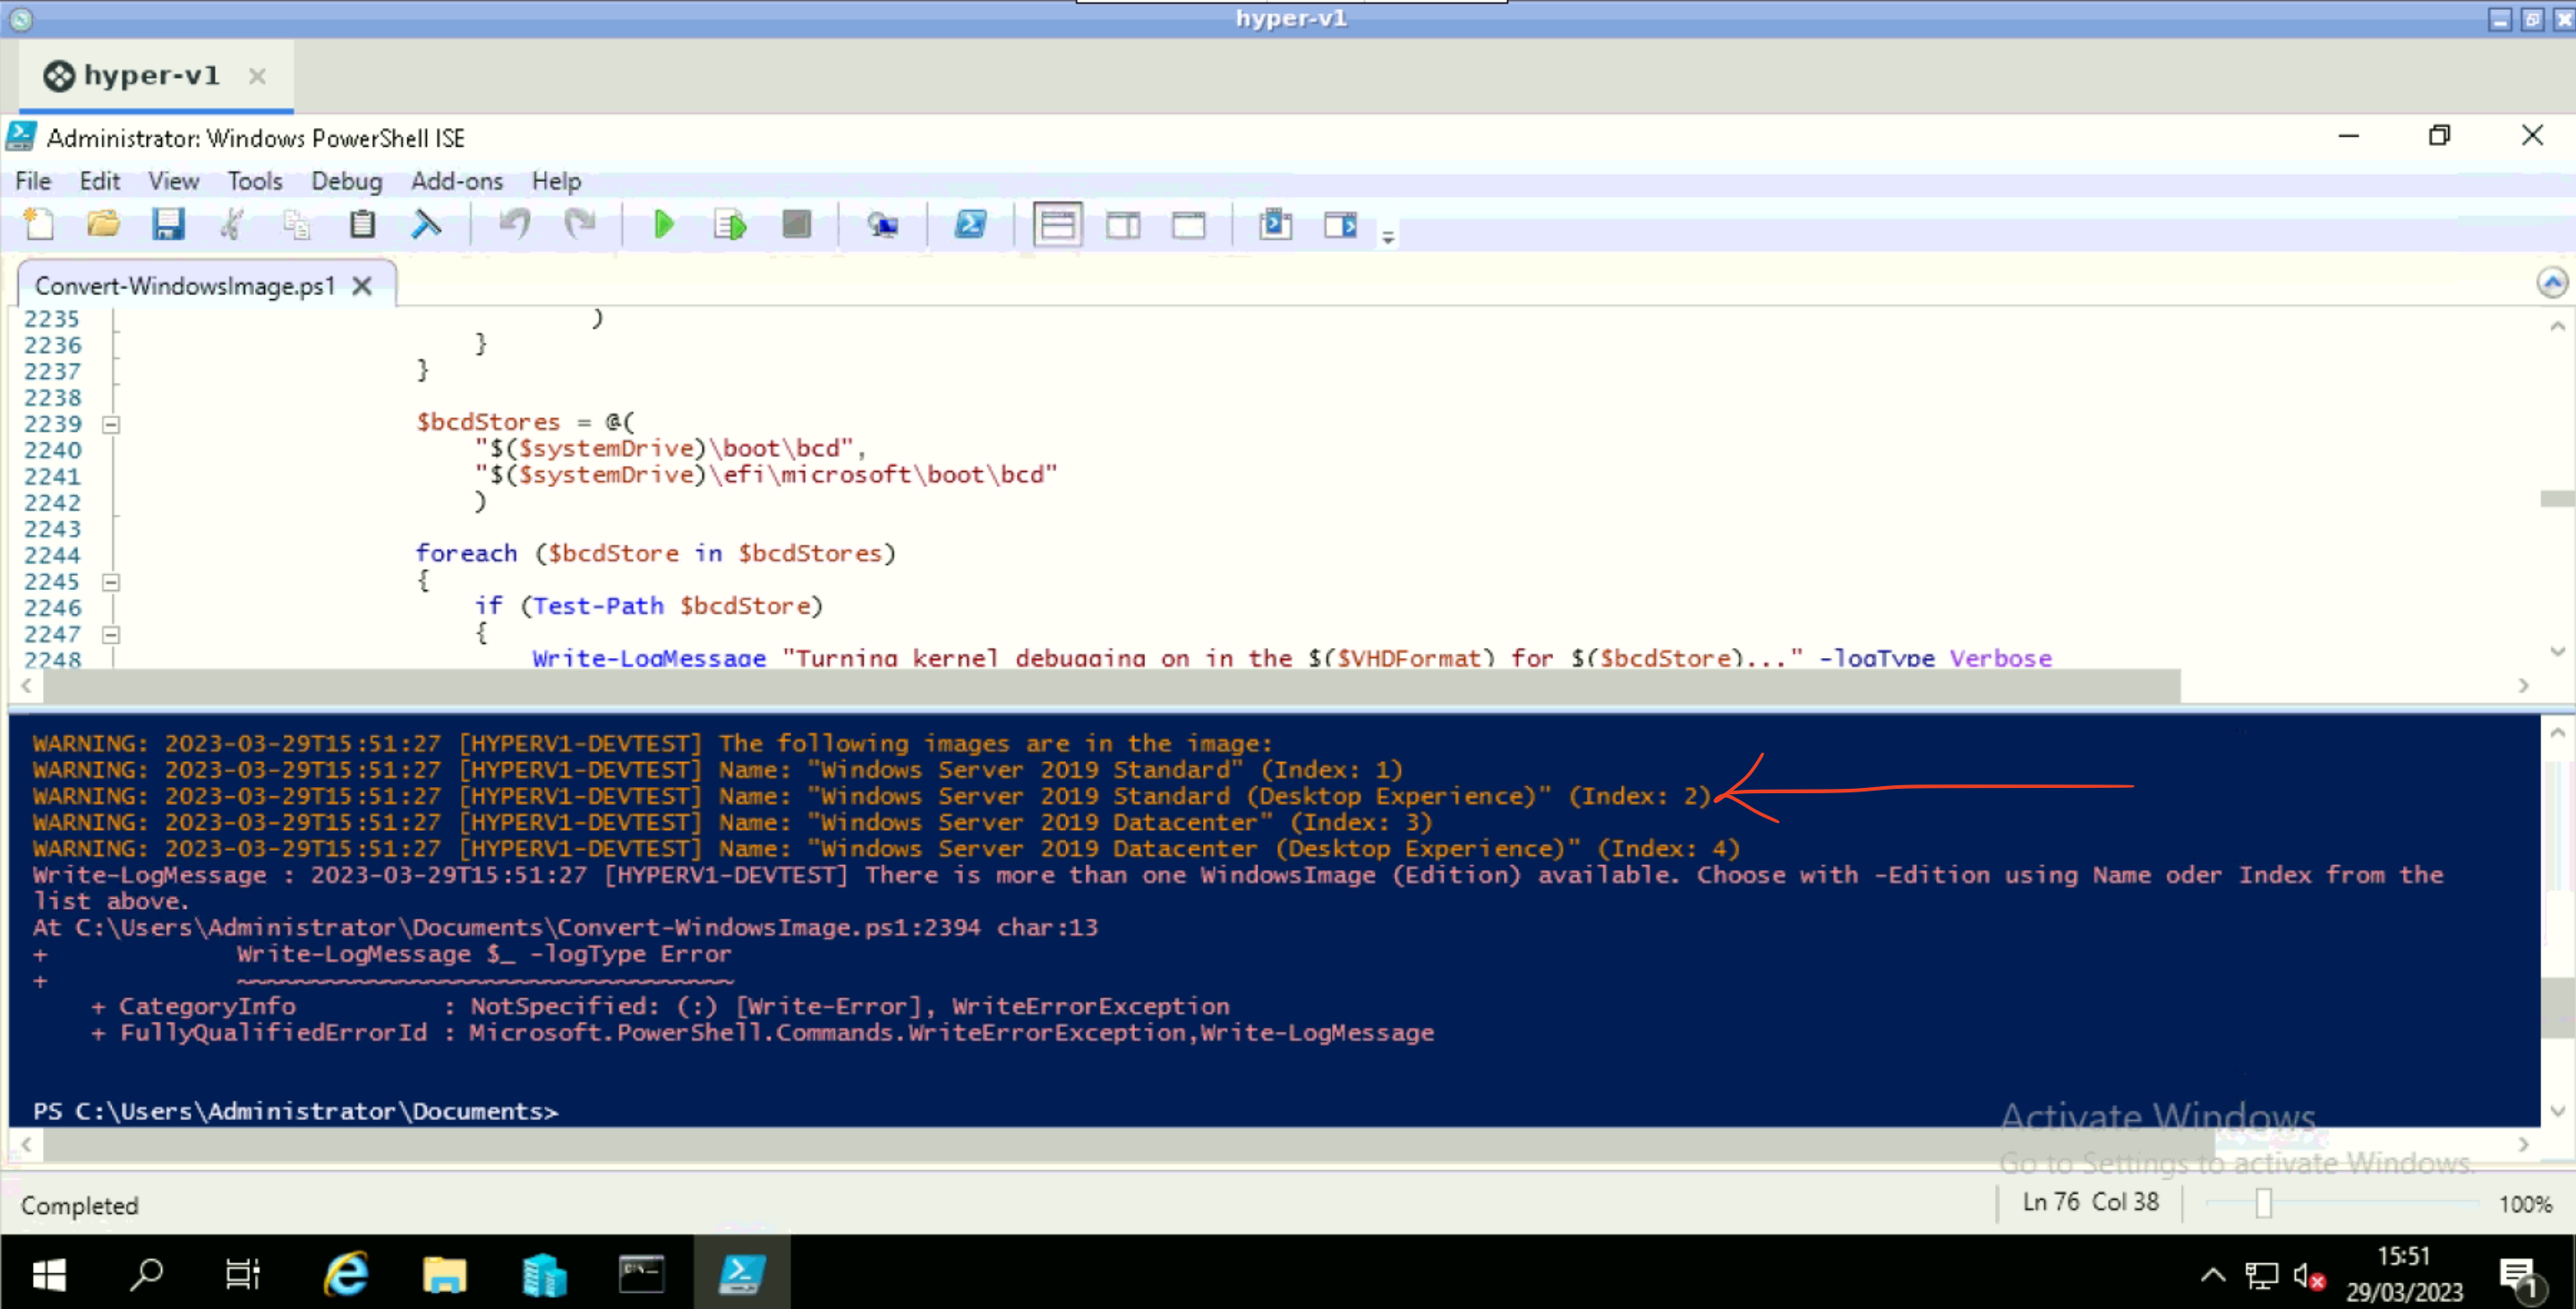
The above command requires -Edition option which is to be found by running above command. This fails with warning to supply Edition and displays the list of Available Editions on the ISO file.
Find the index value of the desired Windows edition from the list and update the above command with -Edition option as below.
Convert-WindowsImage -SourcePath “C:<windows iso file>” -VHDFormat “VHDX” -DiskLayout “UEFI” -VHDPath “C:<Windows Server Name>.vhdx” -Edition <index number>
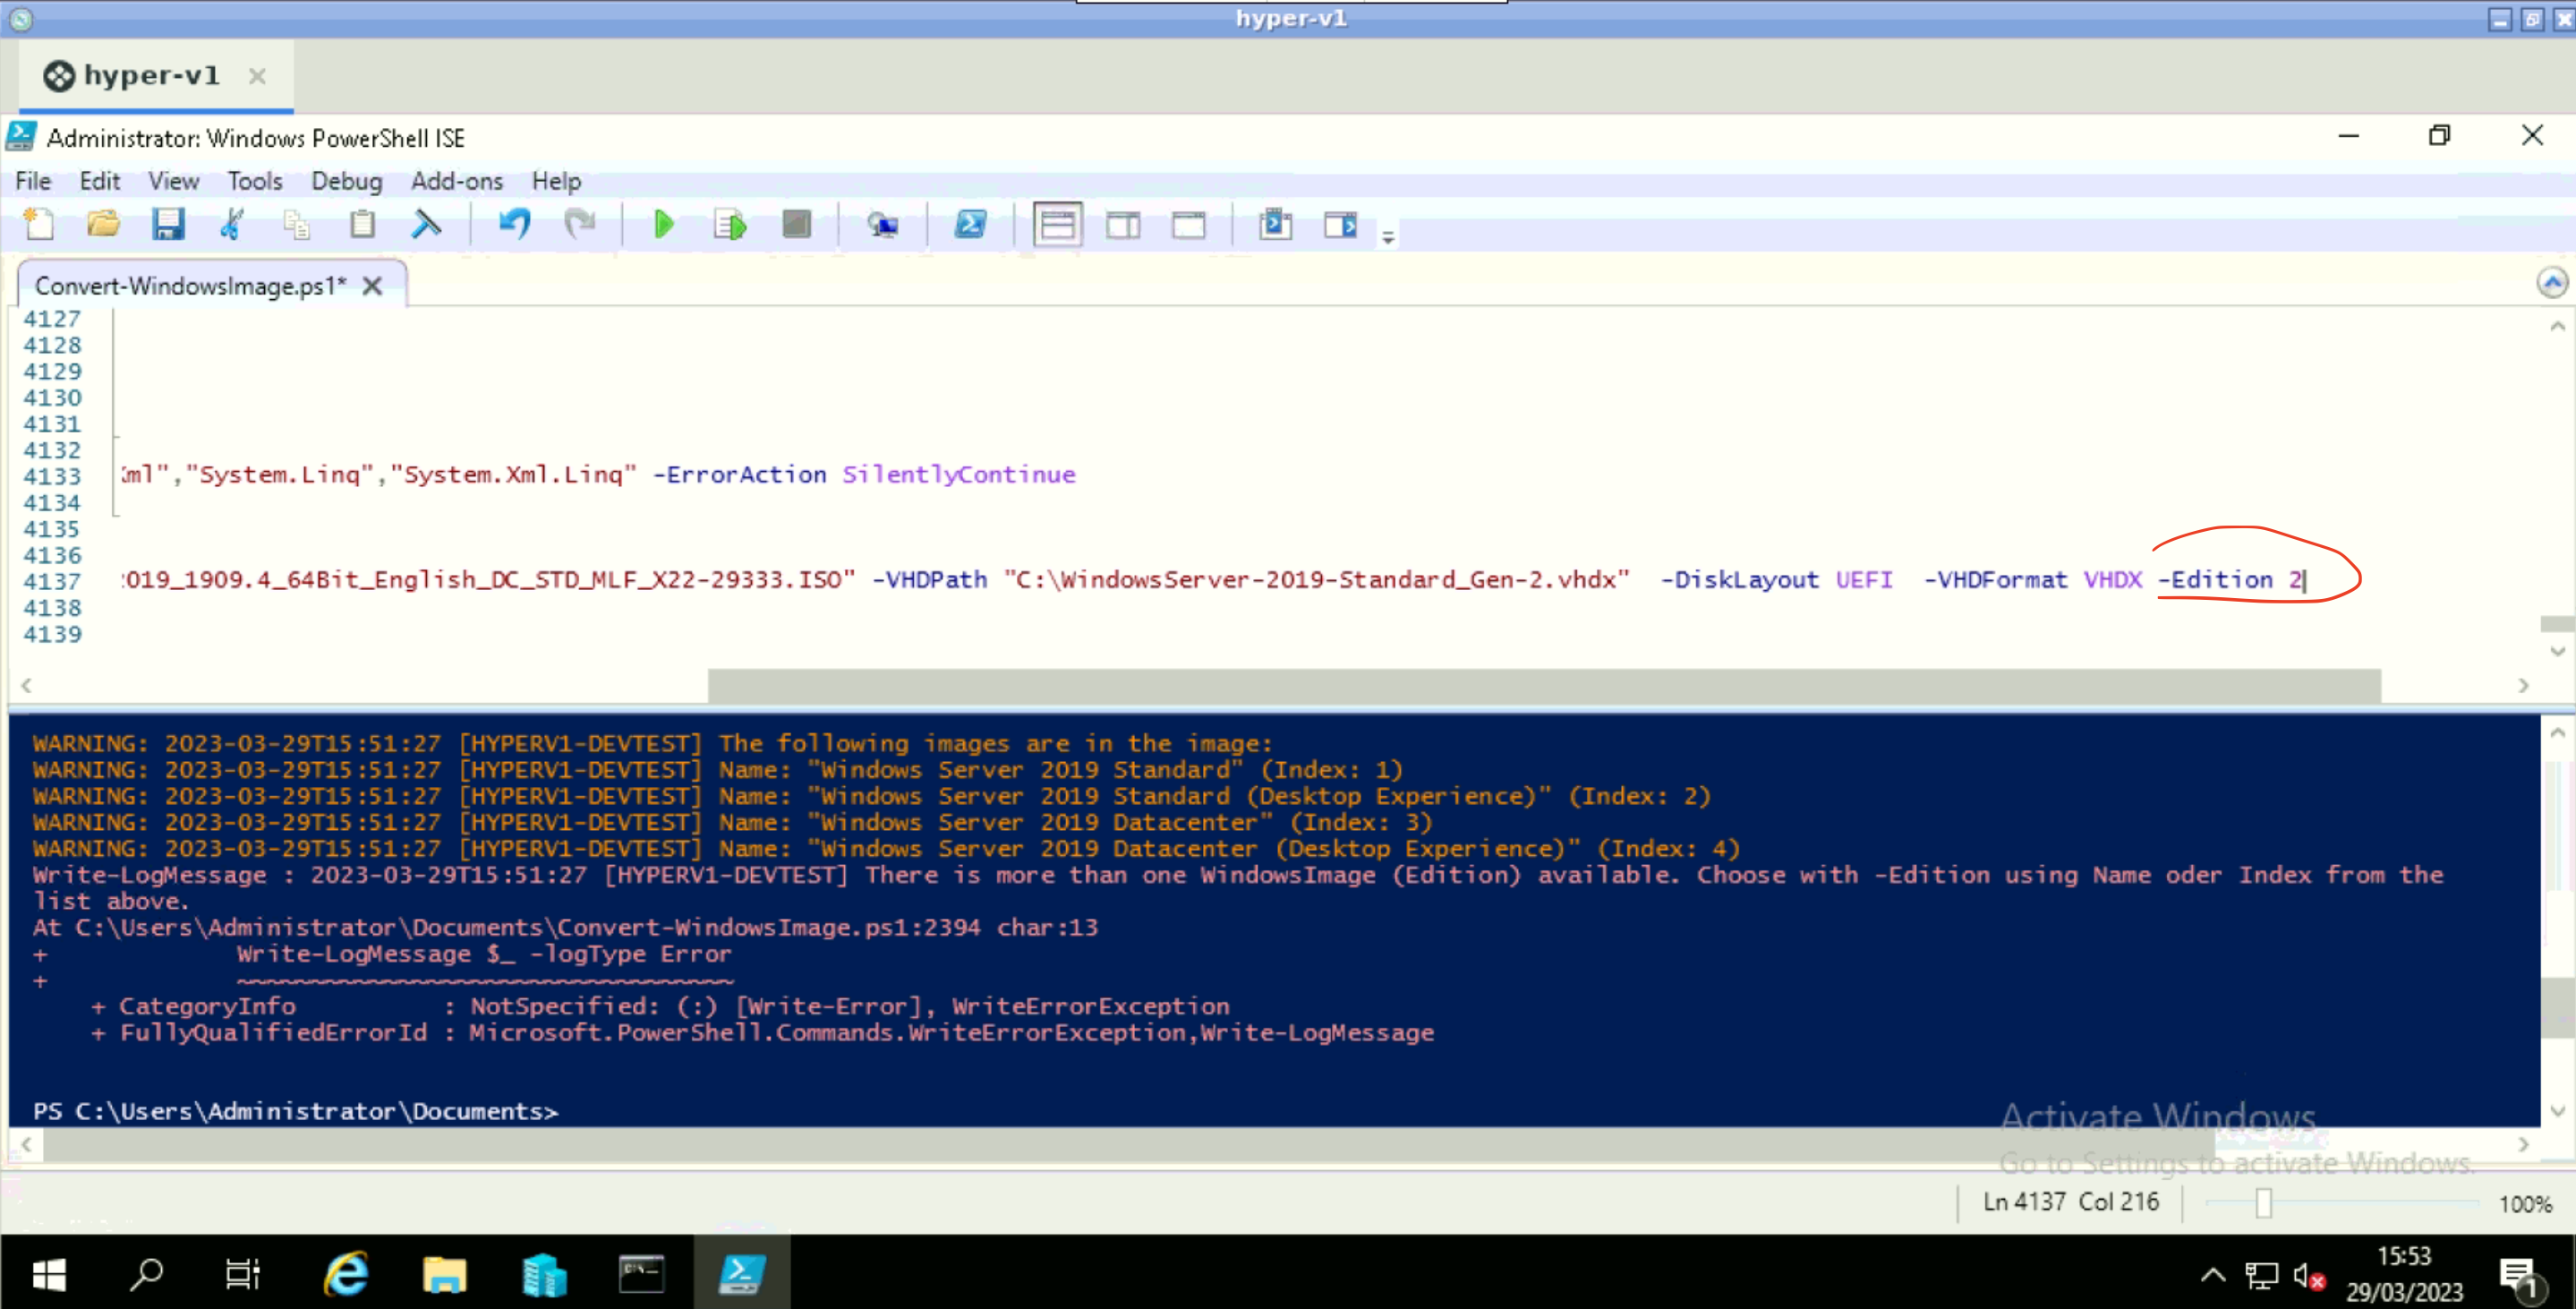
Order of the -Edition option is not strict. In above example it is supplied at the end of the command.
Run the command to start the ISO conversion to VHDx. This would take sometime to finish. After the completion the .vhdx file is created in C: drive.
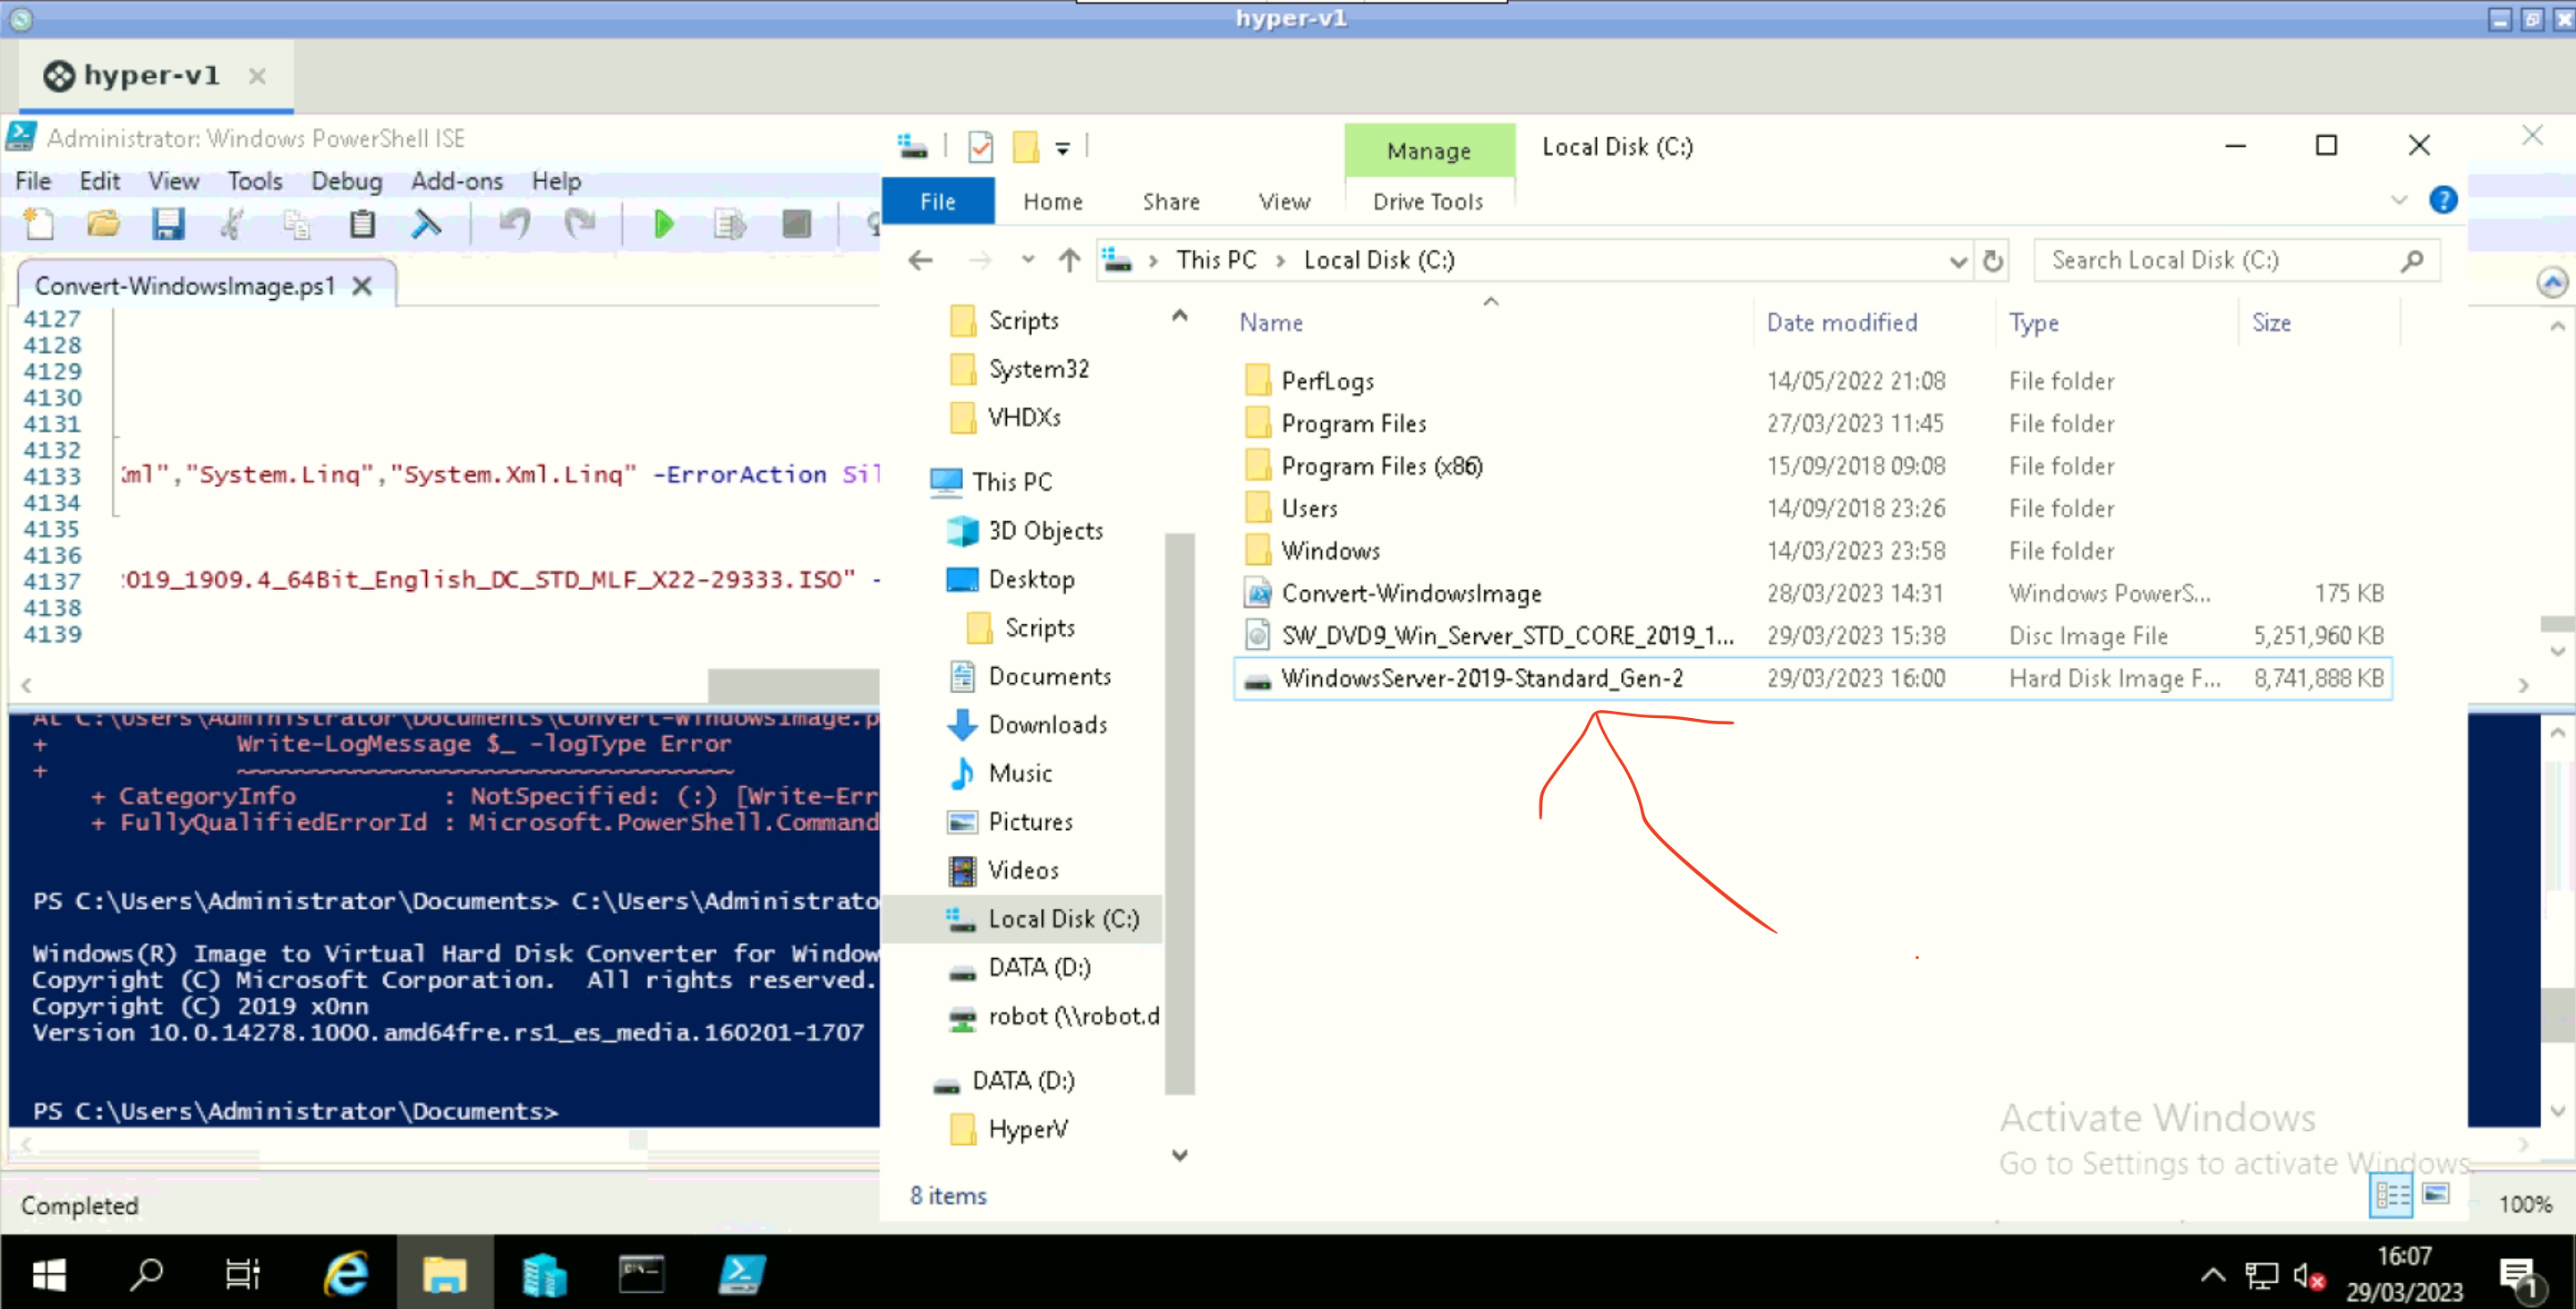
Modify the Created .VHDx file to add Post Installation scripts.
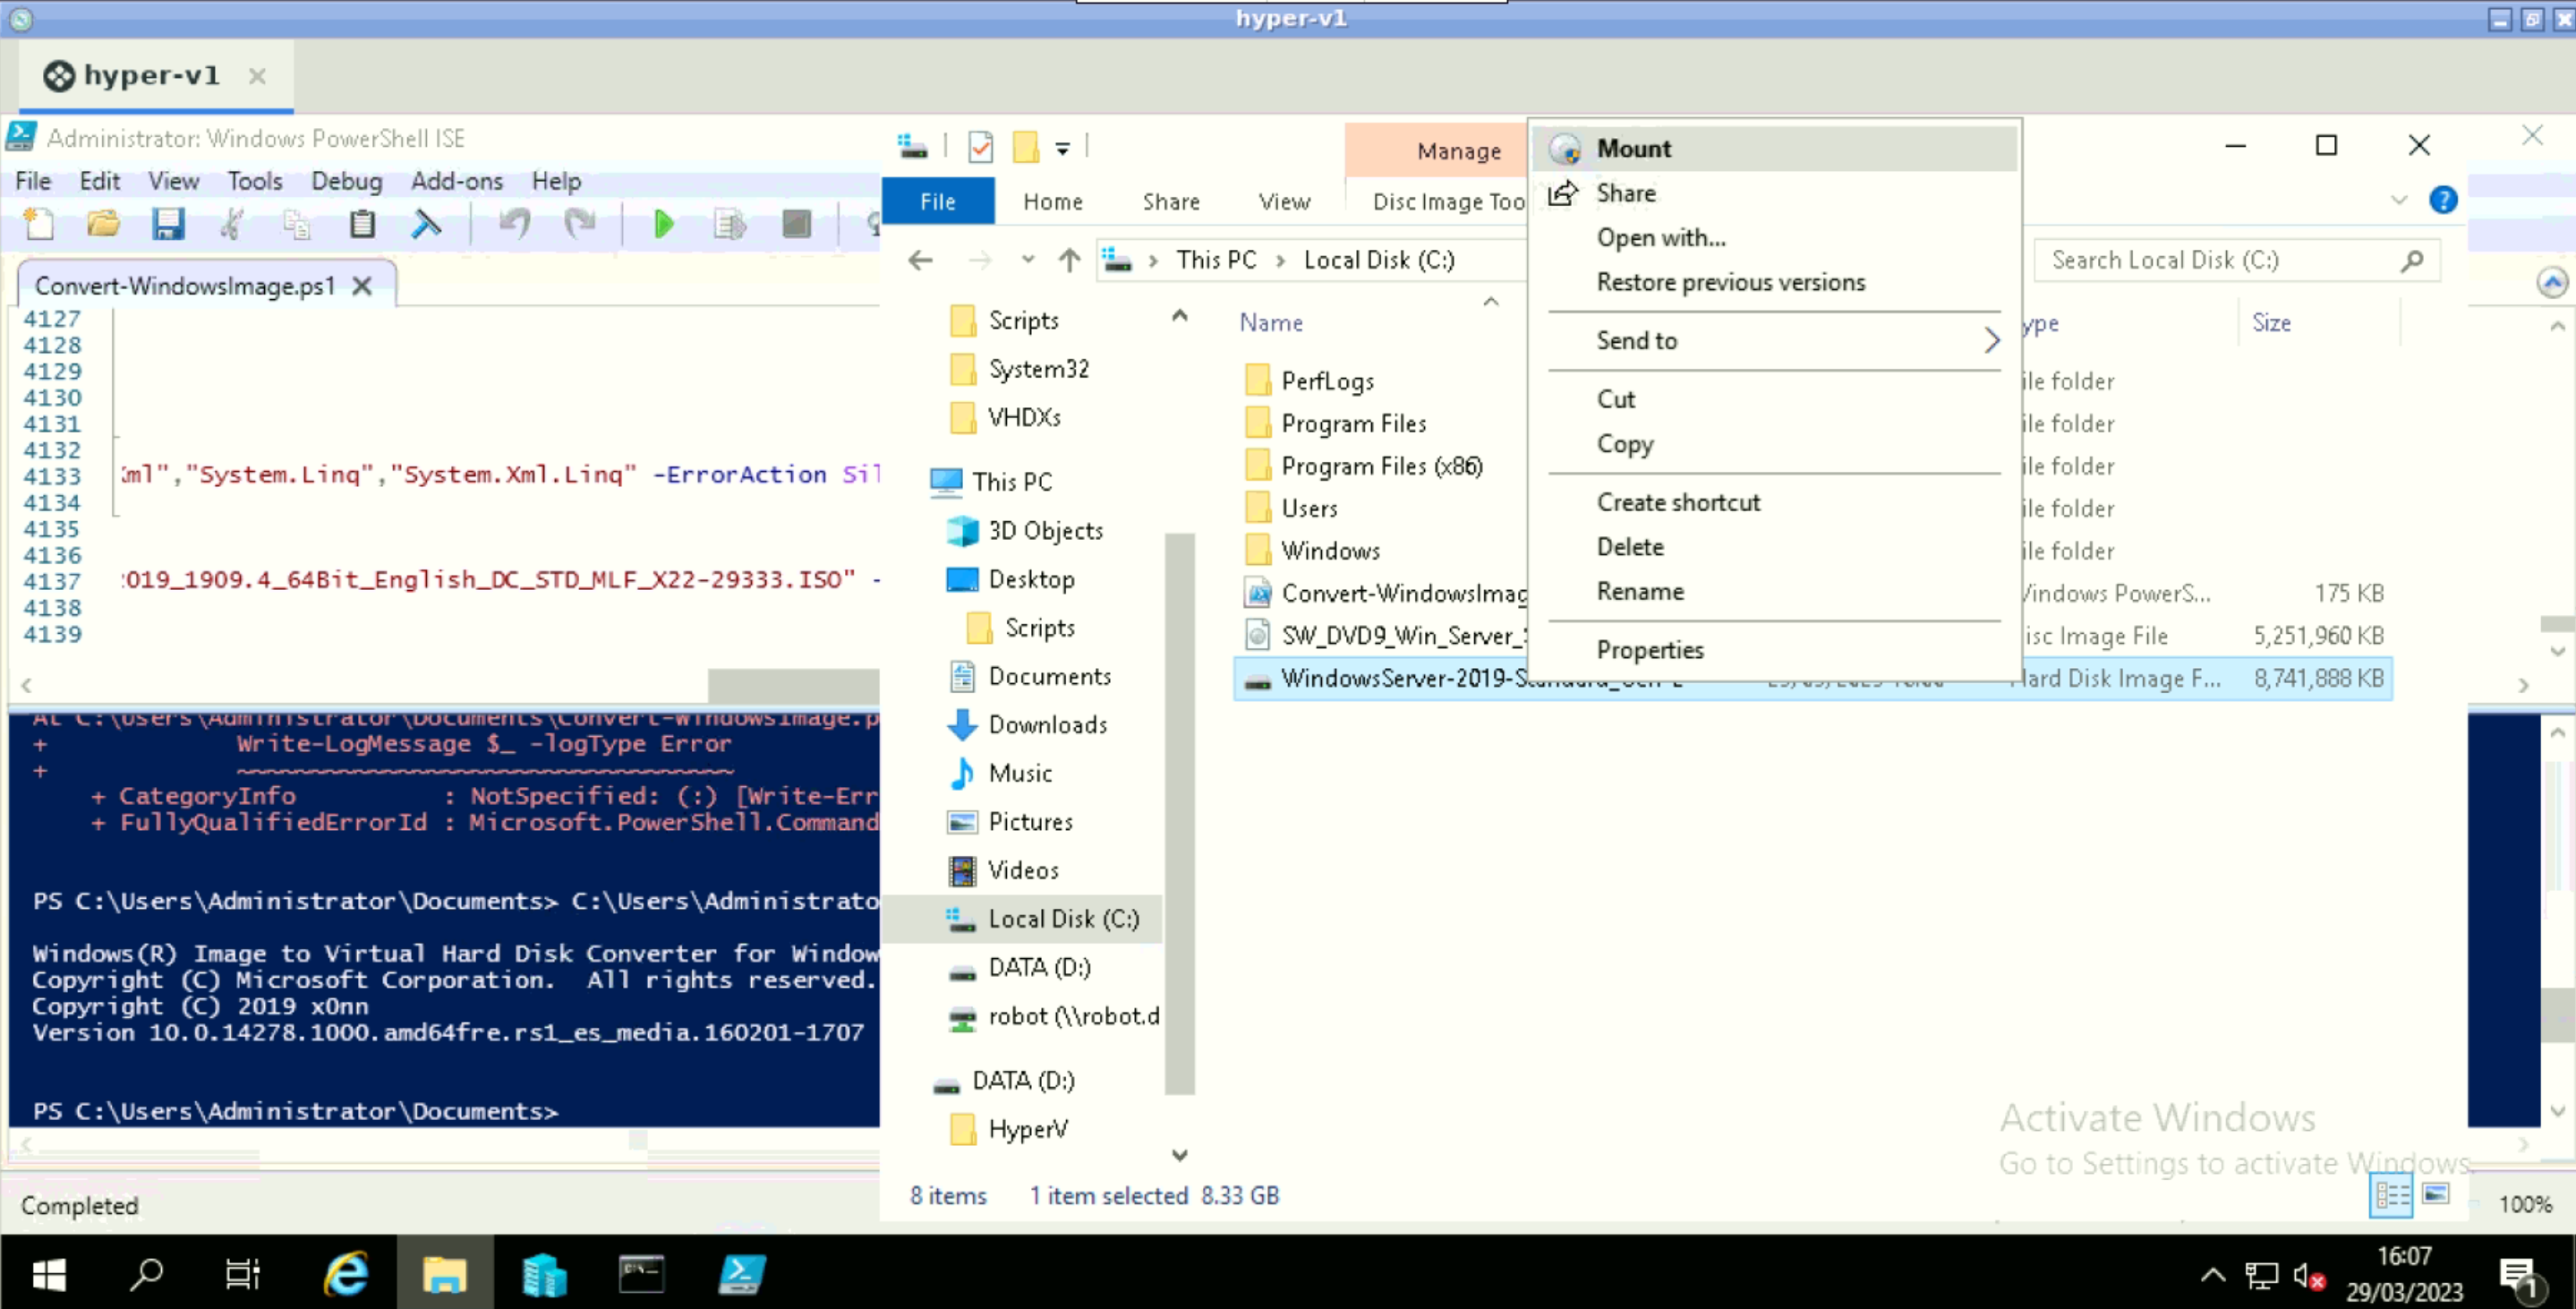
Mount the .vhdx file
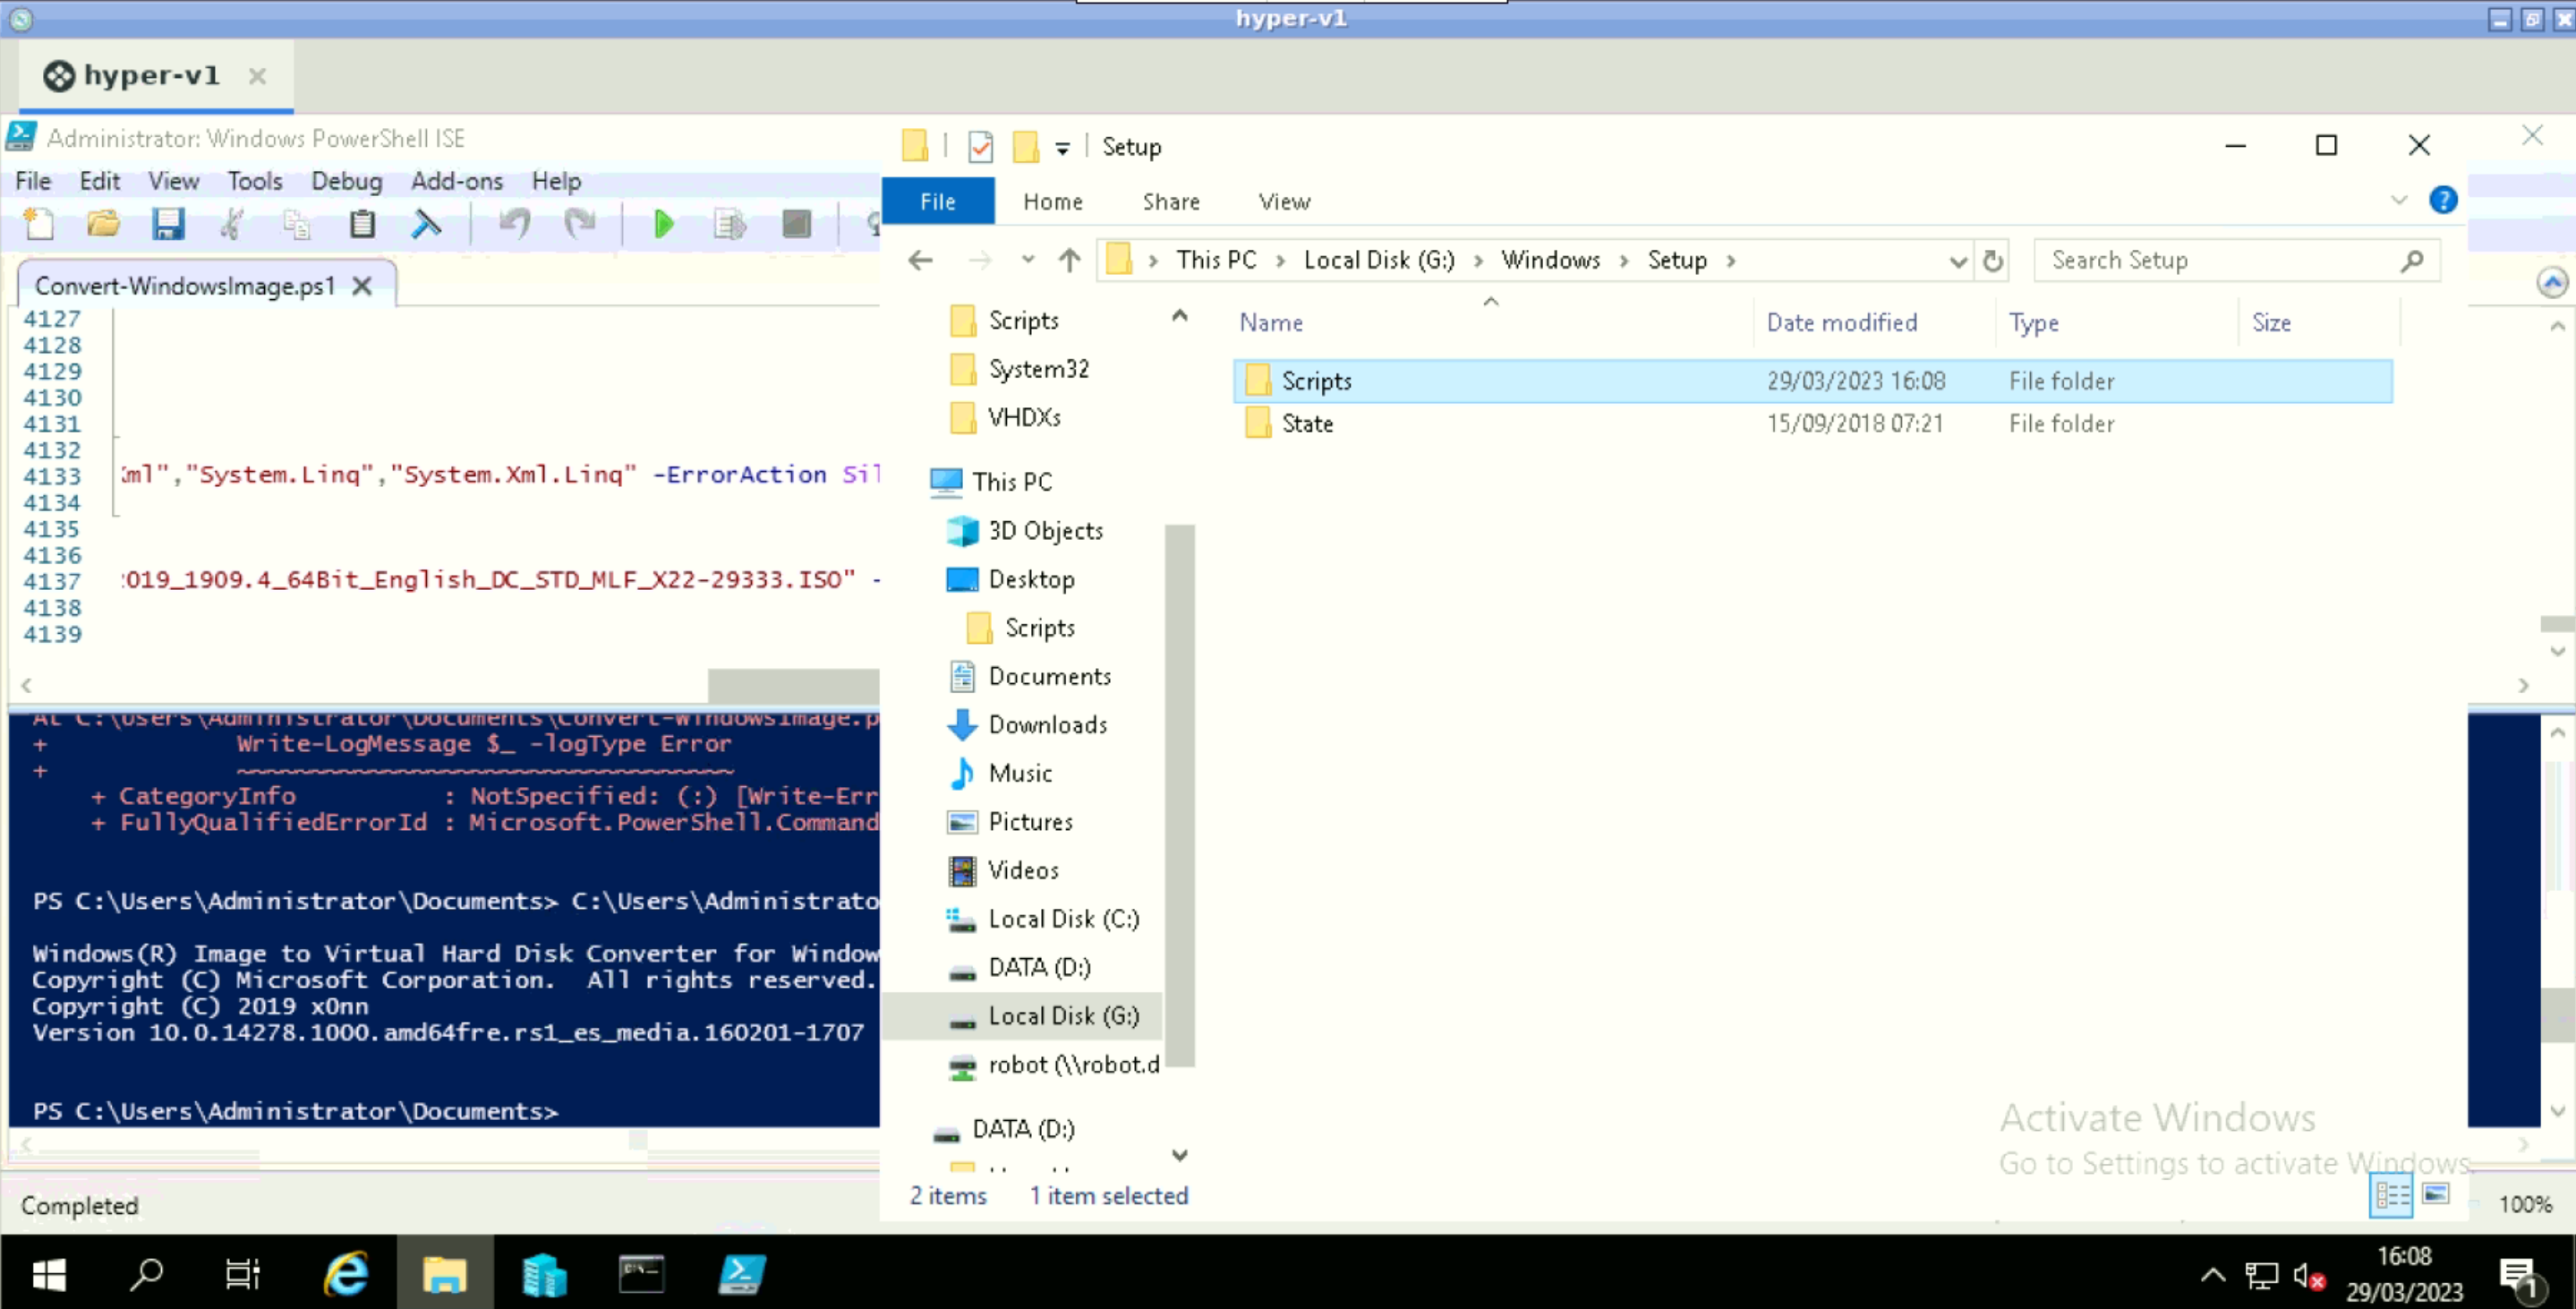
Go to the <Mounted Drive>:windowsSetuplocation
Create a Scripts folder.
Create a SetupComplete.cmd file with following command.
powershell %windir%SetupScriptsPostInstallation.ps1; DEL %windir%SetupScriptsPostInstallation.ps1
Create a PostInstallation.ps1 file with following content.
[xml]$XML = Get-Content C:\network.xml
## STEP 1: RENAME NET ADAPTER ##
Foreach($NetAdapter in Get-NetAdapter){
$NetAdapterDisplayValue = (get-netAdapterAdvancedProperty | ?{($_.DisplayName -eq "Hyper-V Network Adapter Name") -and ($_.Name -eq $NetAdapter.Name)}).DisplayValue
Rename-NetAdapter -Name $NetAdapter.Name -NewName $NetAdapterDisplayValue
}
## STEP 2: SET IP ADDRESSES ##
Foreach($NetAdapter in $XML.Network.NetAdapters.NetAdapter){
if($NetAdapter.Gw -notlike $Null){
New-NetIPAddress -InterfaceAlias $($NetAdapter.Name) `
-IPAddress $($NetAdapter.IP) `
-PrefixLength $($NetAdapter.Netmask) `
-DefaultGateway $($NetAdapter.GW) `
-Type Unicast | Out-Null
}
Else{
New-NetIPAddress -InterfaceAlias $($NetAdapter.Name) `
-IPAddress $($NetAdapter.IP) `
-PrefixLength $($NetAdapter.Netmask) `
-Type Unicast | Out-Null
}
if ($NetAdapter.DNS -notlike $Null){
Set-DnsClientServerAddress -InterfaceAlias $($NetAdapter.Name) `
-ServerAddresses $($NetAdapter.DNS) | Out-Null
}
if(!($NetAdapter.RegisterDNS)){
Set-DNSClient -InterfaceAlias $($NetAdapter.Name) -RegisterThisConnectionsAddress $False
}
}
# Enable Firewall Rule for Remote Desktop
netsh advfirewall firewall set rule group="remote desktop" new enable=yes;
# Enable Ping
netsh advfirewall firewall add rule name="Allow incoming ping requests IPv4" dir=in action=allow protocol=icmpv4;
# Remove unattend.xmls
Remove-Item -Path "C:/unattend.xml" -Force;
Remove-Item -Path "C:/Windows/Panther/unattend.xml" -Force;
Remove-Item -Path "C:/network.xml" -Force;
# AVMA(Automatic Virtual Machine Activation)
cscript //B %windir%/system32/slmgr.vbs /ipk $ActivationKey;
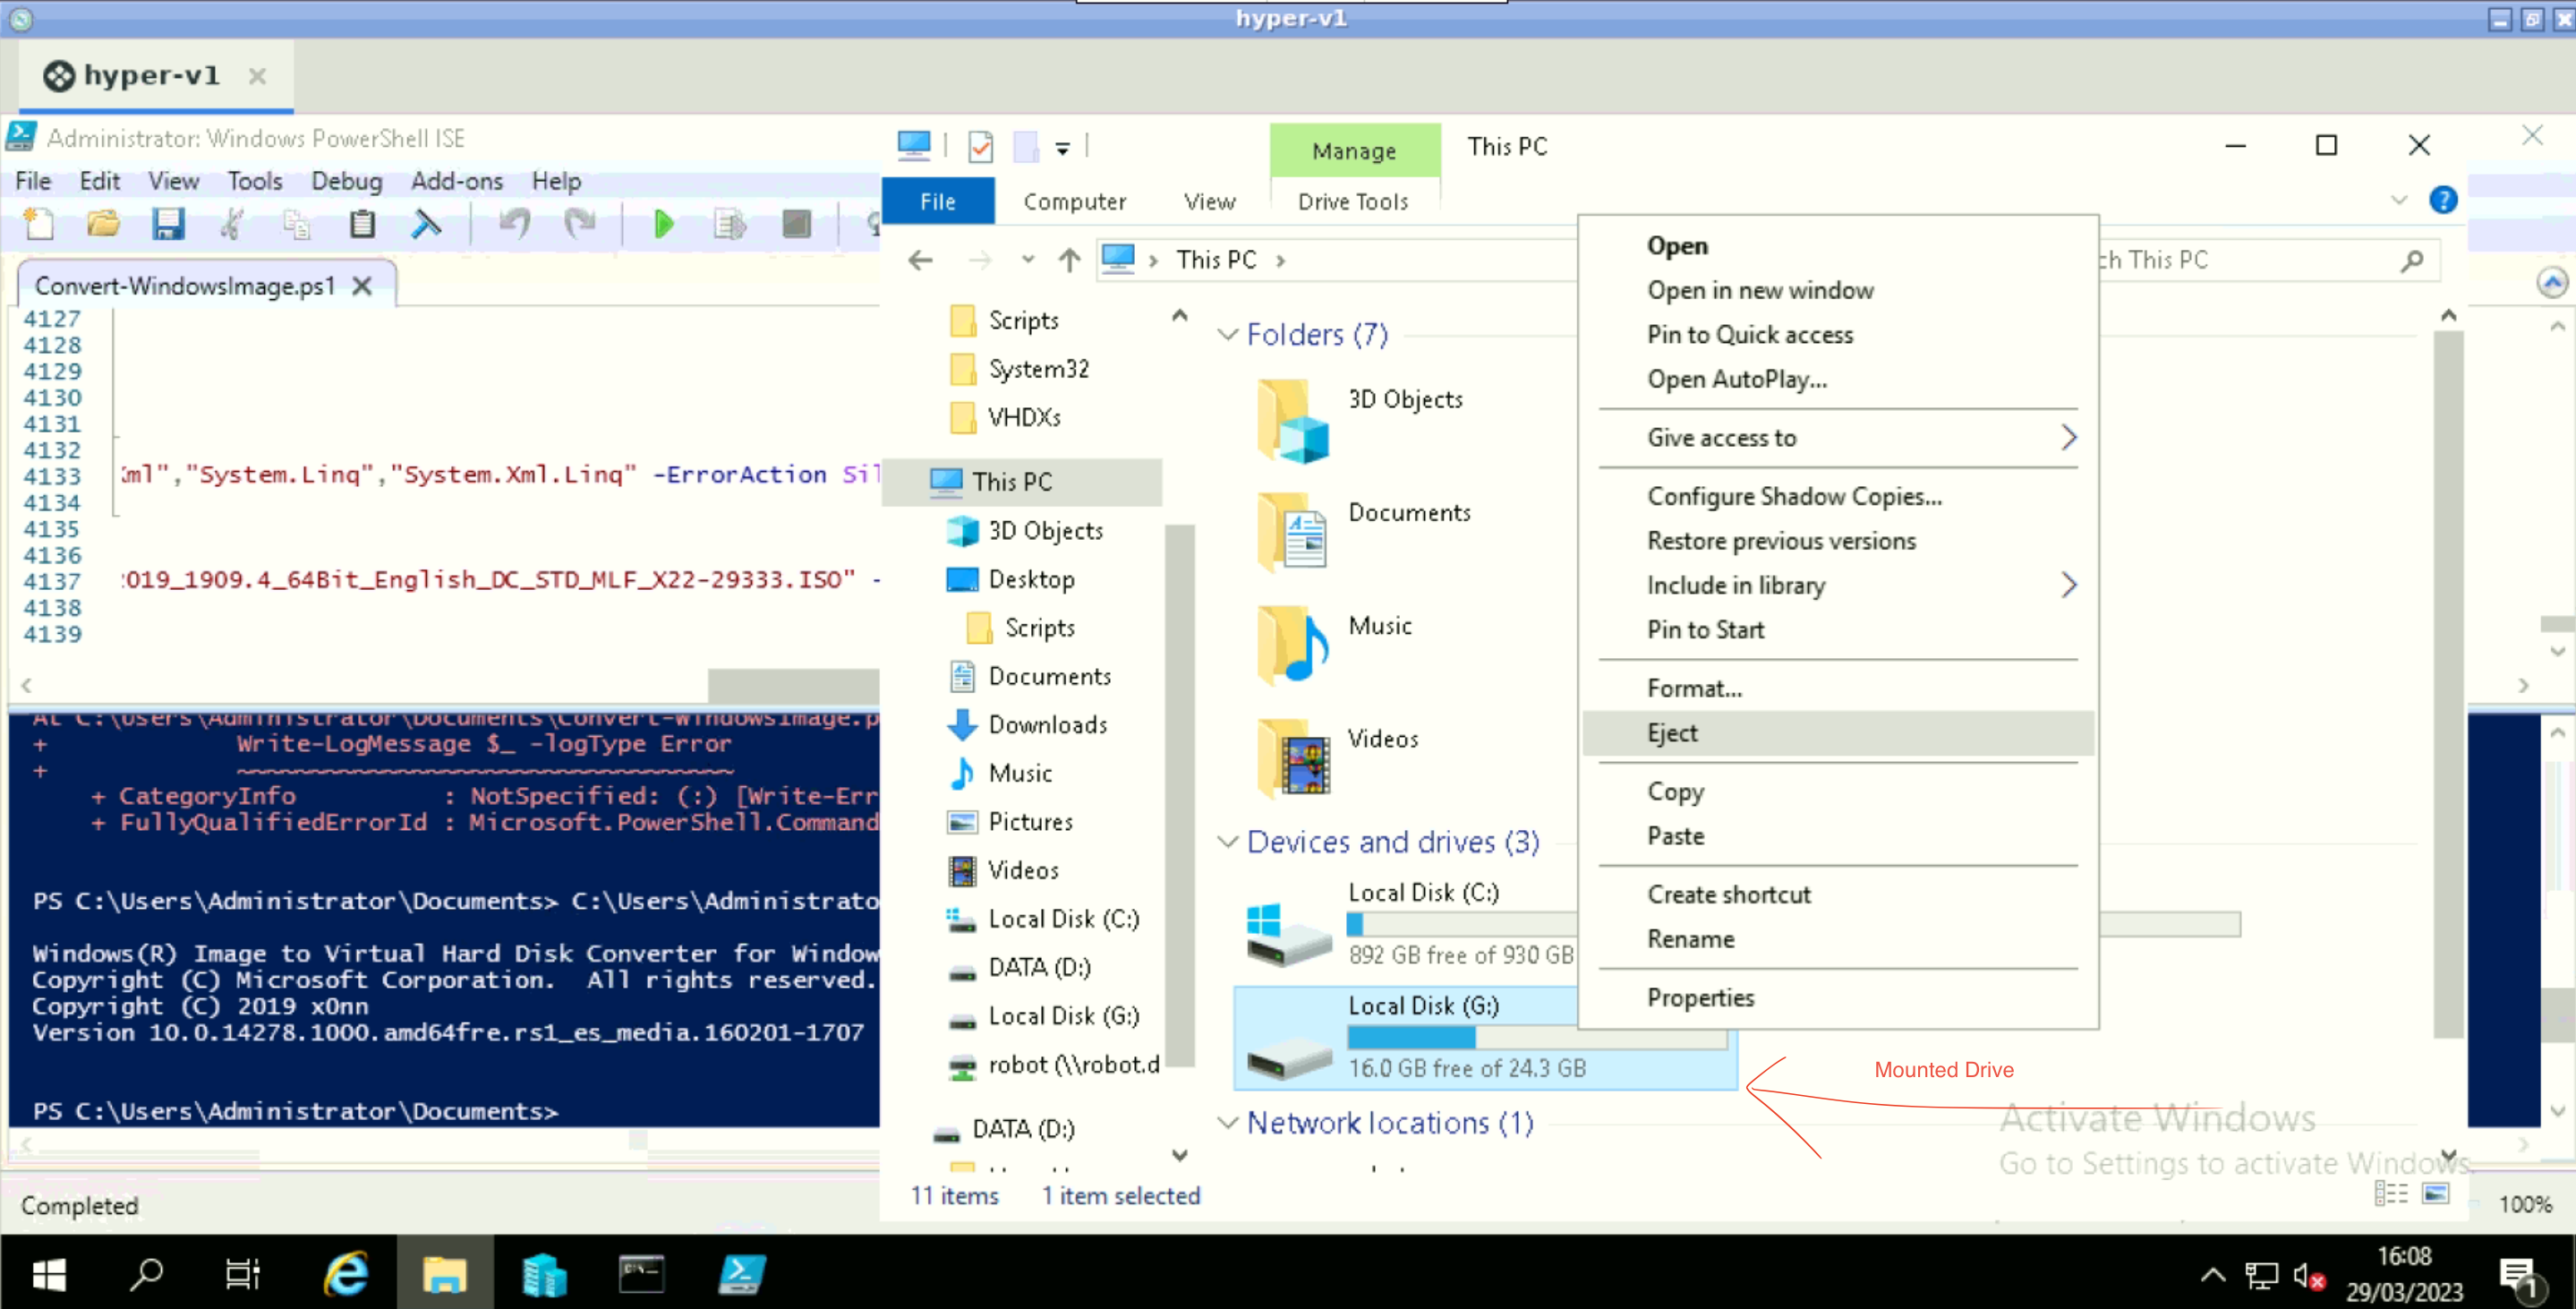
Unmount/Eject the Drive.
File VHDX file is ready to Test.
Step 4, Testing created VHDX file
Copy the Converted VHDX file on the C: to Robot Network drive at Z:HyperVVHDXs<Windows Server Name>.vhdx
Add this newly created Windows VHDXs image to your Test COP’s IAAS.image table. Use the name of the .vhdx including .vhdx as file_name.
Test this image’s VM from Compute UI app by creating a new VM with this image as Operating system.
Robot builds the VM with this image.
During this process if any issue arise, diagnose and resolve them and start from beginning. Contact CloudCIX support in case you fail to convert and build a VM.
Viable candidate for the VHDX is one that meets all requirements, This one is added to production databases.